Goal : How to git your magic xpi project and connect it to AzureDevops
Prerequisites :
- Access to Azure Devops repository
- Git installed (download Git-2.47.1.2-64-bit.exe) + GitExtension (GitExtensions-x64-5.1.1.17970-939c0edba.msi)
- TortoiseGit (TortoiseGit-2.17.0.2-64bit.msi)
- Git Scc provider plugin for Visual Studio https://france.magicsoftware.com/share/GitSccProvider.zip
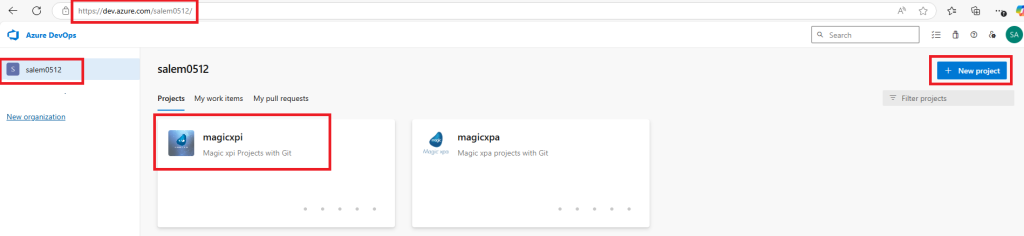
1/ Check that you can have access to your azure devops organization
Try to access https://dev.azure.com/<organization name>
If you are already logged with your microsoft account, the first time it will ask you to create your organization.
You can create a devops project by clicking on New project
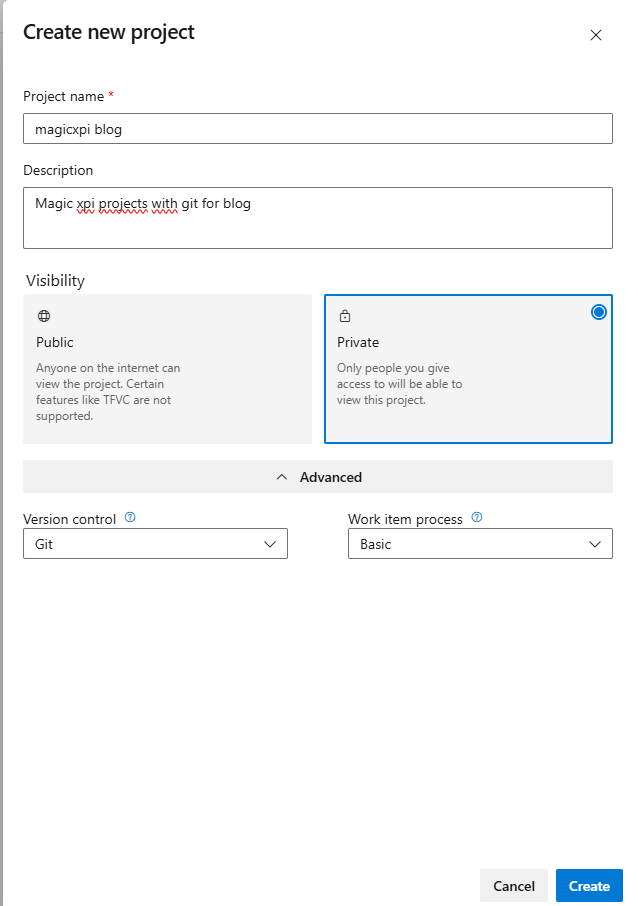
Create your own project (magicxpi blog) and choose Git as a version control
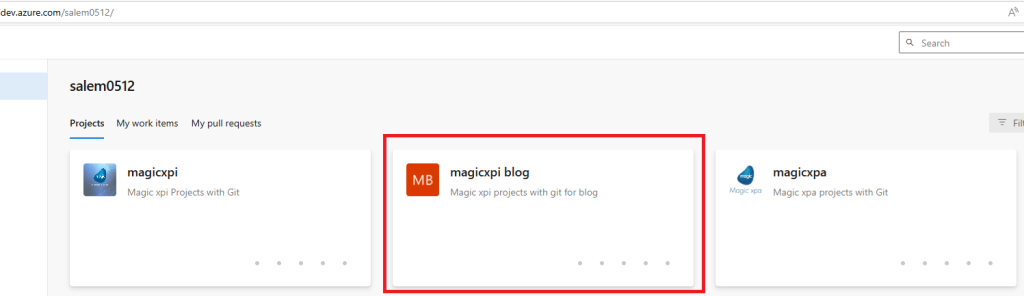
you should see your project
2/ Click on the project and Repos menu on the right side, you should see your Git endpoint URL
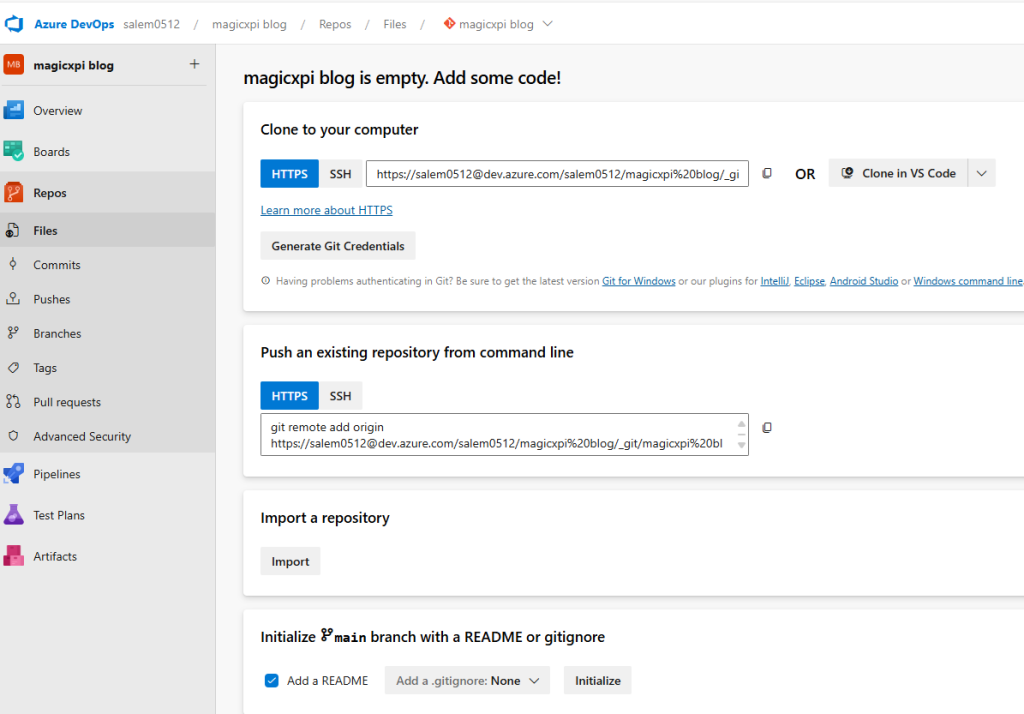
In my case : https://[email protected]/salem0512/magicxpi%20blog/_git/magicxpi%20blog (we will use this url later)
3/ Install Git server 64 (standard installation) and Git Extension (see prerequisite)
4/ Install Tortoise Git (standard installation) (see prerequisite)
5/ Copy the Git Scc provider files plugin into your <Magicxpi installation directory>Studio\Extensions directory
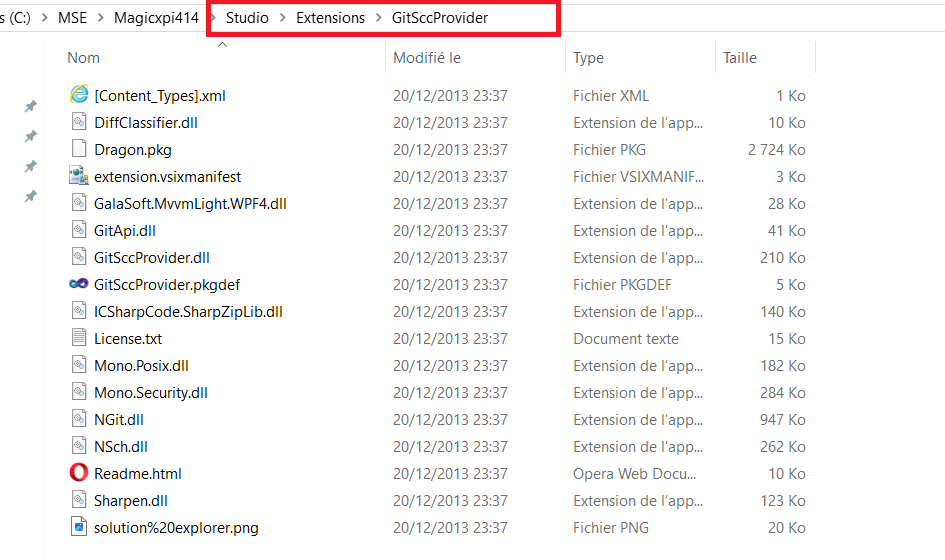
(**) verify that the folder is unlocked in the properties
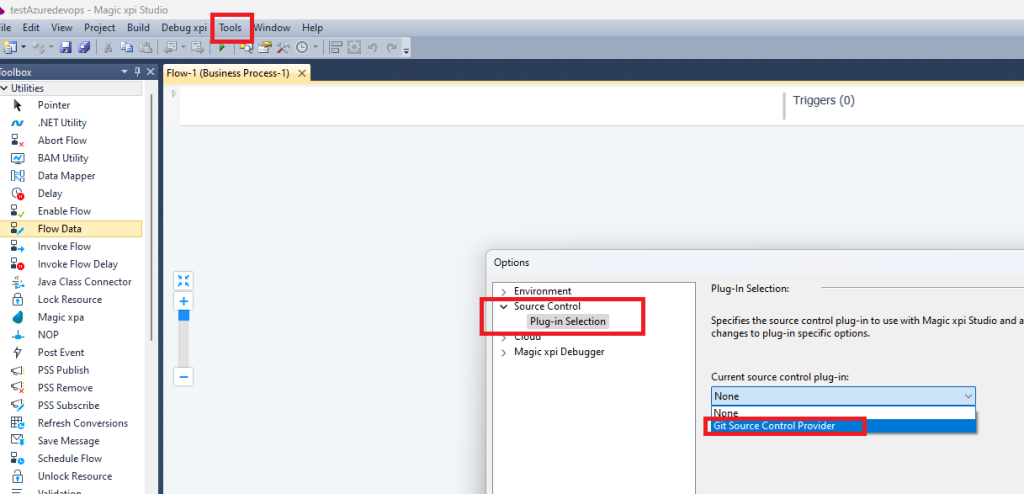
6/ Restart your Magic xpi Studio and create a new project (testazuredevops)
Choose Tools=>options=>Source Control=>Plug-in Selection => Git Source Control Provider
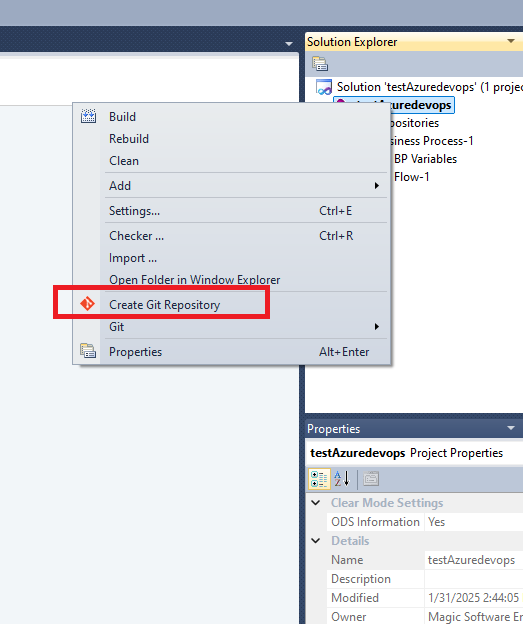
7/ Right click on your project in the solution explorer
Choose Create Git Repository
8/ Open your .gitignore file with your texteditor
The file is in your local project folder.
Add these lines
testAzuredevops/mappergenerate
testAzuredevops/UDS
testAzuredevops/Temp
testAzuredevops/*.hash
testAzuredevops/MonitorOfflineMetadata.xml
testAzuredevops/Start.lnk
testAzuredevops/Stop.lnk
testAzuredevops/start.xml
testAzuredevops/start.xml.triggers
testAzuredevops/testAzuredevops.ibp
testAzuredevops/Debug_Info.xml
testAzuredevops/MonitorOfflineMetadata.xml
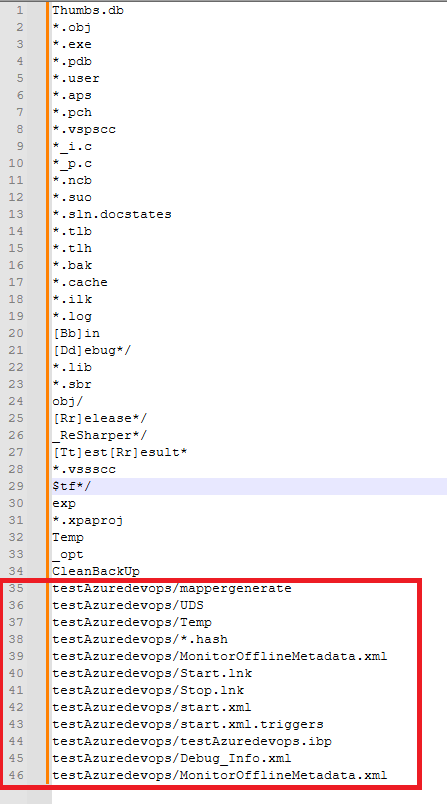
Save your file
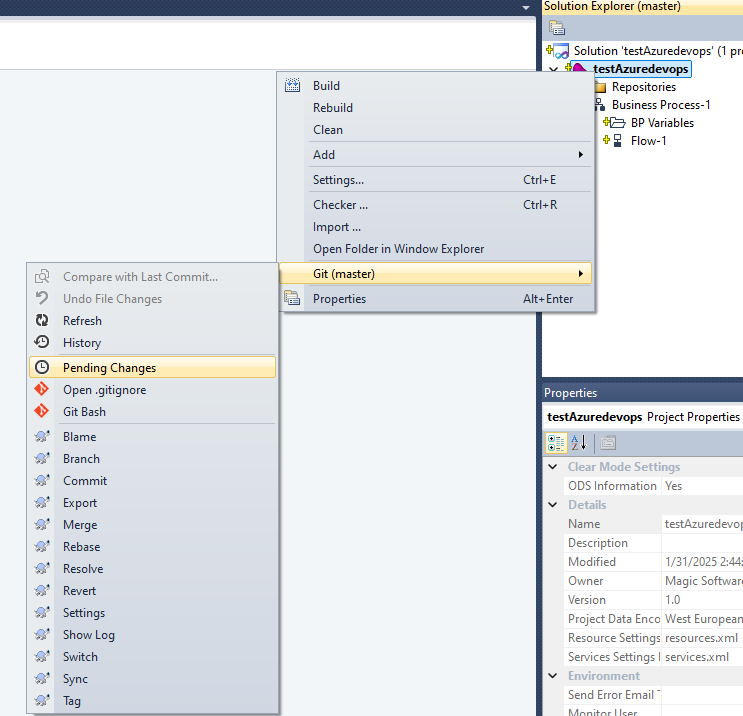
9/ Go back to Magic xpi Studio
Right click on the project and choose « Pending Changes » and enter a comment and then check all the files
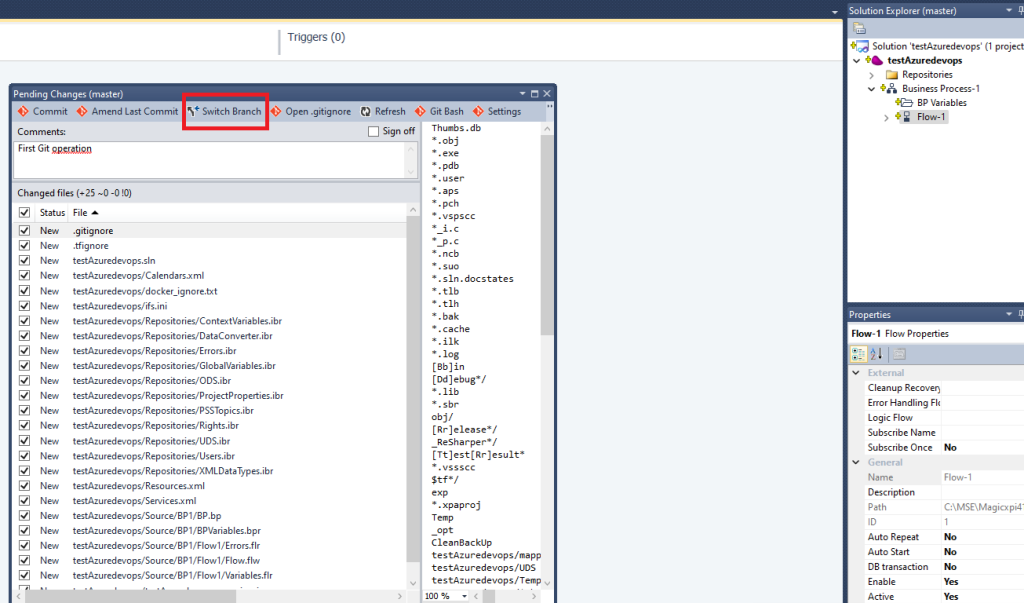
Click on Commit
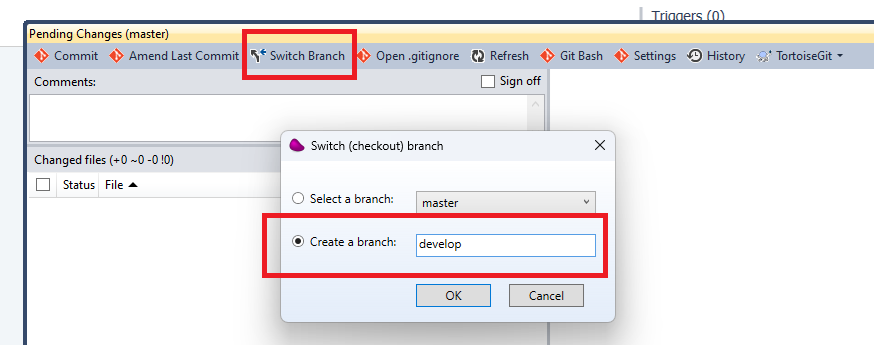
When this operation is finished, choose Switch Branch and create the branch (develop)
(*) Start a command line in the project directory : git flow init can do the job as well
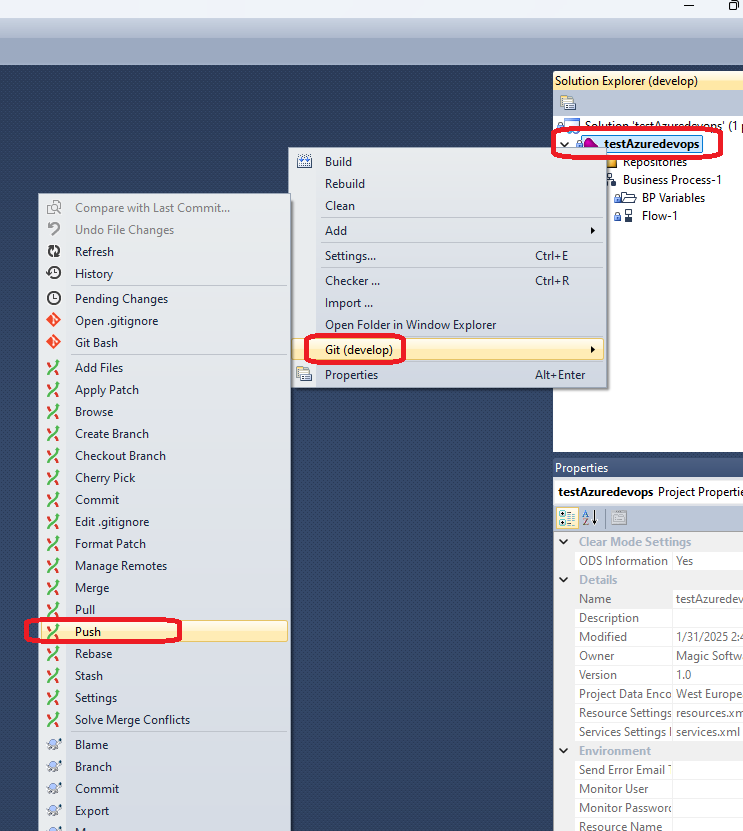
10/ Right click on the project in the solution explorer
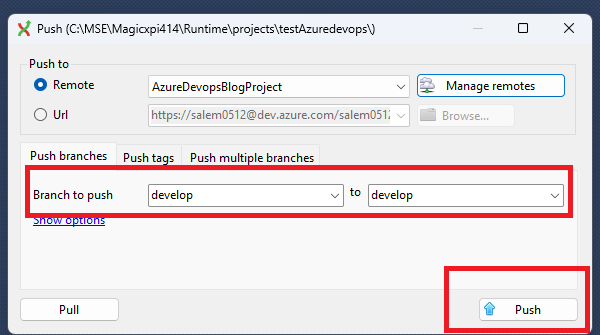
Choose Push option
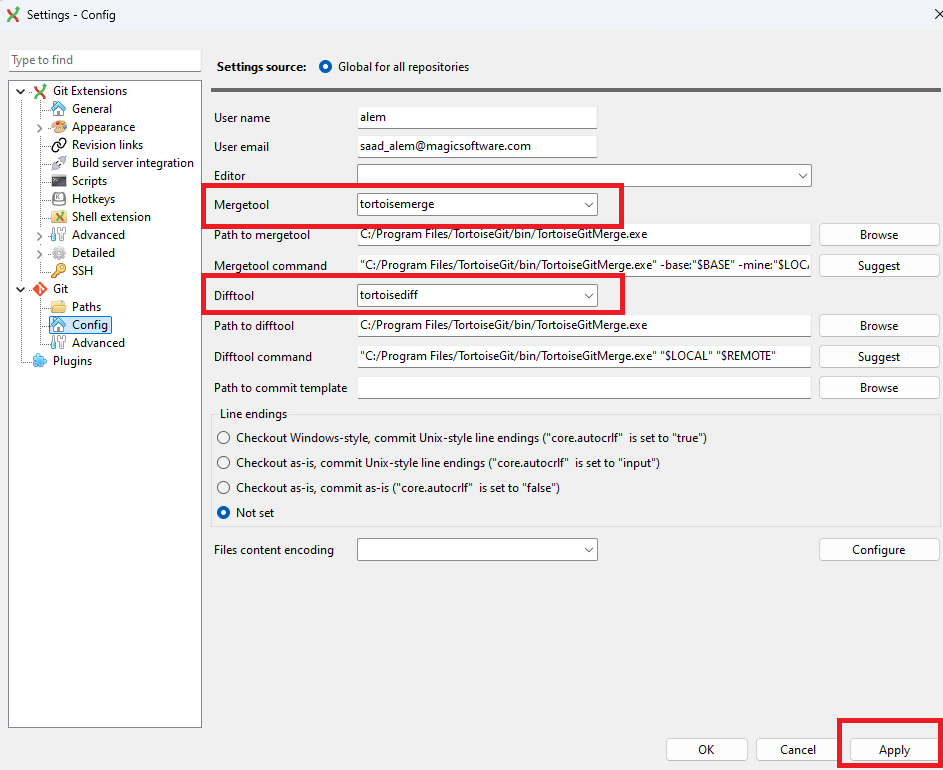
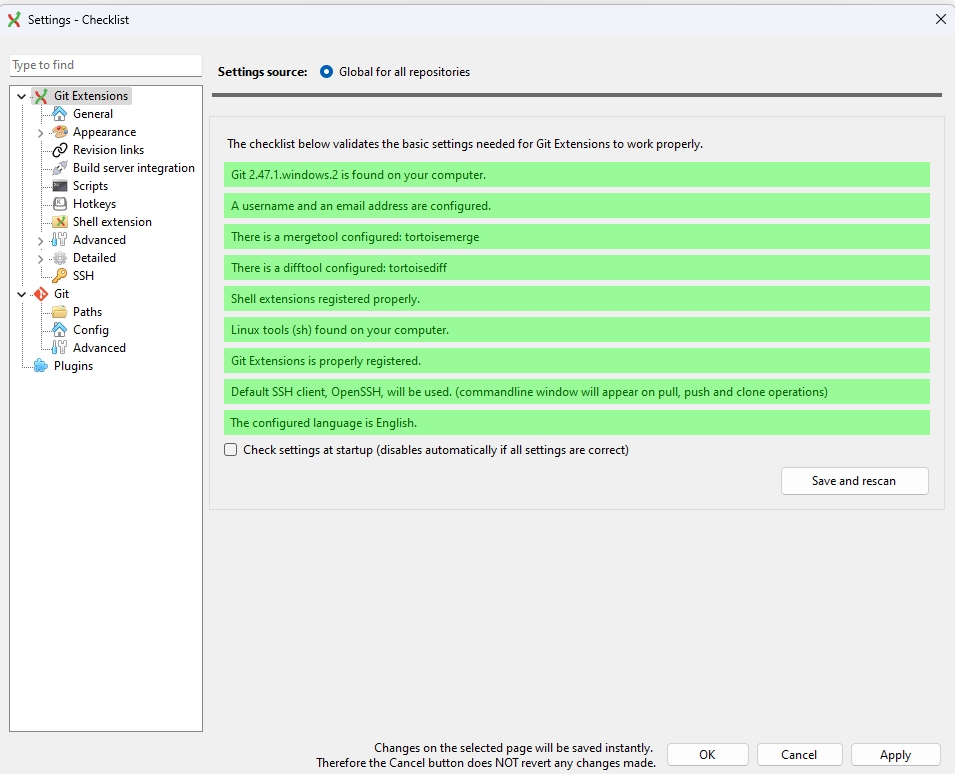
Choose your language and fill the information.
You can choose Tortoise Merge and Tortoise Diff tools and select English
11/ Choose Manage remote and copy your Azuredevops endpoint URL (step 2)
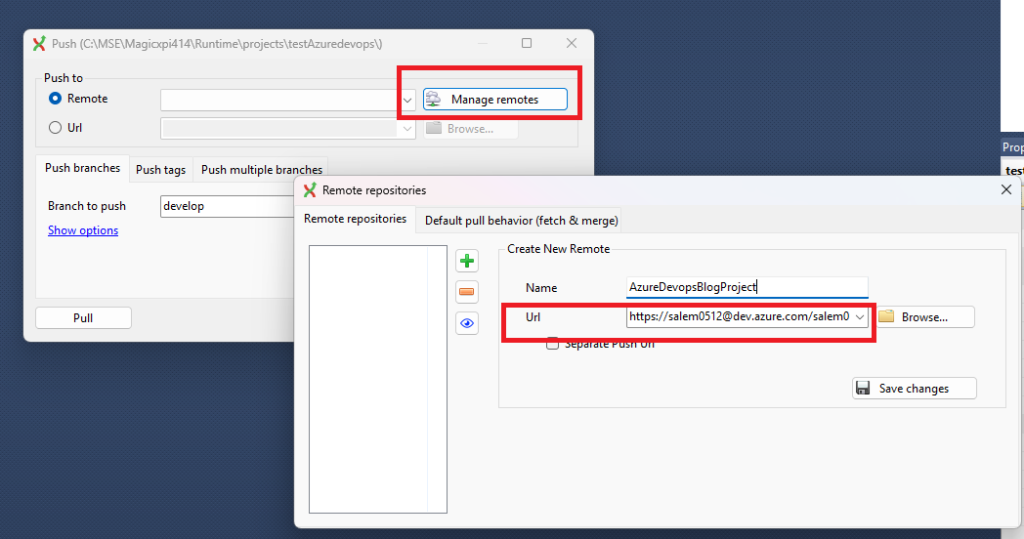
answer Yes to the question
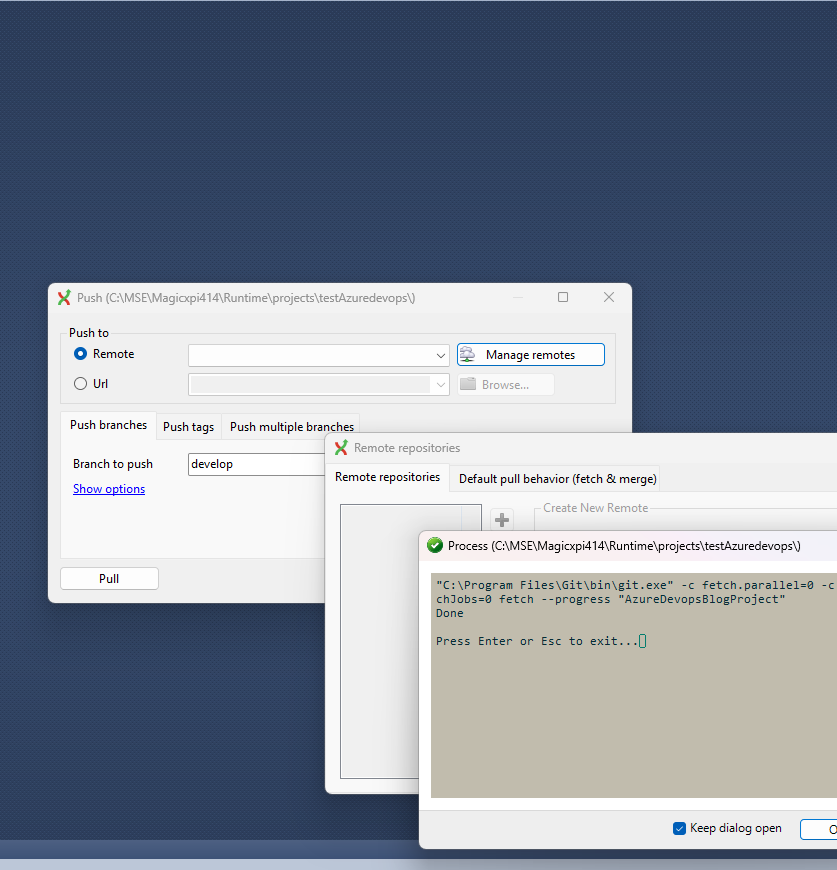
Click Push
Answer Yes 2 times then you get

(*) You can be asked to sign on your microsoft account
12/ Check on your devops azure console that your project is gitted on the correct branch
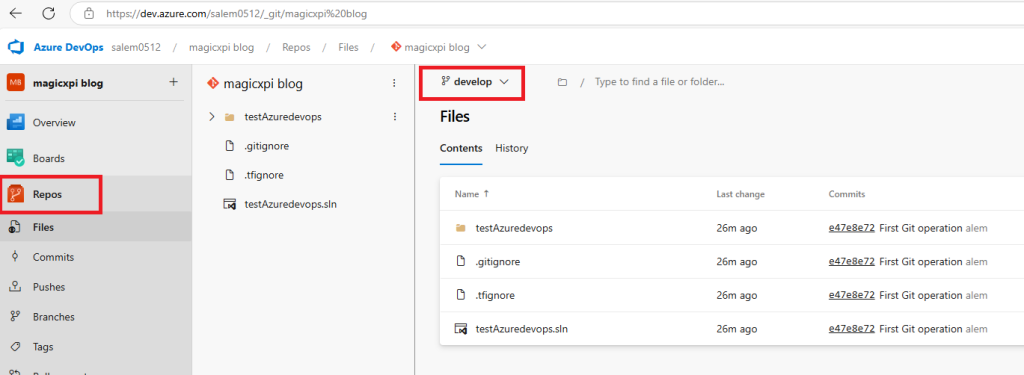
Congratulation, you have » gitted » your first magic xpi project 🙂
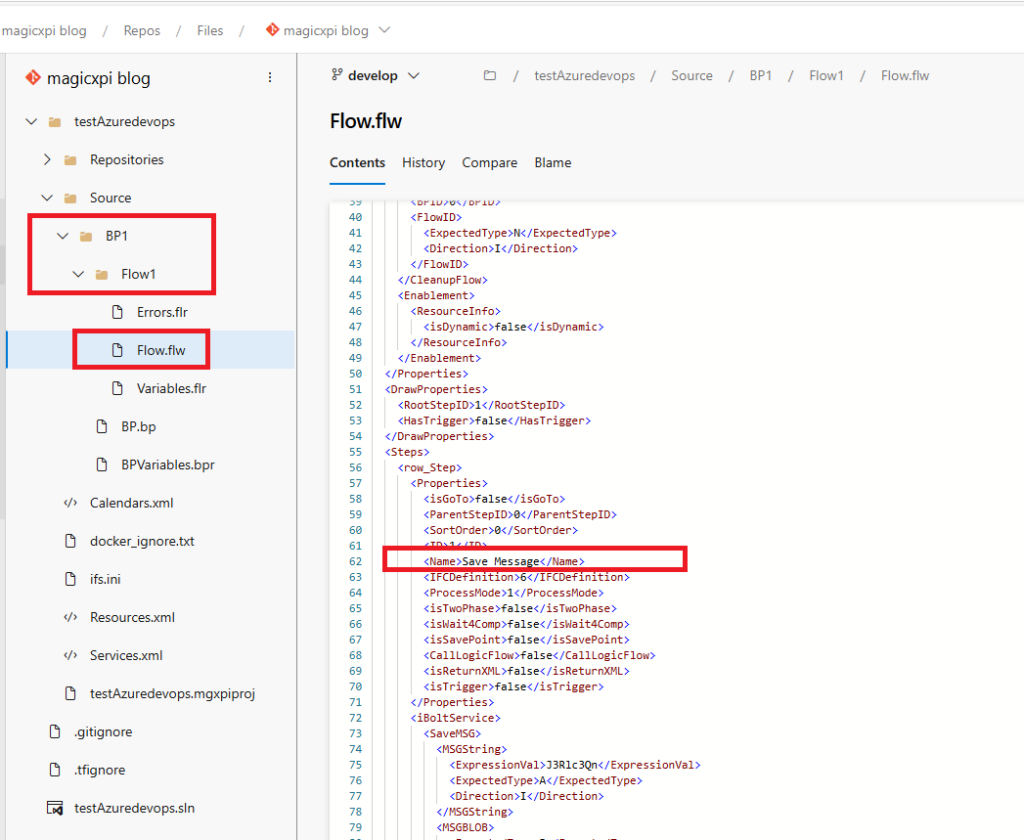
12/ Add a Save message Step in your flow with a dummy message
add a comment and commit

Then push your modification to your azure devops git repo (right click on project and choose push)
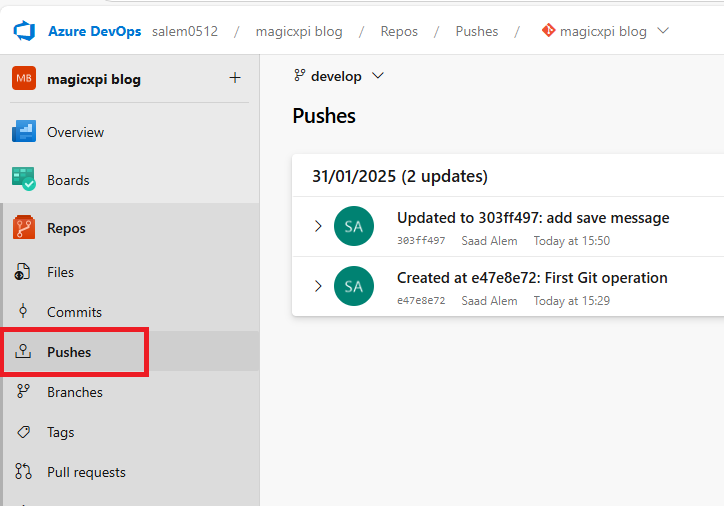
In the pushes menu, you can check all your previous operations
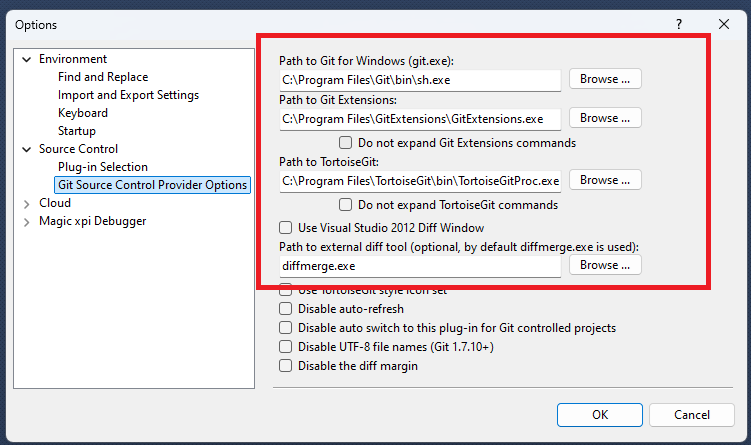
(*) In your Magic xpi studio, the Menu Tools=>Options=>Source control=>Git Source Control Provider Options should be like this