Describe the different steps for connecting Magic xpi with AzureAD using REST API
1/ Check that you get OAuth2 token from login.microsoftonline using Postman
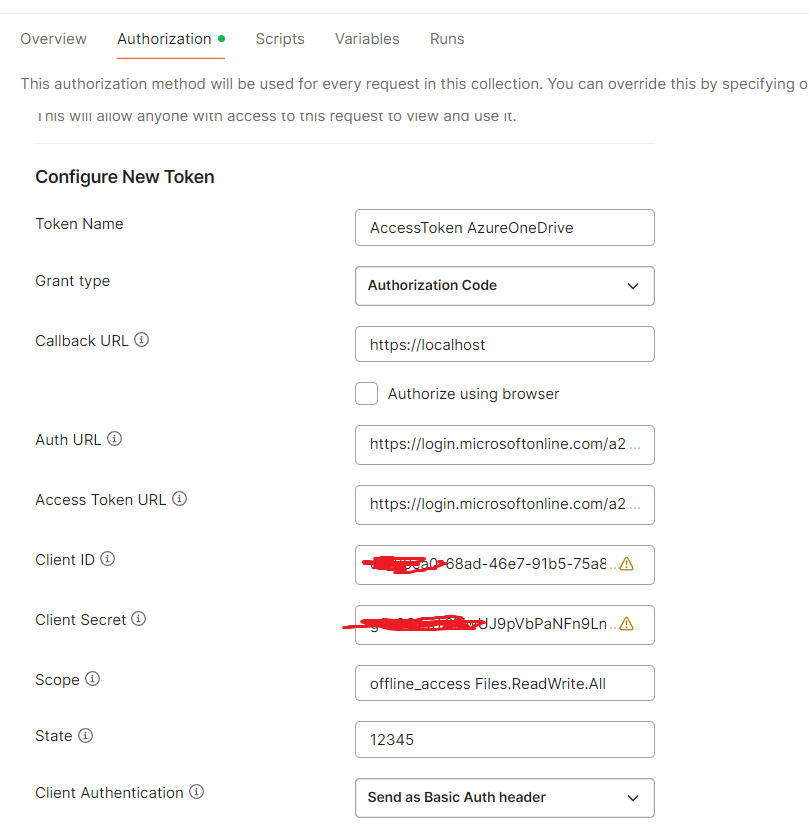
(*) client_id, clientsecret, resource, tenantid, callback URL and scope are retrieved from azure portal (https://portal.azure.com)
(**) Check the API permissions
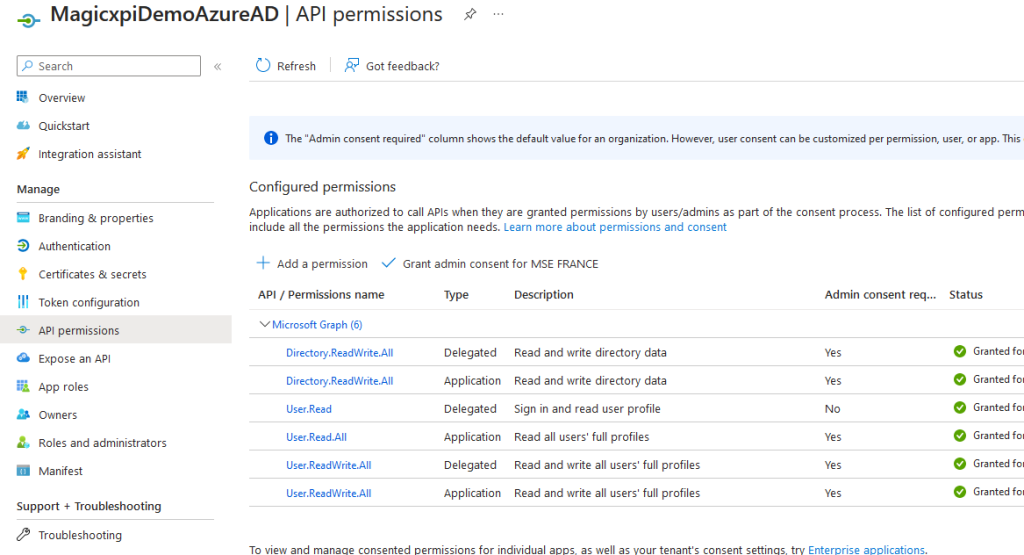
2/Check that you can get the Users List from Postman
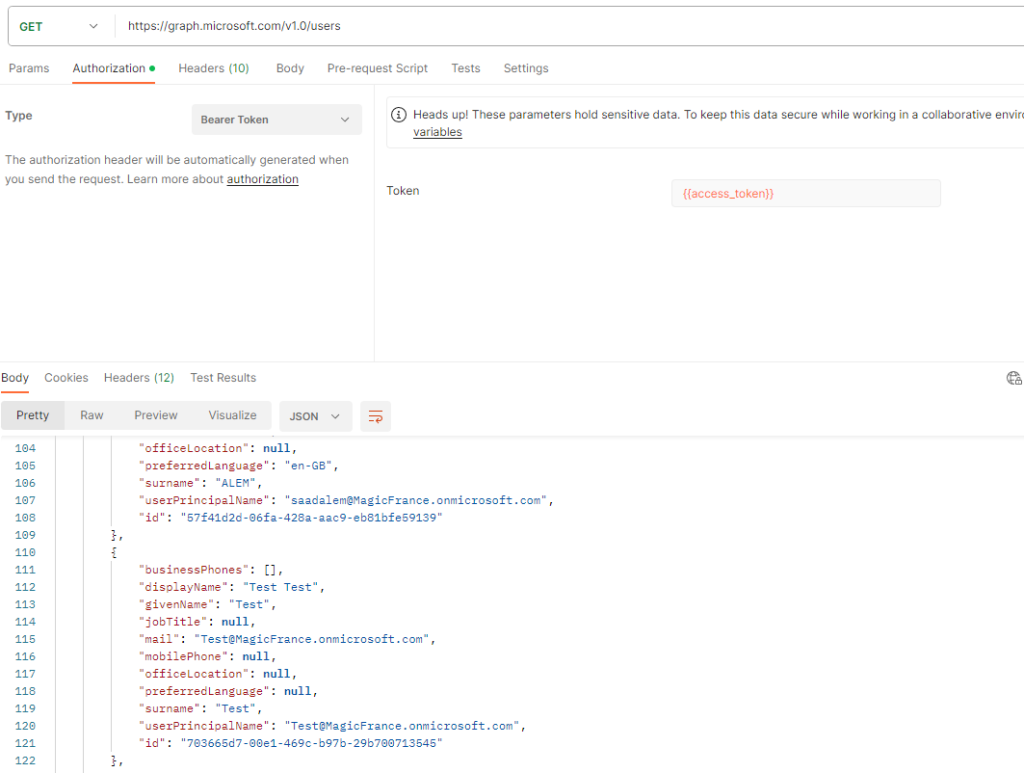
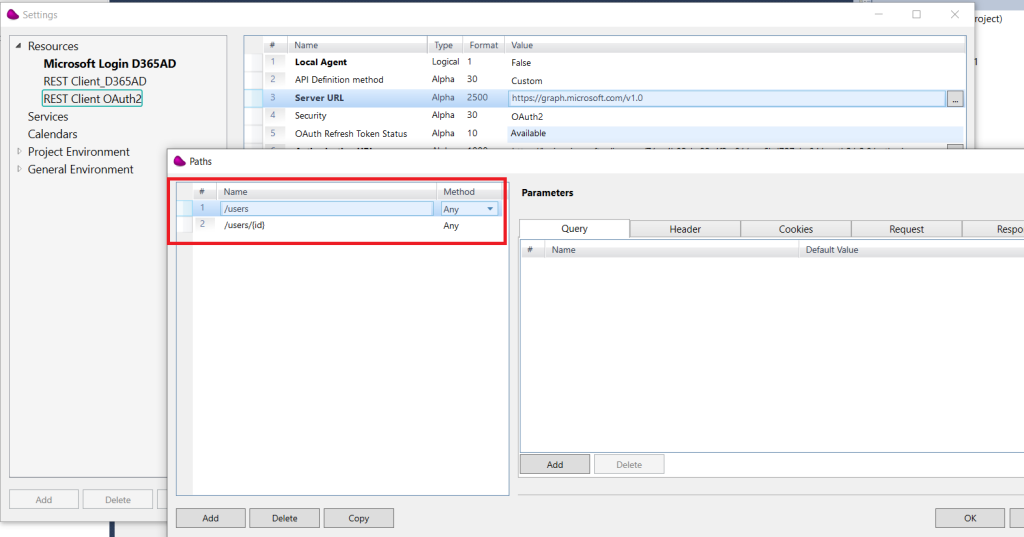
2/ Create a REST Client Magic xpi resource (Project=>Settings=>Resources)
Define a REST resource with OAuth2 security enabled with all credentials
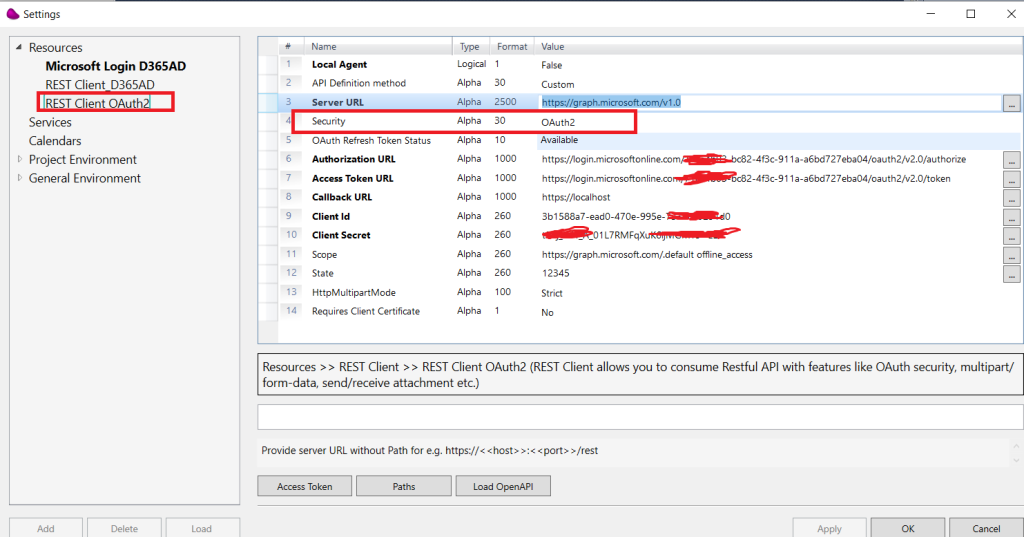
Define 2 Paths : /users and /users/{id}
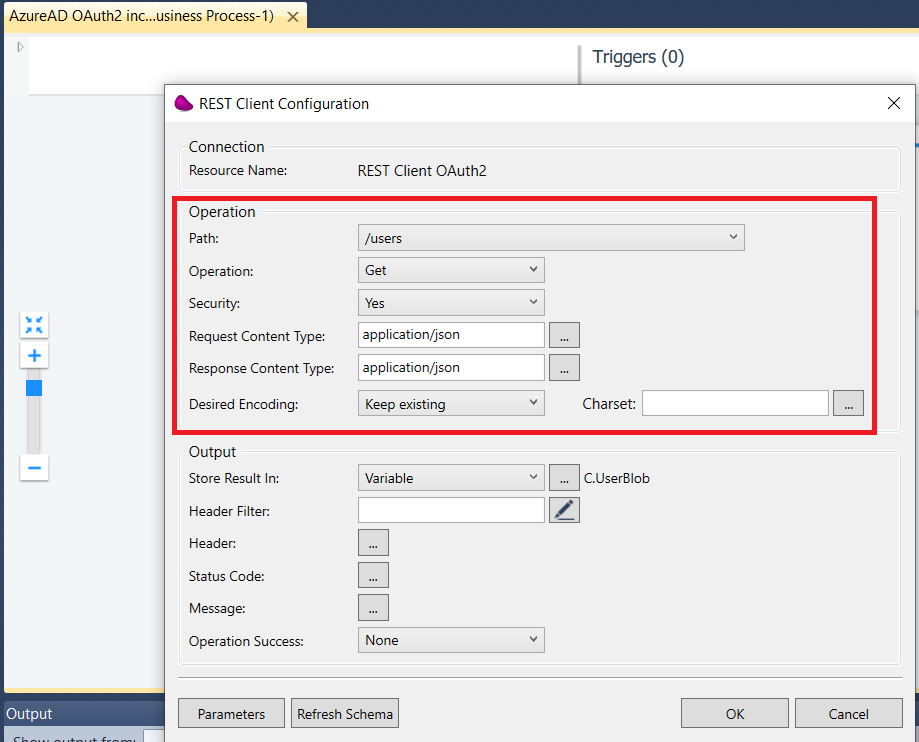
3/ Drag and Drop a REST Client Connector linked to the resource and configure the connector to call users with Get operation.
7/ Use Datamapper component to parse the Json response and create a flat file with 3 columns (userPrincipalName, id, mail)

8/ To create a User, you need to update a json message with different attributes using a flow data component or a datamapper
(*) to get the Json format, please consult Microsoft documentation (Create User – Microsoft Graph v1.0 | Microsoft Learn)
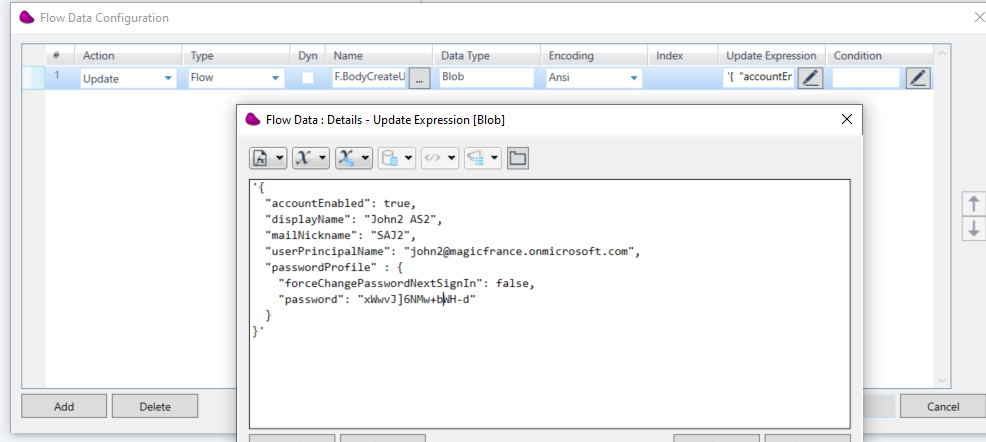
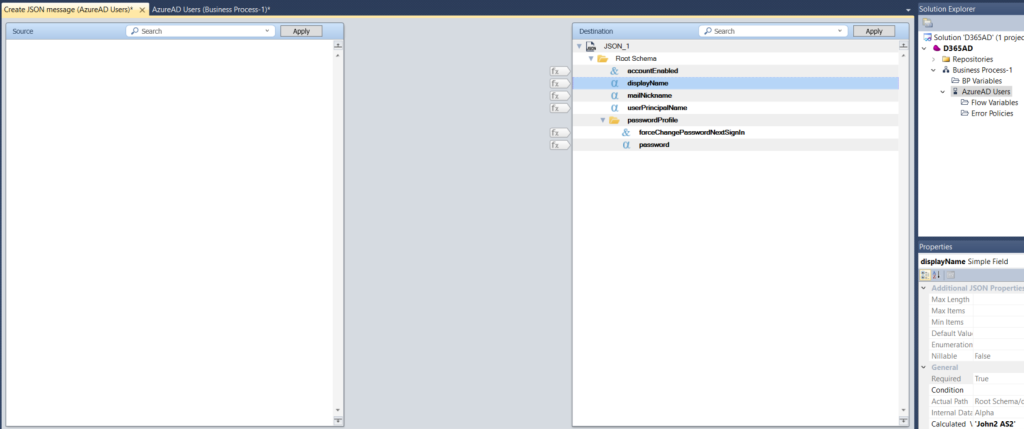
9/ Drag and Drop a REST Client connector and call users with Post operation
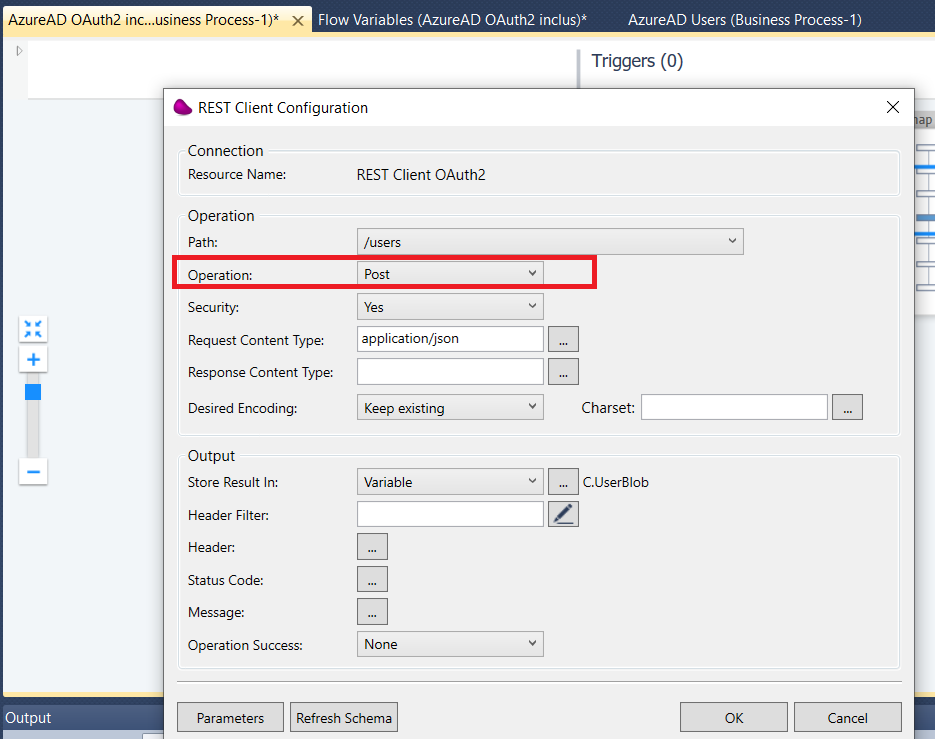
If the user is created successfully, you should receive status 201 in the variable F.StatusCode and a json response with the user id

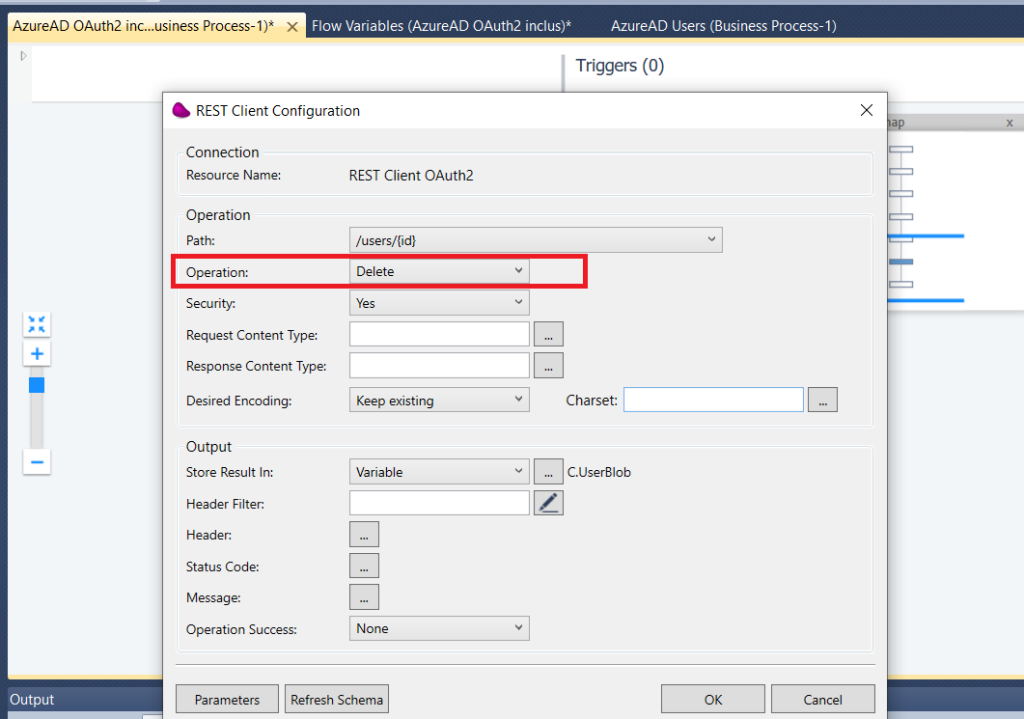
10/ If you want to delete, update an AD user, you can use Operations : Delete, Patch and pass the userid in the path ( /users/{id})
Below an example for deleting the user.

11/ Documentation Reference :
https://learn.microsoft.com/en-us/graph/api/resources/users?view=graph-rest-1.0