Goal : Create, modify and delete, … JIRA issues
Describe the different steps for connecting Magic xpi with JIRA cloud platform5 using REST API with Basic Auth or OAuth2
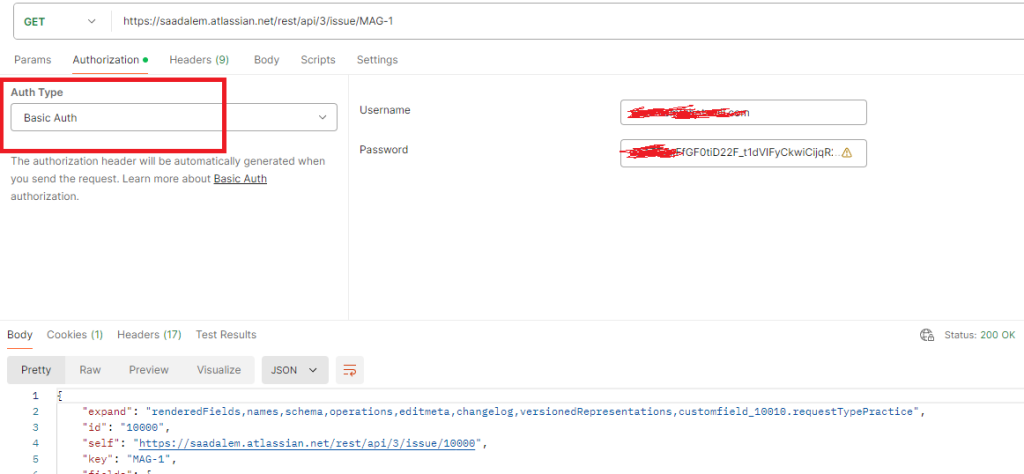
1/ Check with Postman the connection with your User and Password
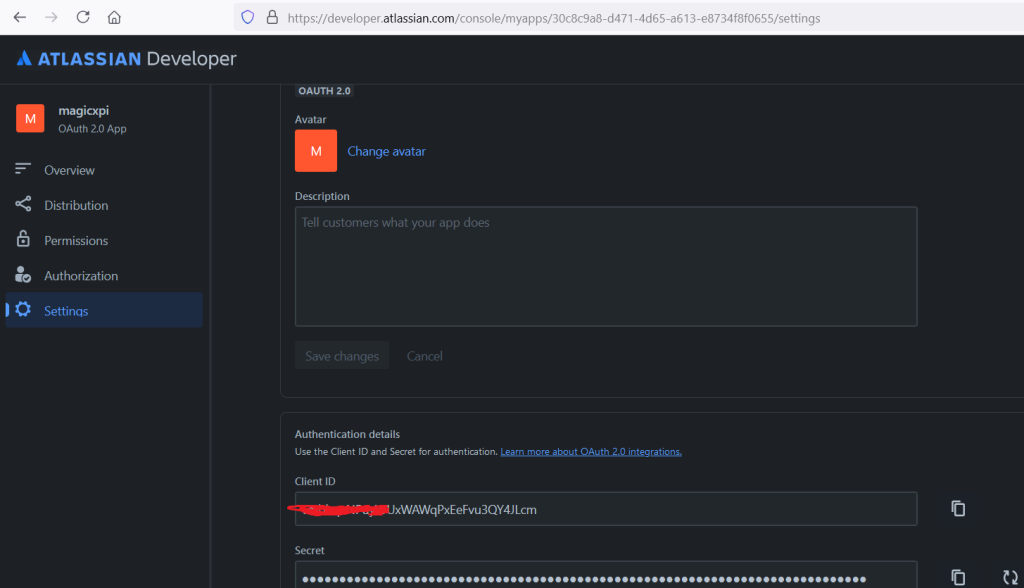
2/ (*) For OAuth2, define an apps in the atlassian developer console with desired scope and get all the credentials (Client ID, Client secret, Callback URL ).
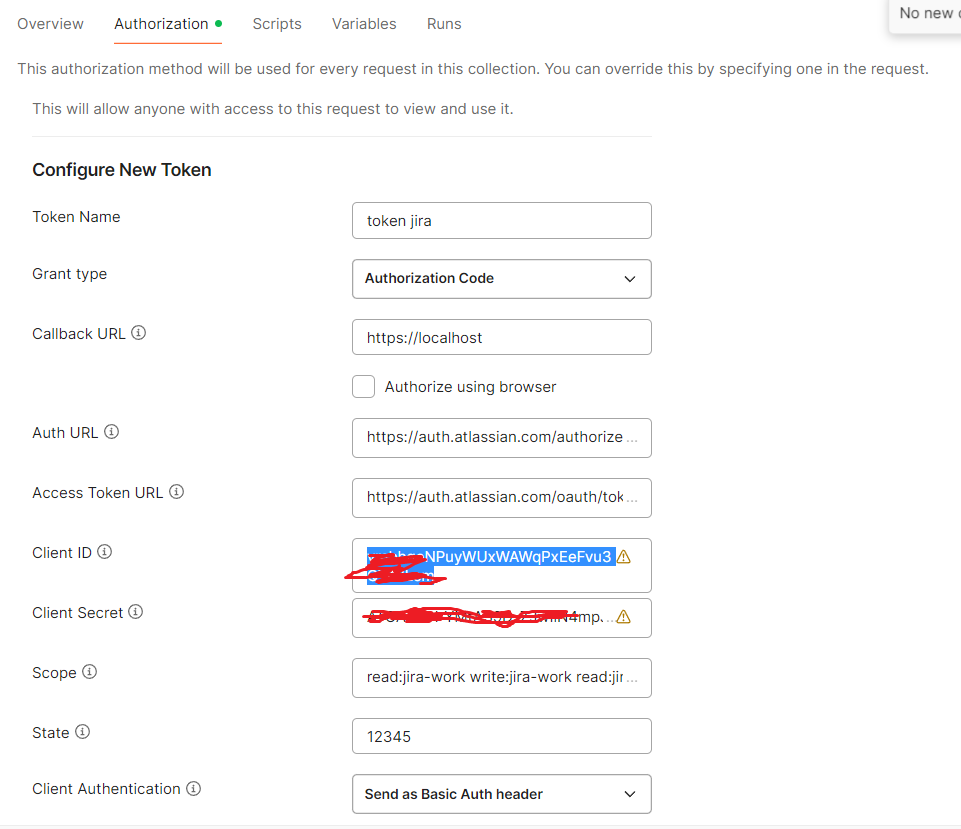
3/ (*) For OAuth2 Use Postman to test
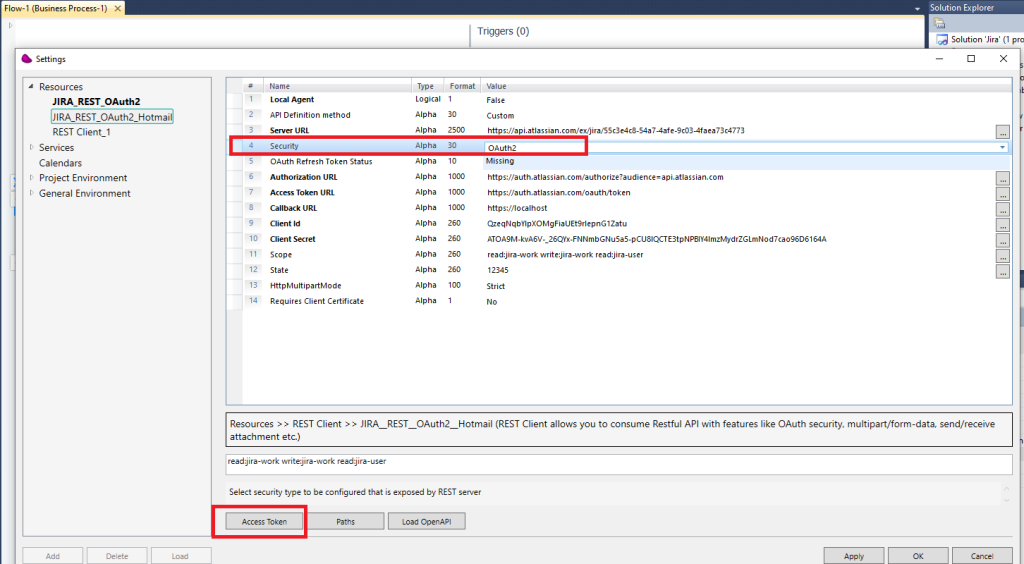
Authorize URL : https://auth.atlassian.com/authorize?audience=api.atlassian.com
Access token URL : https://auth.atlassian.com/oauth/token
Scope : read:jira-work write:jira-work read:jira-user
(*) Future use OAuth2 (Execute a Get on https://api.atlassian.com/oauth/token/accessible-resources)

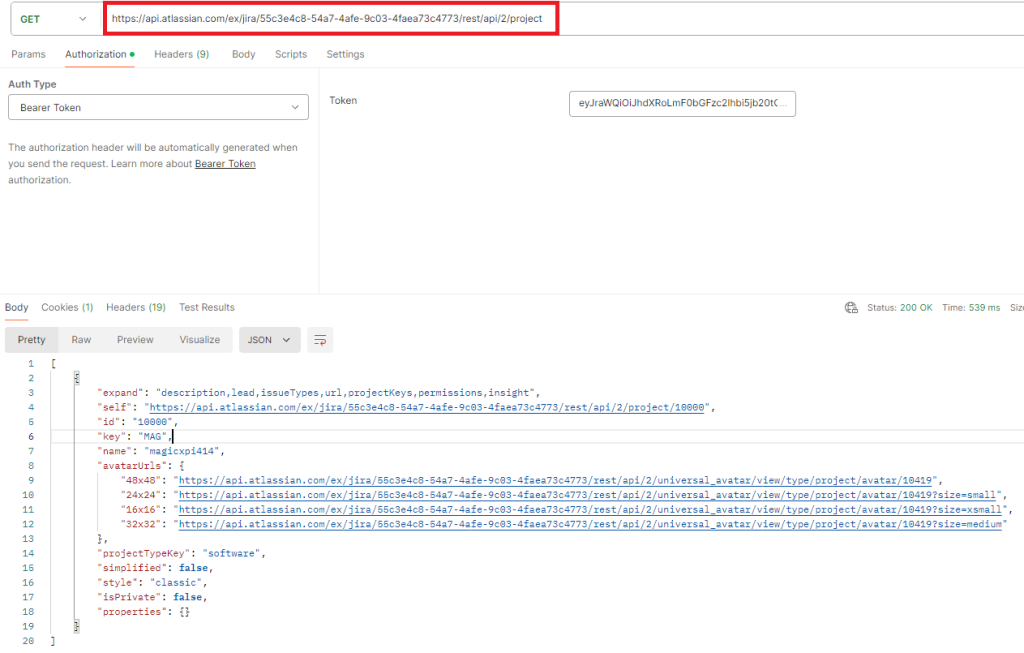
(*) Future use for OAuth2 (Copy the id of your Jira project and Execute a GET on https://api.atlassian.com/ex/jira/<id>/rest/api/2/project)
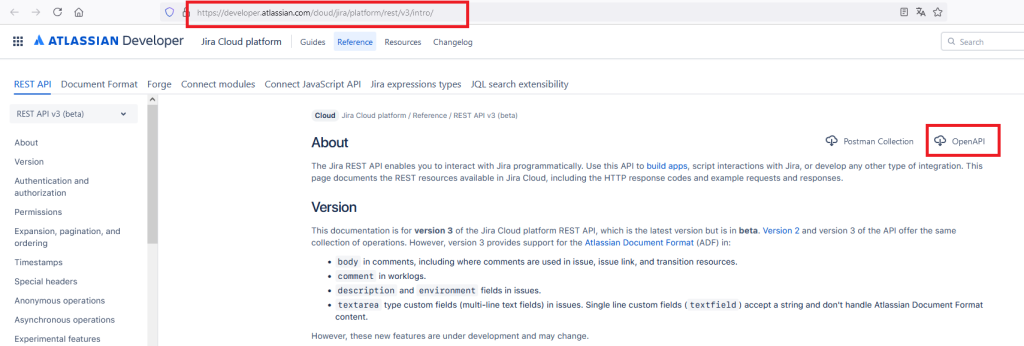
4/ Download Open API file from Atlassian from https://developer.atlassian.com/cloud/jira/platform/rest/v3/intro/
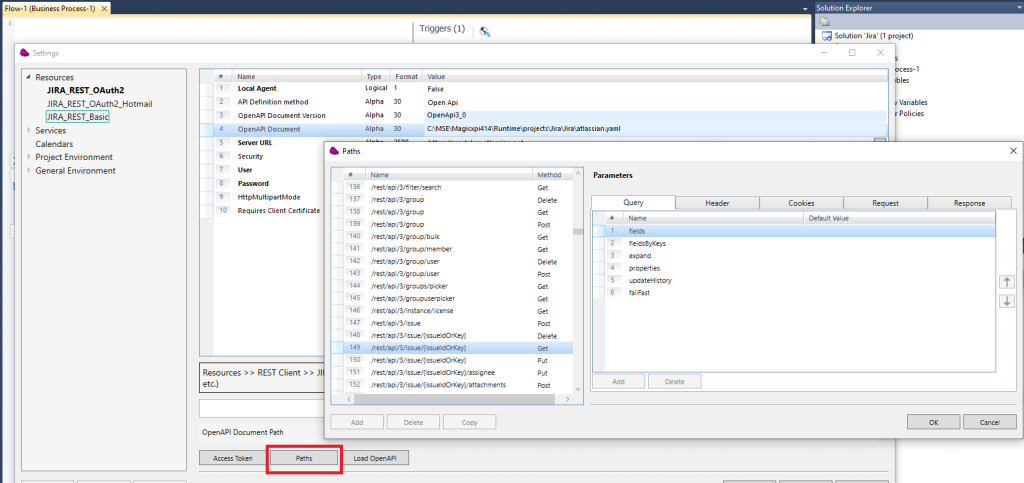
5/ Open a Magic xpi project and define a REST Client Resource
Rename the Resource to « JIRA_REST_Basic » and set API Definition to « Open Api » and clic the « Load OpenAPI » button

6/ Click on « Paths » to discover all the endpoints available in other to play with JIRA
6/ Design a new flow and Drag and Drop the Rest Client connector.
Choose Path : /rest/api/3/issue/{issueIdOrKey} and Get operation and click OK
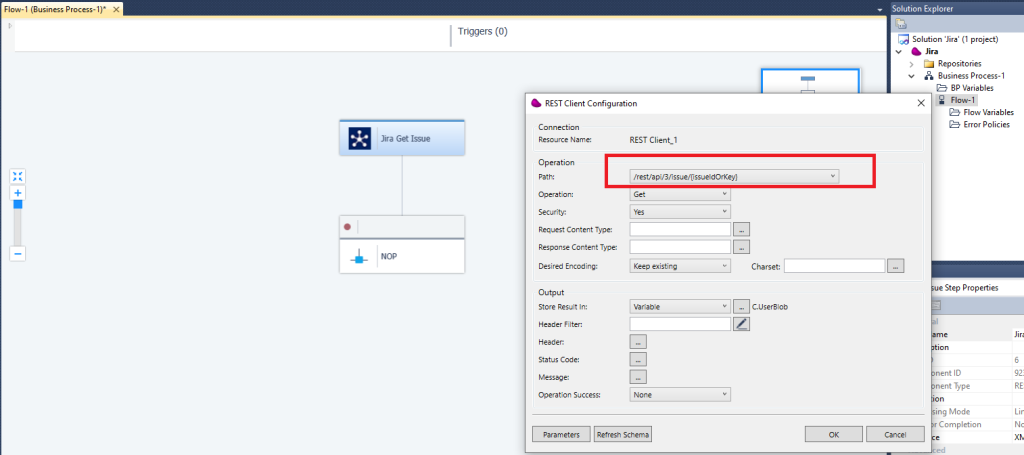
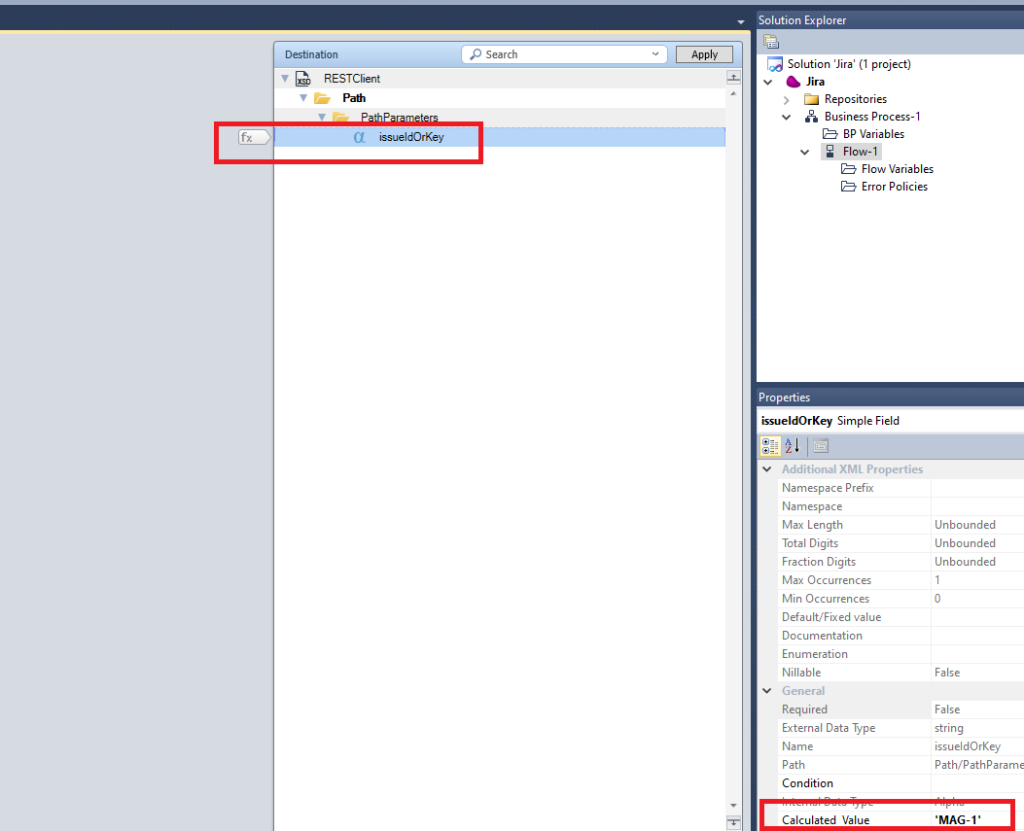
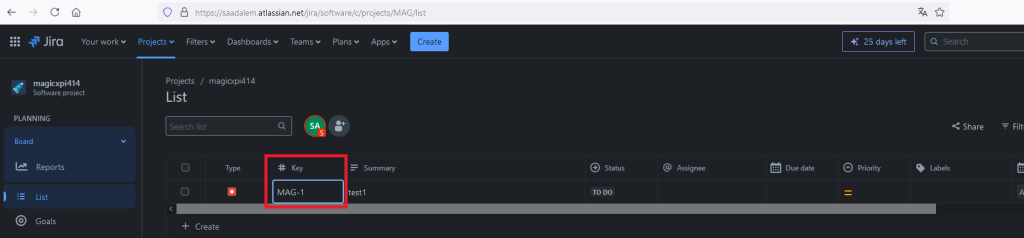
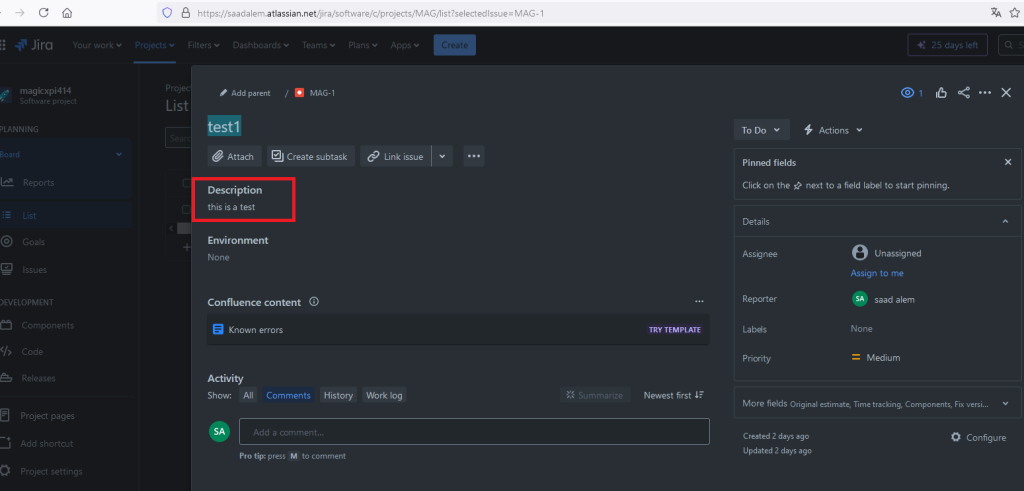
Set the Jira issue name to issueIdOrKey field (« MAG-1 » in my case)
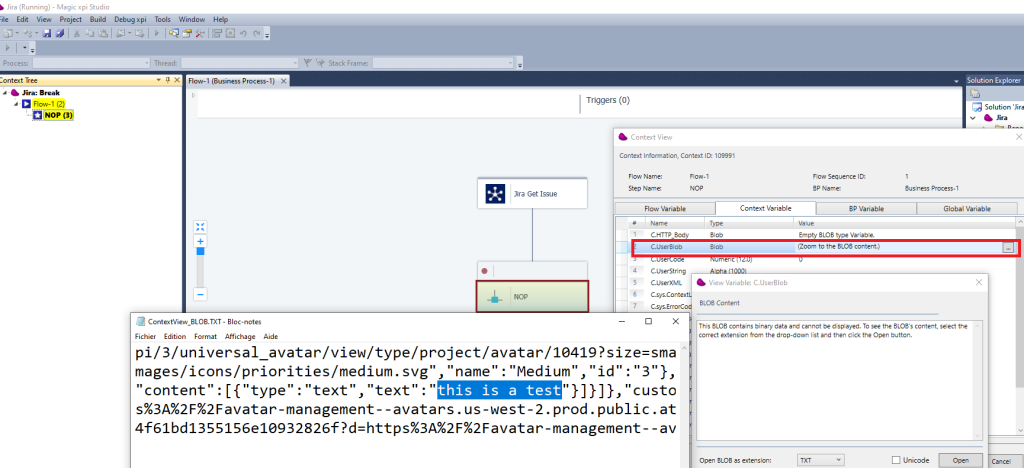
7/ Execute the flow in Debug Mode.
You get the response in the C.UserBlob variable
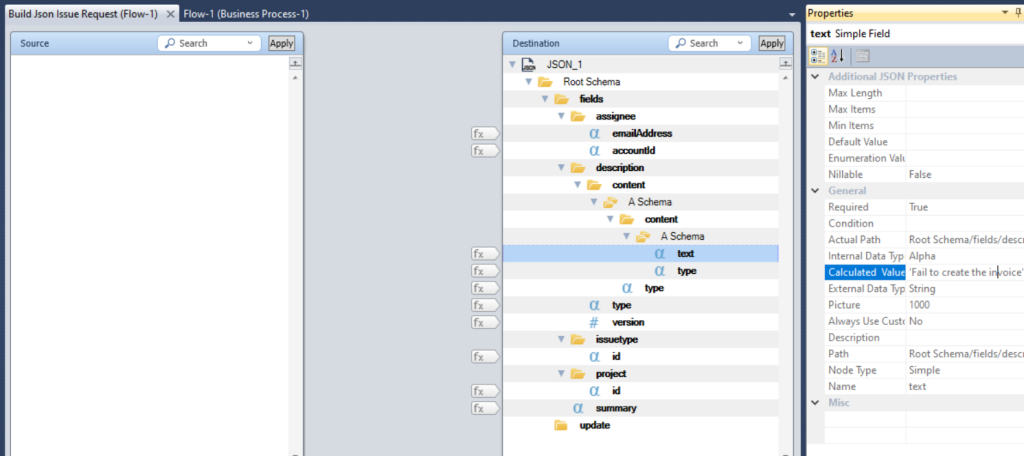
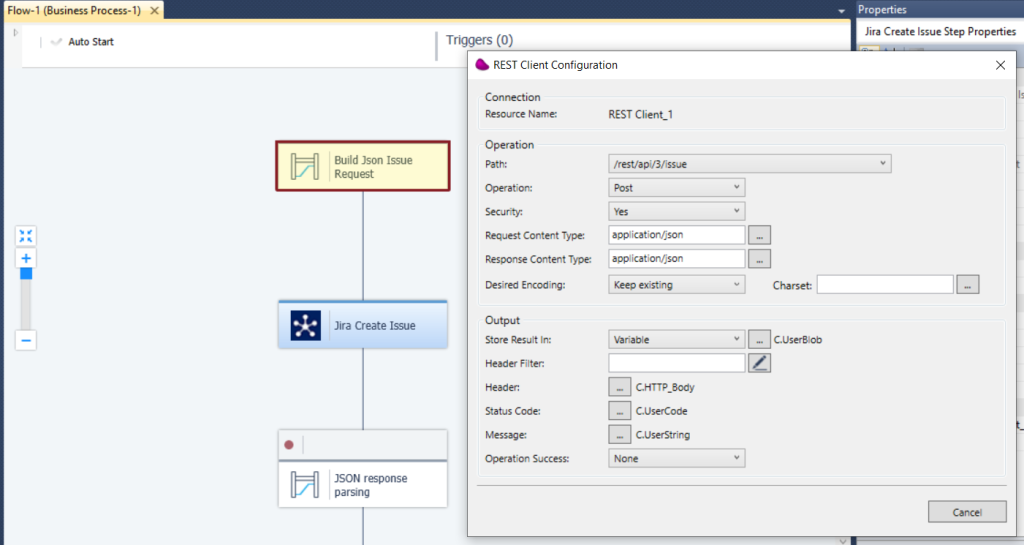
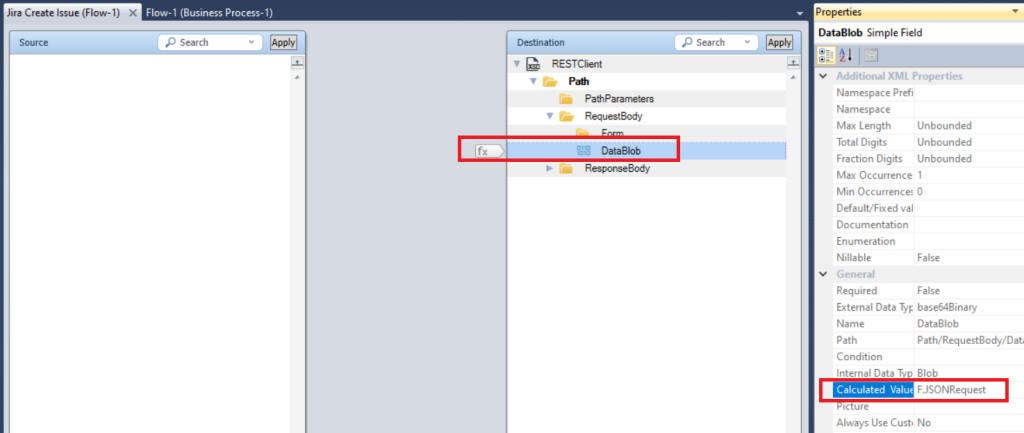
8/ To create a JIRA issue, you have to use the Data Mapper with the correct JSON schema in other to create the JSON request
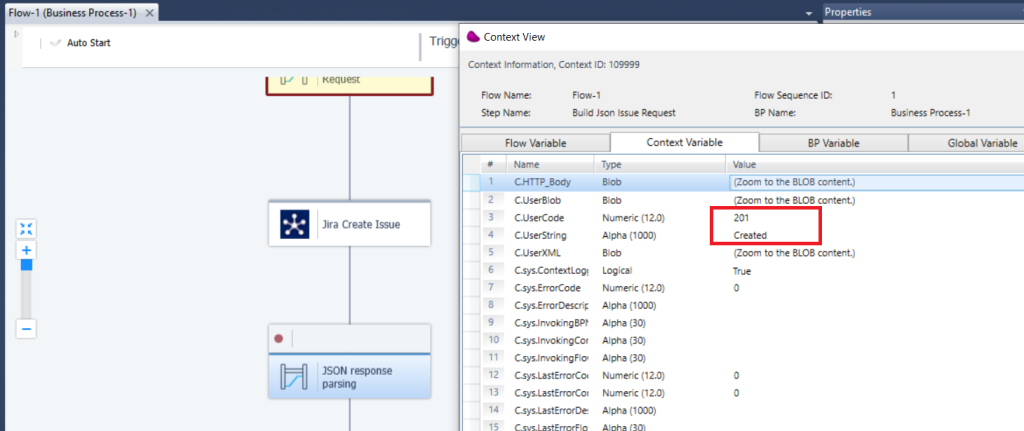
9/ Drag And Drop REST Client connector and execute a POST on /rest/api/3/issue with the previous JSON (F.JSONrequest)
You should receive a 201 created in the status
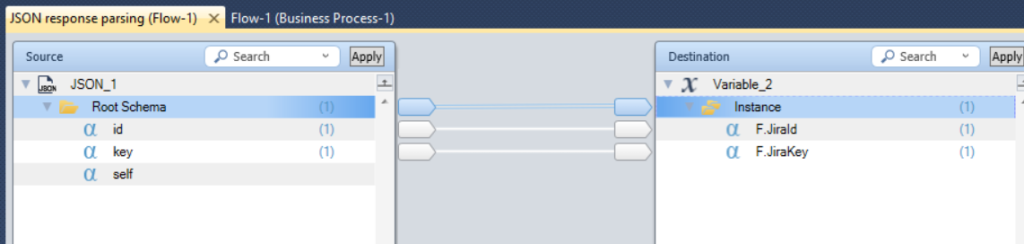
10/ After the REST Client Step, you can parse the response with the Datamapper and the Json schema to catch the JiraId and JiraKey
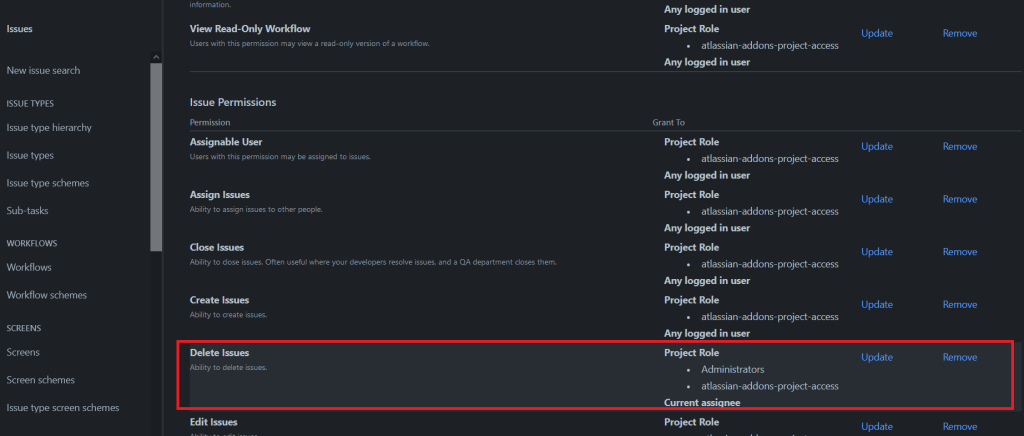
11/ To delete a JIRA issue, you need to have the correct right (see Delete permission in JIRA)
Drag And Drop REST Client connector and execute a Delete on the path : /rest/api/3/issue/{issueIdOrKey} and pass the Jira Issue Key
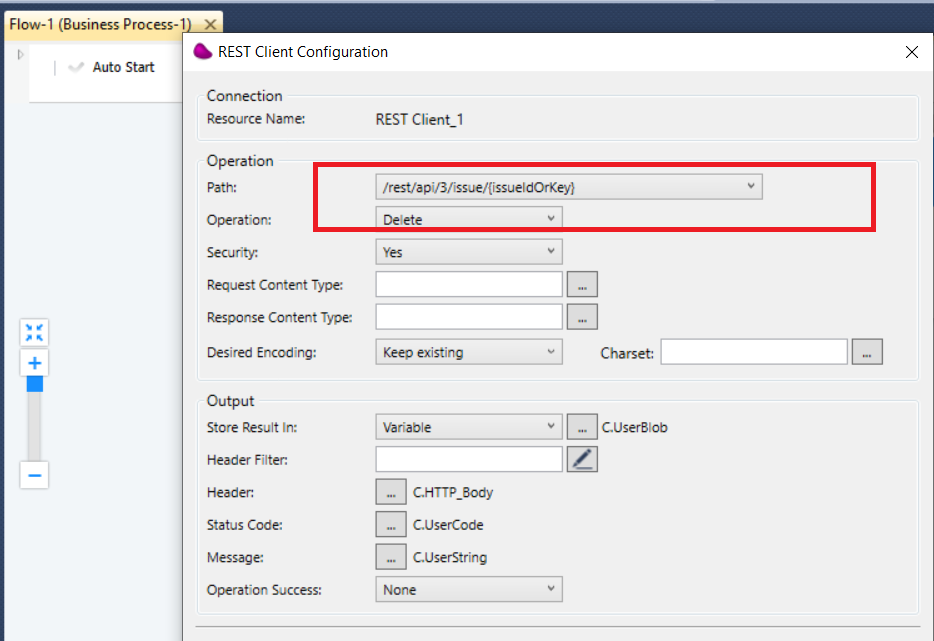
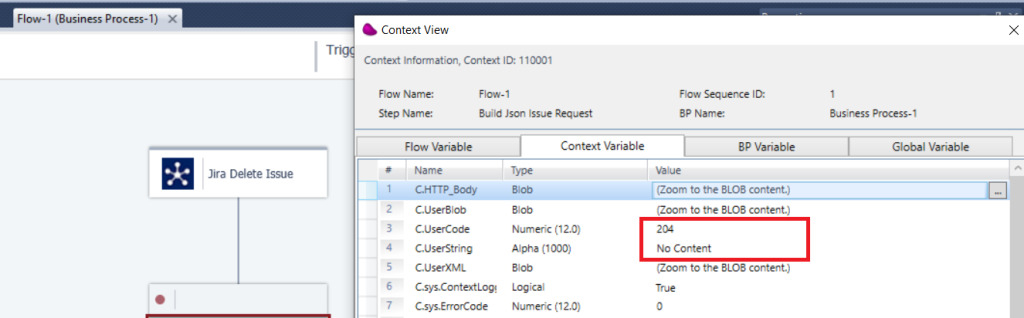
You should receive status 204 No Content
8/ For OAuth2 authentification, you have to create a REST Client Magic xpi resource with « Security » set to « OAuth2 » and pass all the required parameters
(*) uuid in the Server URL correspond to your Jira project id (see step 3)
(**) Currently the Access Token cannot be retrieved because of a technical issue … to continue