Goal : Search, Update order with Magic xpi using salesforce commerce REST API (OCAPI vs SCAPI)
1/ Salesforce Commerce Cloud REST API works with FrontEnd Token and BackEnd Token (OCAPI open commerce API)
Front End Token needs the information below
- client_id_ocapi
- password_ocapi
- host_auth (https://account.demandware.com/)
Check with Postman that you get the token
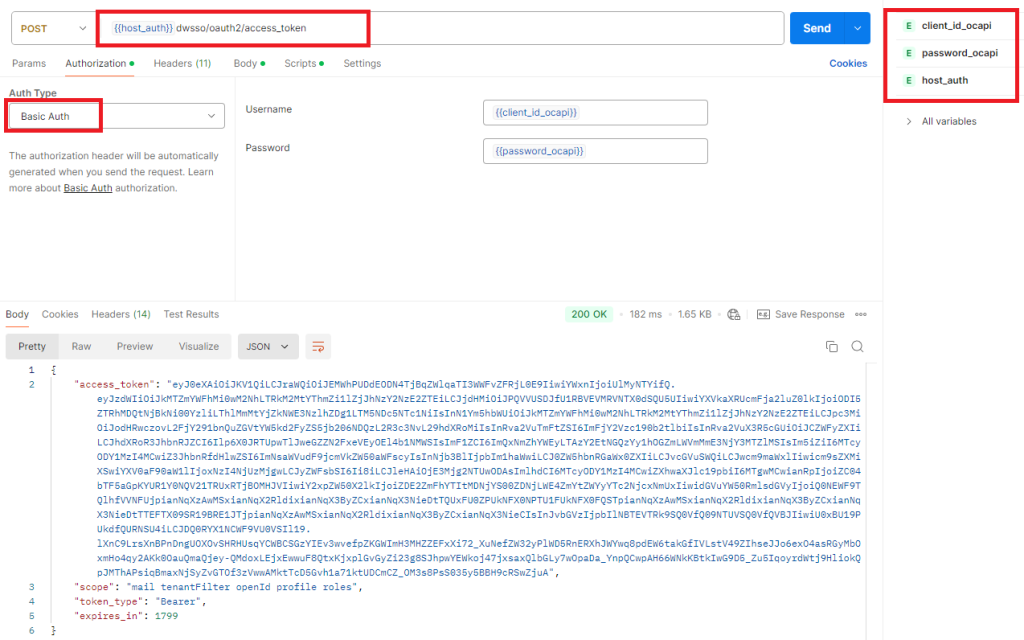
You must send in the body (format x-www-form-urlencoded) : grant_type:client_credentials
2/ You can now search order with this Front End Token by doing a POST on {{host_ocapi}}/s/{{site}}/dw/shop/v22_10/order_search
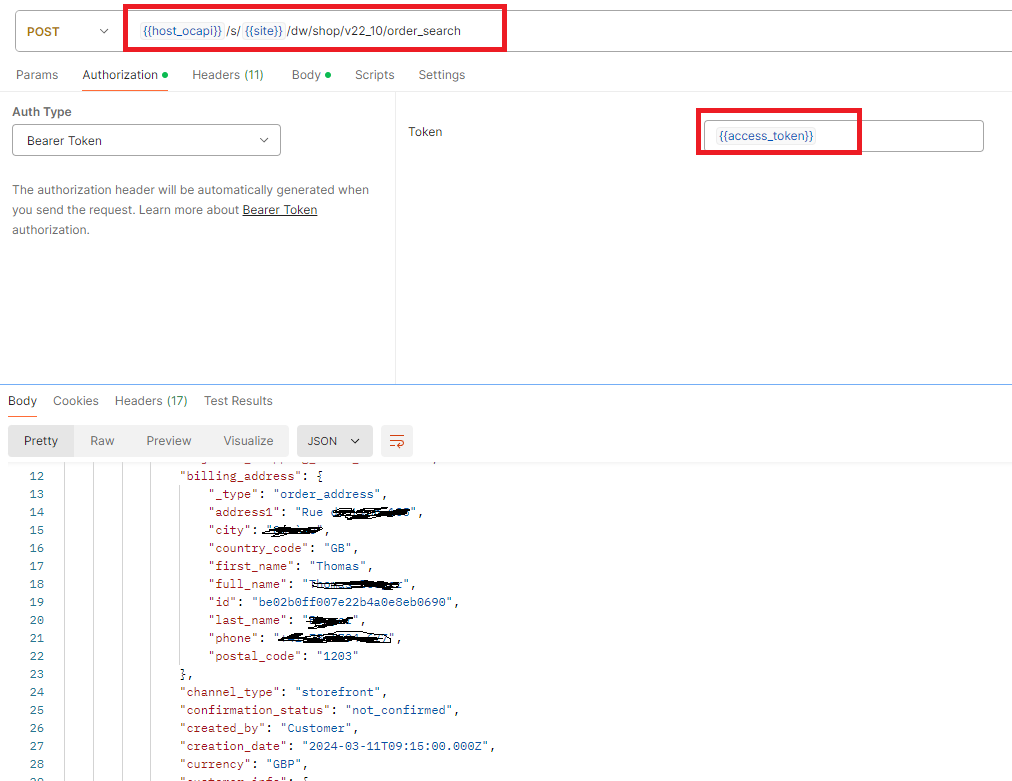
{{host_ocapi}} is your salesforce commerce cloud url : example https://staging-shop.mse.com
{{site}} country site : example FR
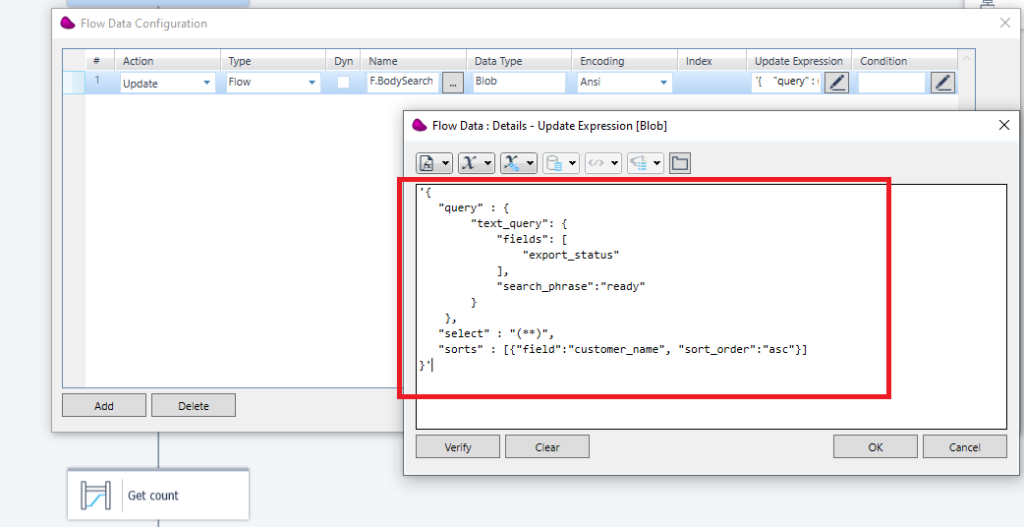
You can send in the Body the JSON below :
{
« query » : {
« text_query »: {
« fields »: [
« export_status »
],
« search_phrase »: »NOT_EXPORTED »
}
},
« select » : « (**) »,
« sorts » : [{« field »: »customer_name », « sort_order »: »asc »}]
}
3/ To manipulate an order, you need a « BackEnd Token »
To retrieve it, you need the information below
- {{host_integration}}dw/oauth2/access_token?client_id={{client_id_ocapi}}
- {{user_access}}
- {{password_integration}}
- {{password_ocapi}}
Pass these parameters in the related fields like below
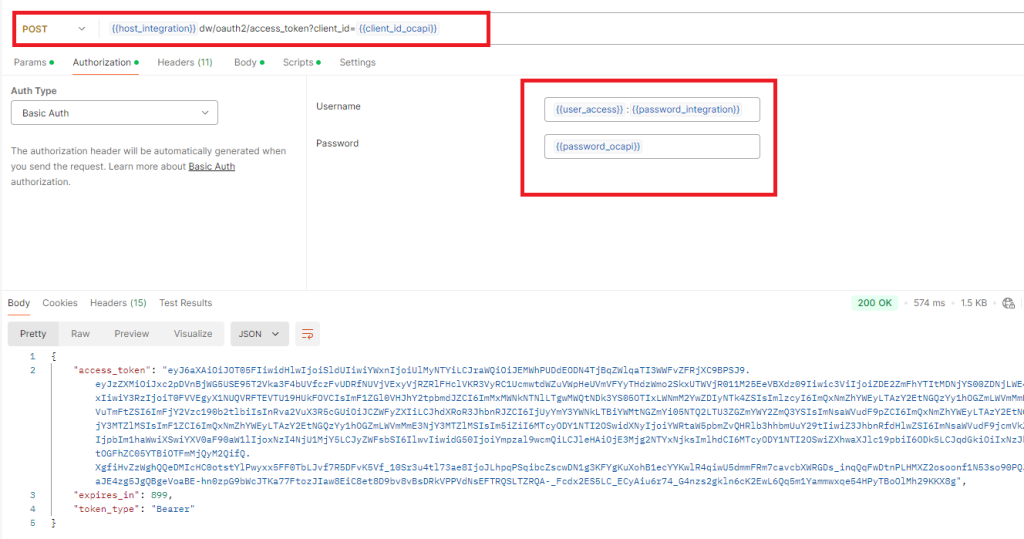
You must send in the body (format x-www-form-urlencoded) : grant_type:urn:demandware:params:oauth:grant-type:client-id:dwsid:dwsecuretoken
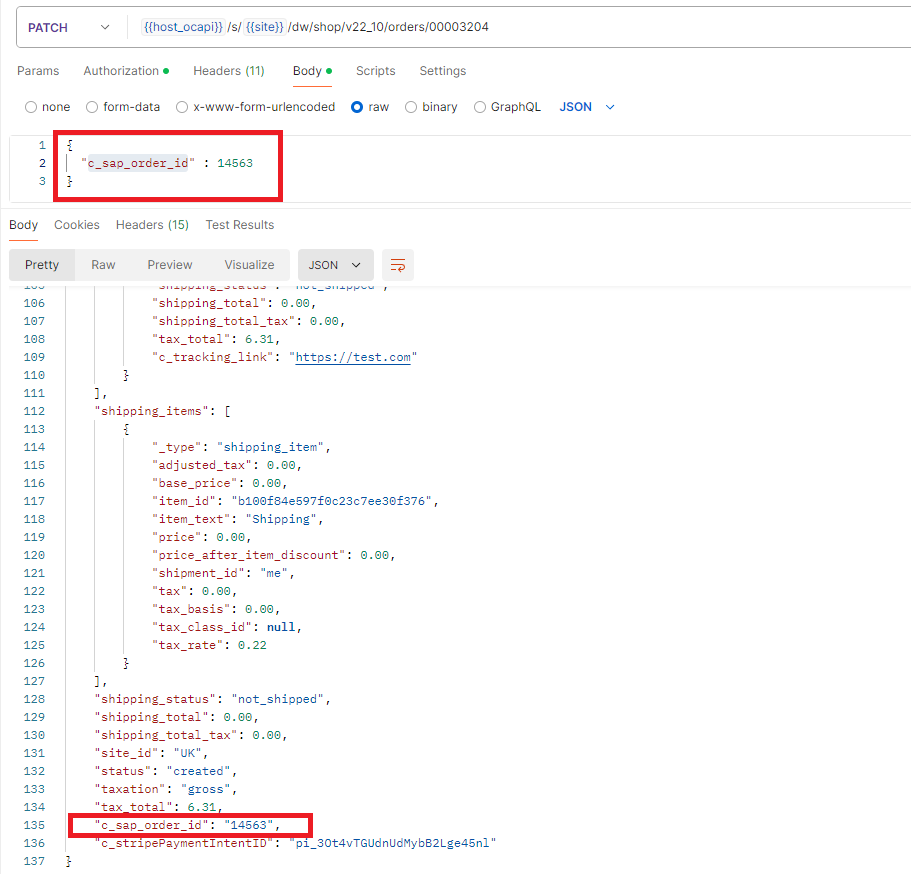
You can now update an order with this token using this URL
PATCH on {{host_ocapi}}/s/{{site}}/dw/shop/v22_10/orders/00003204
00003204 : order number
4/ Define 2 REST Client resources for Front End Token and Back End Token in Magic xpi
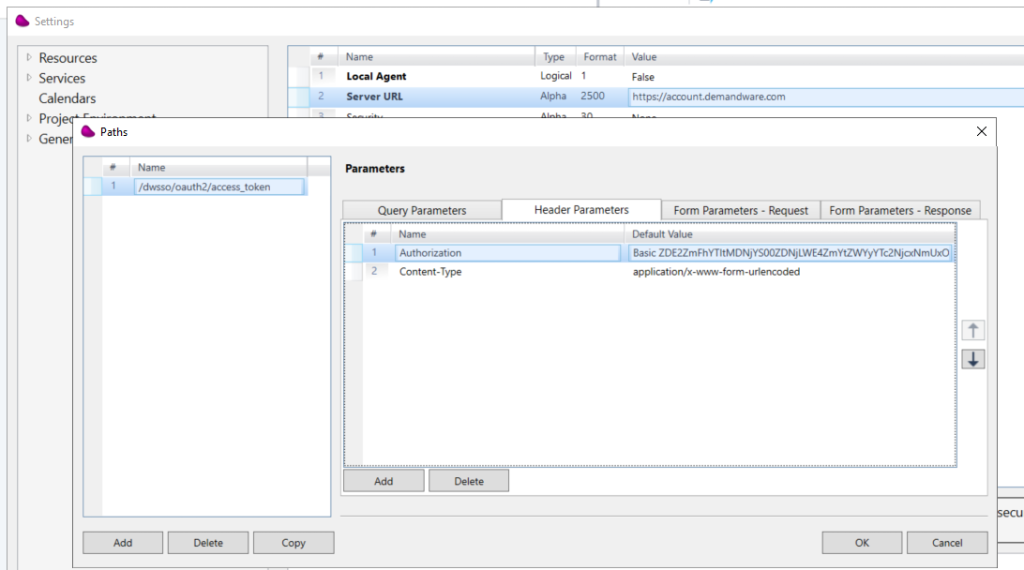
FrontEnd Token resource :
- https://account.demandware.com
- Path : /dwsso/oauth2/access_token
- 2 headers
- Content-type : application/x-www-form-urlencoded
- Authorization : Basic ZDE…. (dummy value) (you can store the result value in an environment variable for use with the connector)
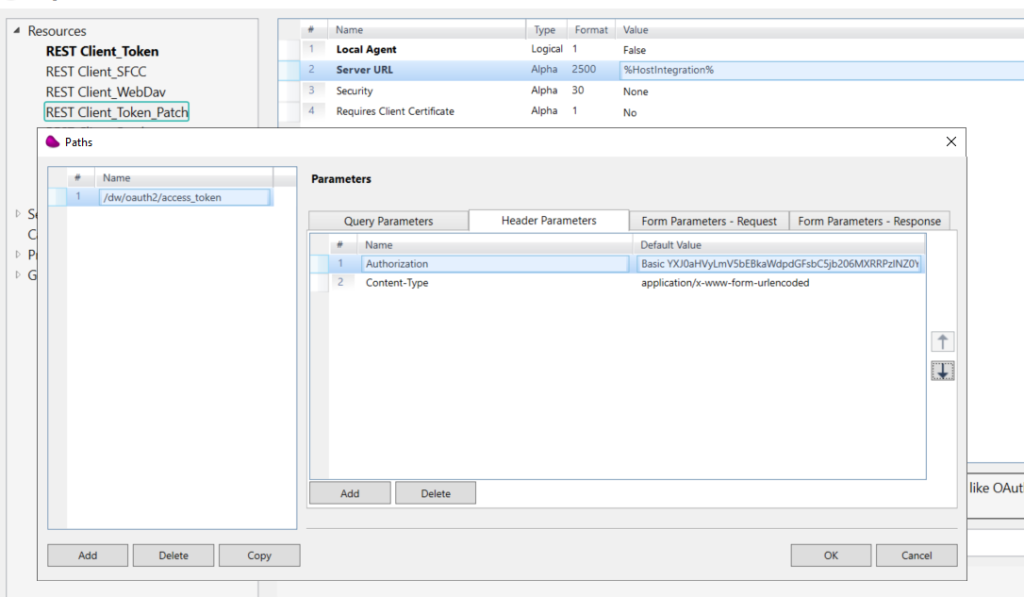
BackEnd Token resource :
In the same way, define another REST Client resource with these information
- HostIntegration environment variable is something like that : https://staging-eu01-mse.demandware.net
- client_id in the query parameter is something like uuid : d19faaa2-03ca-4d3c-a8ff-ef2a766778d3
- Authorization is the result of base64 encoding of {{user_access}}:{{password_integration}} and {{password_ocapi}} (you can store the result value in an environment variable for use with the connector)
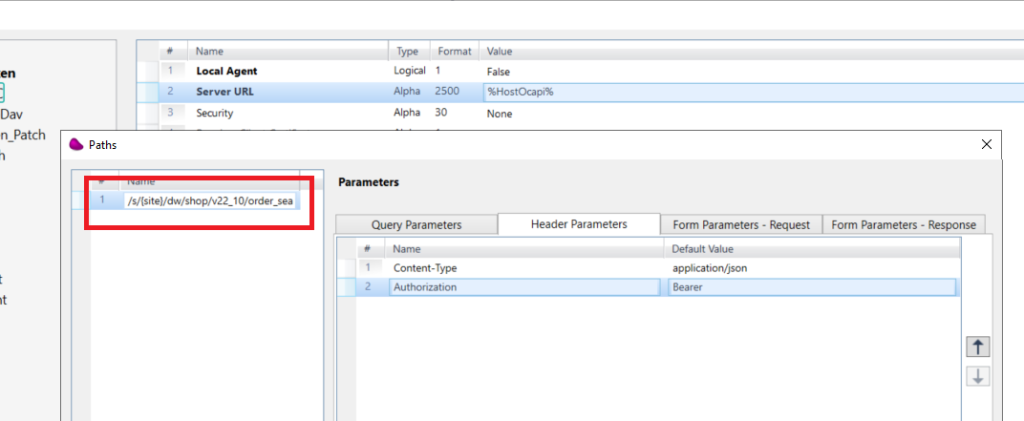
5/ Define a new REST Client resource with these information below
- %HostOcapi%
- Path : /s/{site}/dw/shop/v22_10/order_search ({site correponds to your ISO country)
- If you want to search an order, you will have to use the FrontEnd token in the Authorization header
- if you want to update an order, you will have to use the BackEnd Token in the Authorization header
6/ Creata a new Magic xpi Flow
Define a flow variable (blob) that will hold the body Token and update update it with : ‘grant_type=client_credentials’
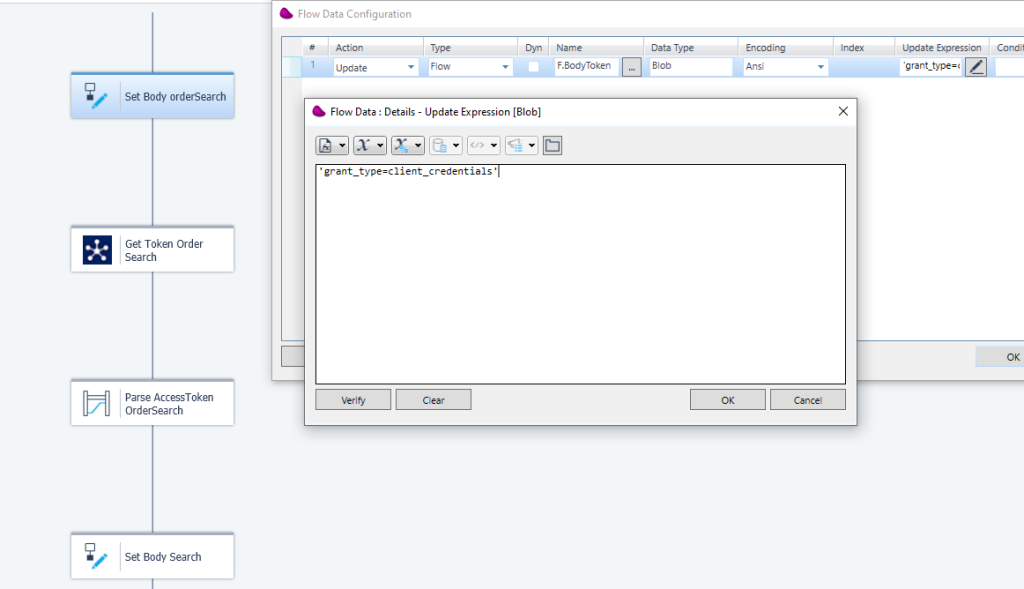
Drag and drop a Rest client connector associated to Frontend Token resource and use a POST with the path /dwsso/oauth2/access_token
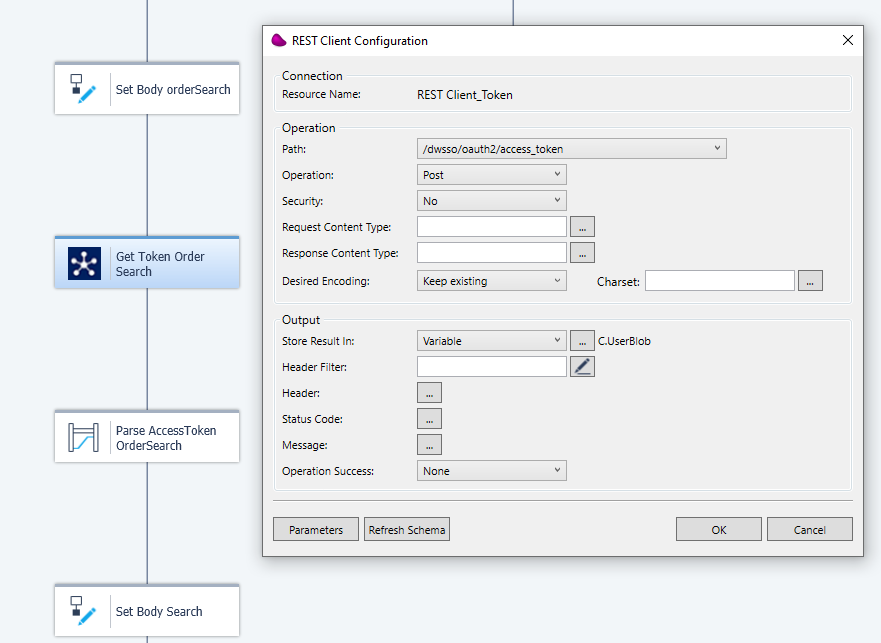
Use a datamapper to parse the json response to retrieve the access token.

7/ Update a flow variable (F.BodySearch blob) with the json query
8/ Drag and drop Rest client connector linked to order search resource and do a GET with path /s/{idsite}/dw/shop/v22_10/order_search
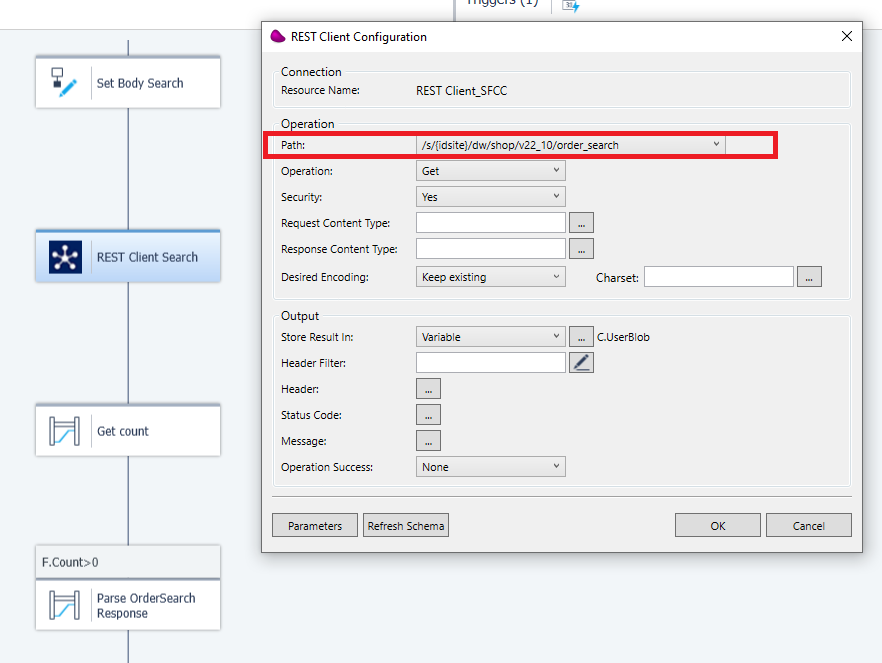
After pressing OK, set the {idsite} with the value that you want
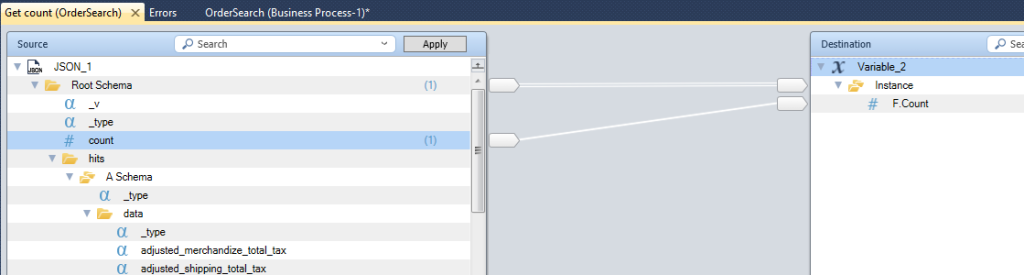
9/ You can count the result by reading « count » element in the json response
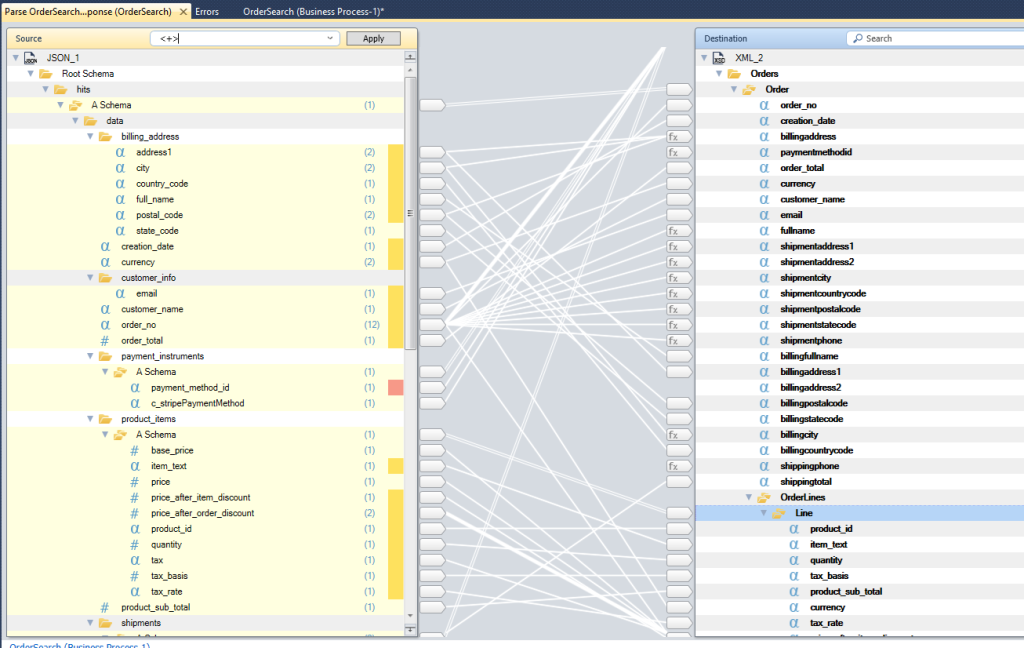
10/ to process all the json orders, you can transform the json orders in to an xml orders object and then use the datamapper to call a subflow, transfer single order to a subflow using the magic xpi XmlForwarding option
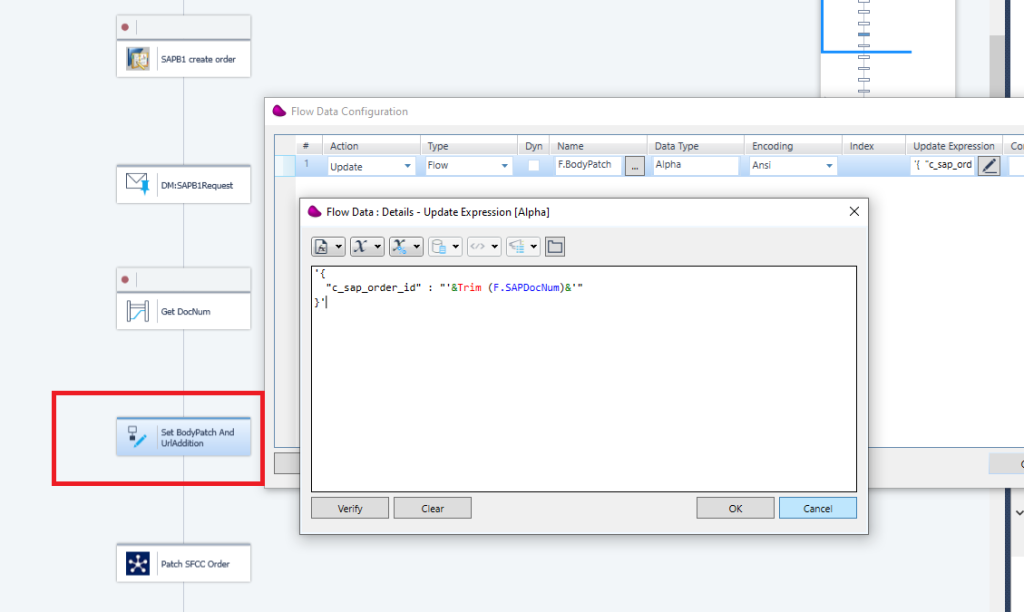
11/ In the subflow, you can create the order in the back office (for example SAPB1), get the answer and if successfull, PATCH Salesforce Commerce Cloud with the SAP order id.
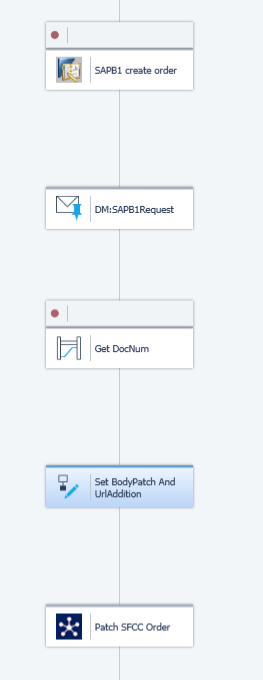
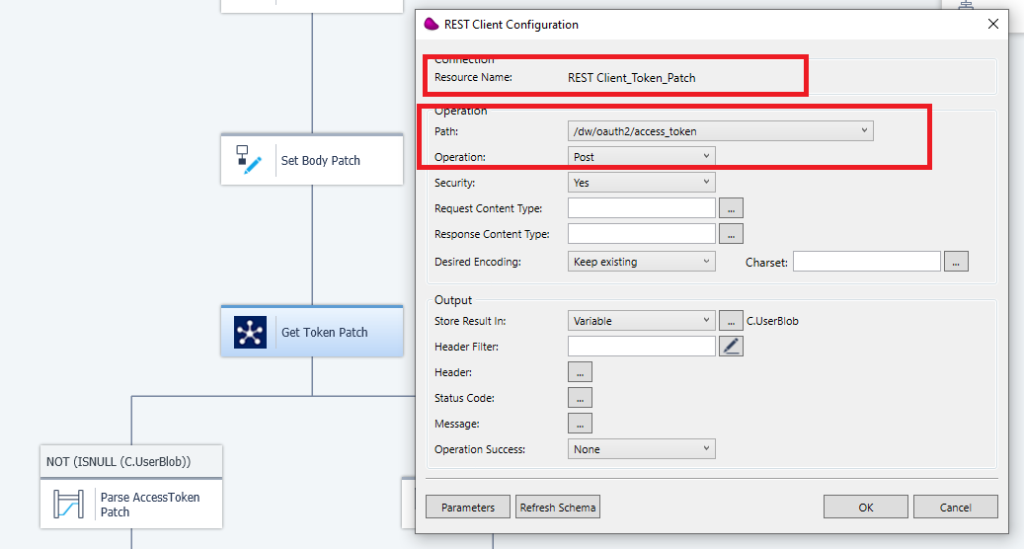
Set the JSON request for the PATCH request
12/ Drag and drop REST Client connector linked to PATCH resource and use a PATCH with path /s/{idsite}/dw/shop/v22_10/orders/{no}
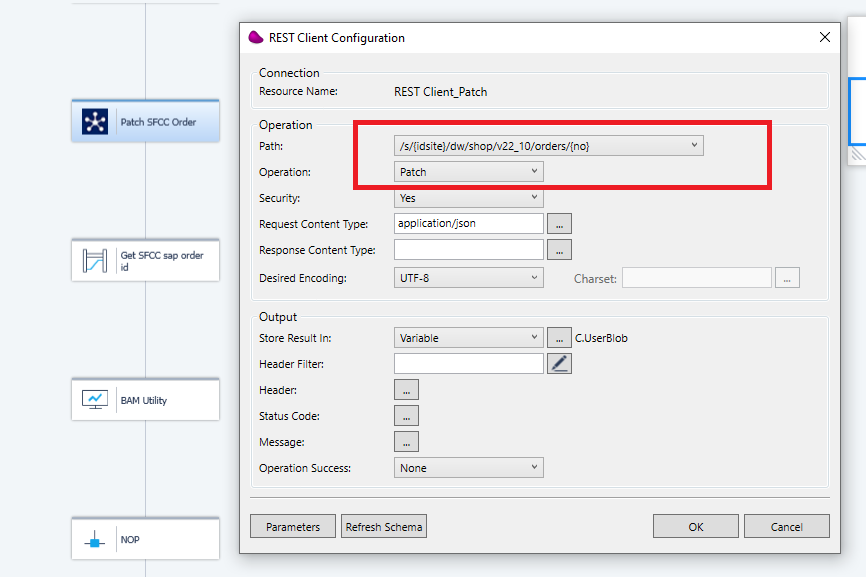
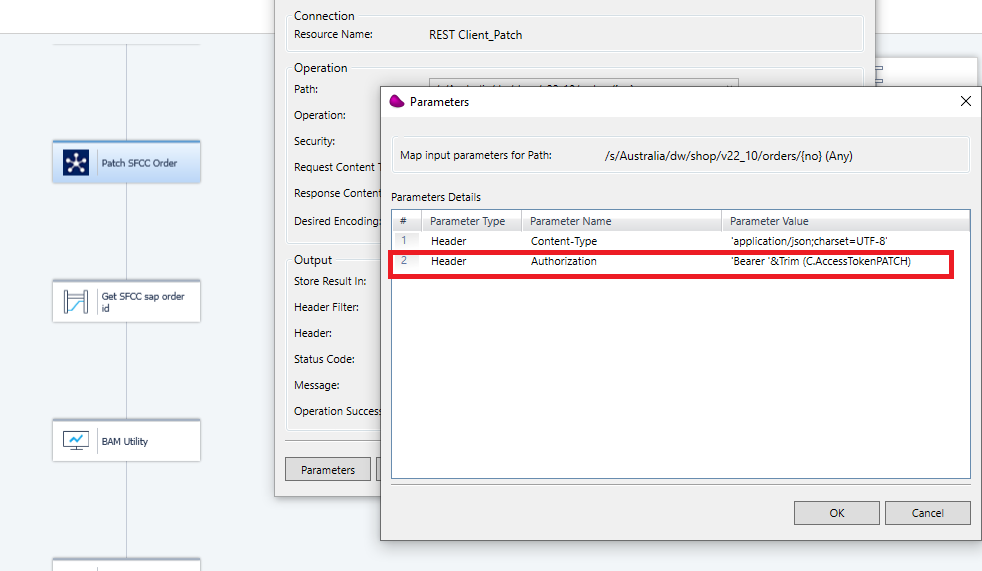
After pressing OK, set the {idsite} and {no} variables with the expected values
(*) don’t forget to set the Token with the Backend Token in the Parameters
(**) This access token can retrieved from the subflow itself or in the flow that calls the subflow.
It can be done like in the Step 6 but with the BackEnd token resource.
Drag and Drop Rest Client connector associated to BackEnd Token resource and use a POST with the path /dw/oauth2/access_token