Goal : Get, Create Incident with Magic xpi using servicenow REST API
Prerequisites :
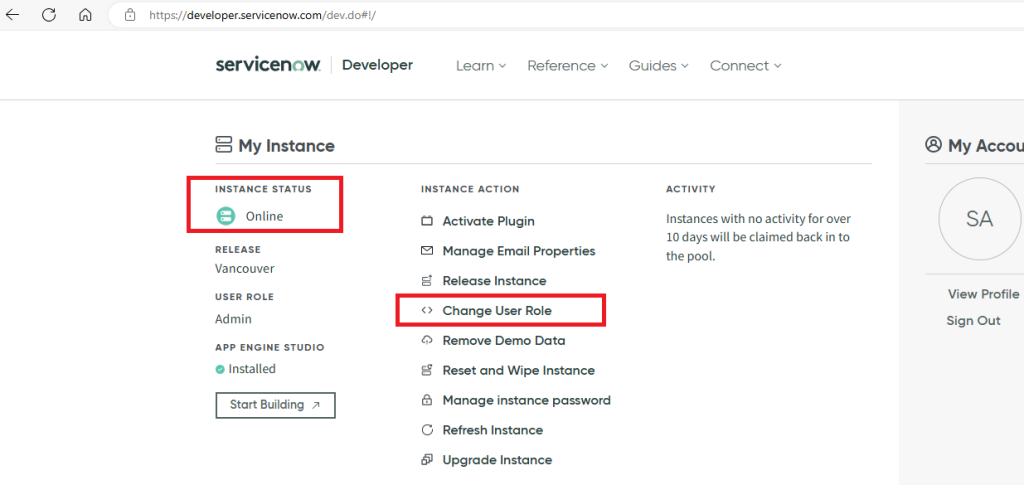
1/ Create your servicenow instance (https://developer.servicenow.com/dev.do) and verify that your user has admin role in other to be able to access Application registry on your instance

2/ Create an Application OAuth
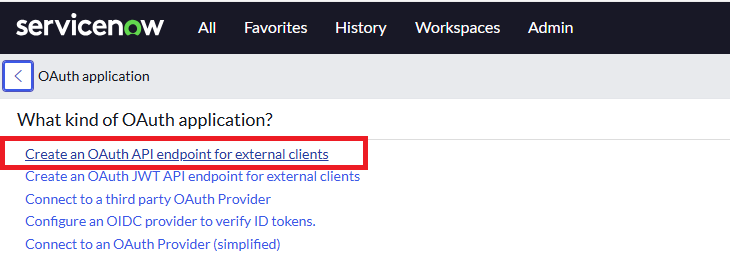
Log in to your servicenow instance with your admin user and search for OAuth
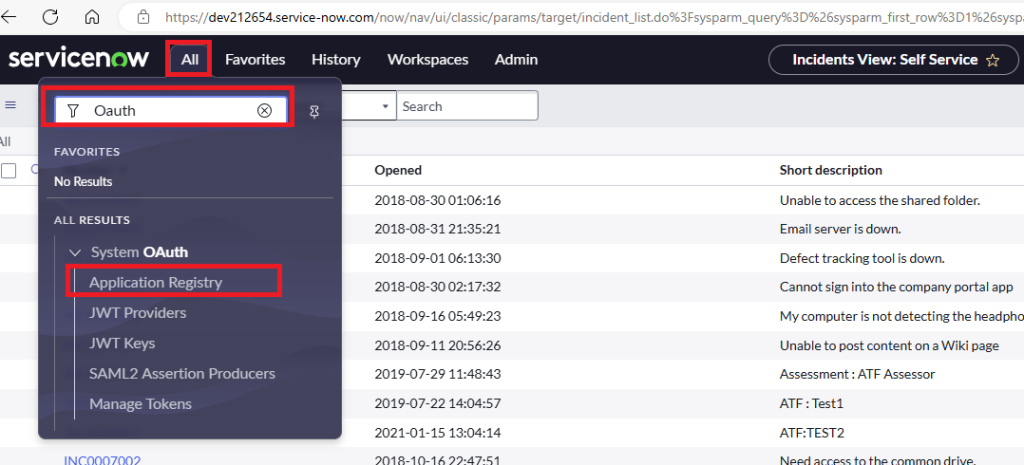
Create a new OAuth Application

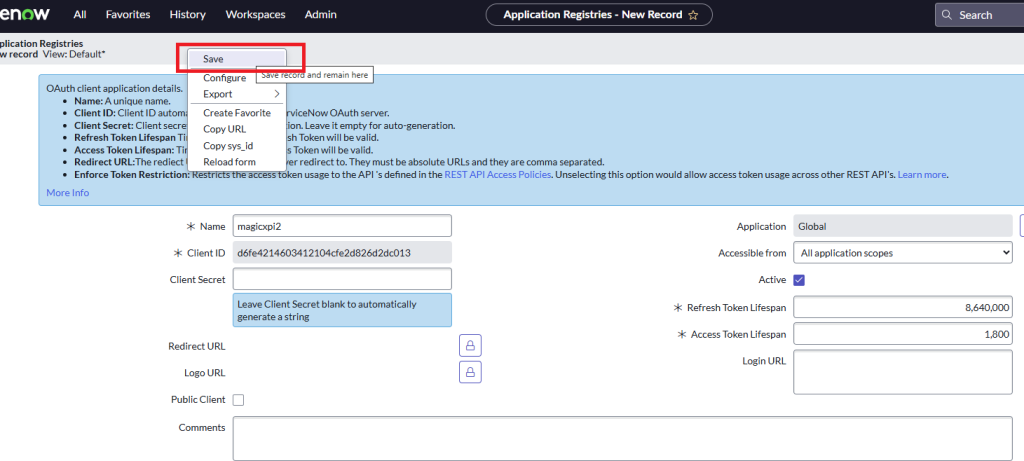
Give a name and leave Client secret blank (it will be generated automatically) and click Save (right clic on top grey area)
After saving, copy the Name, ClientID and ClientSecret
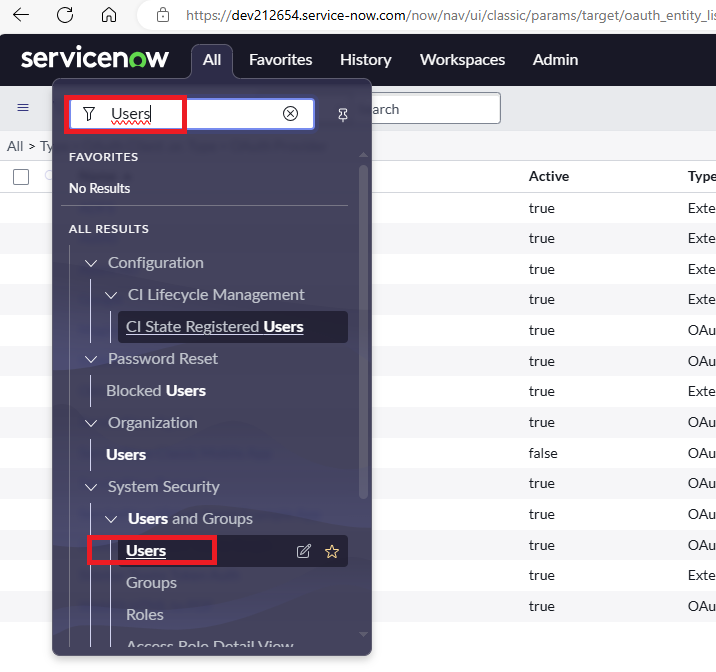
3/ Create a dedicated user to access the API
Search for users and access the users list
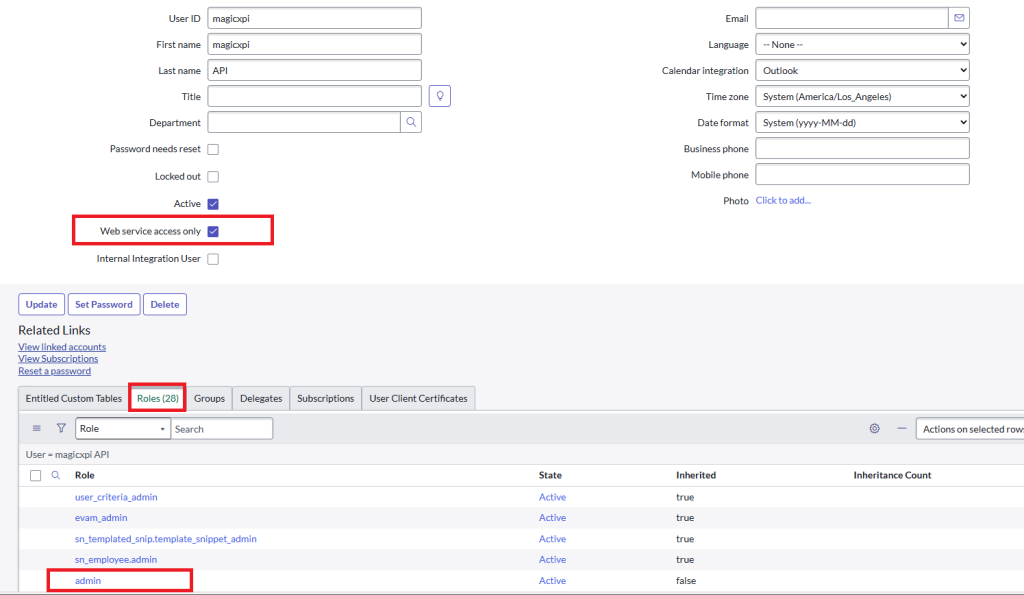
Create a user magicxpi and grant him an admin role( to be able to access everything , you can of course adjust the roles) and Tic the check Box « Web service access only »
(the user will be an API user and not a UI user)
- Save the new user information (right clic on grey top area)
- Click Set Password
- Generate Password
- Copy the password
- click Save Password
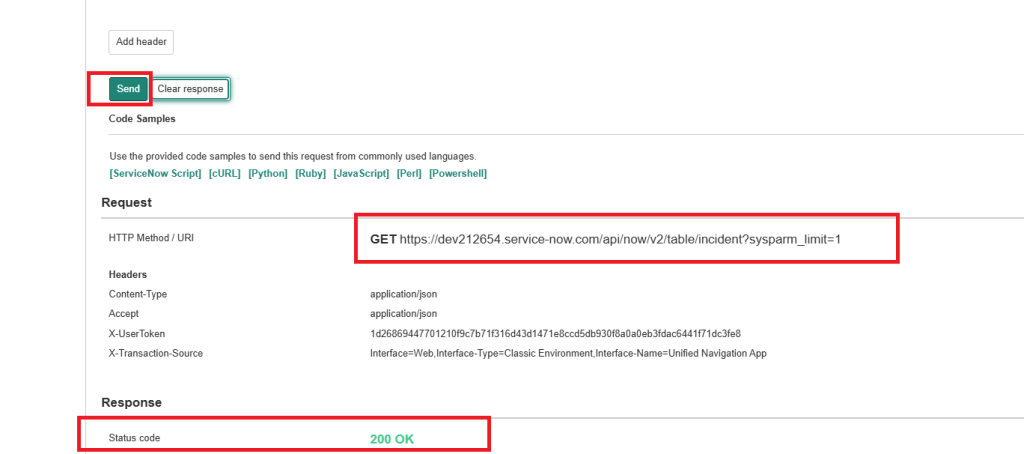
4/ Check with REST API explorer that it’s working

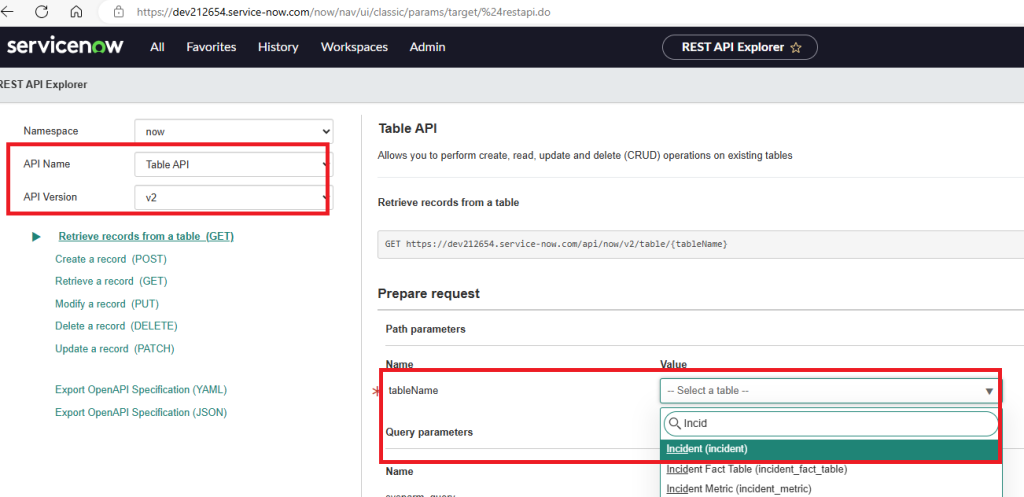
Choose Incident tablename and click Send, you should receveive 200 Http status code
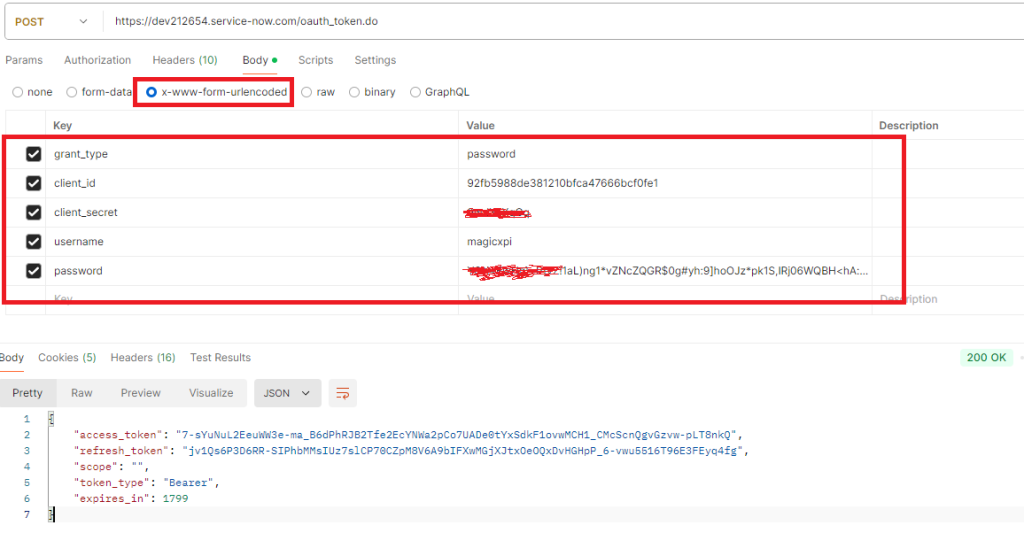
5/ Check with Postman
- Check that you can get the token
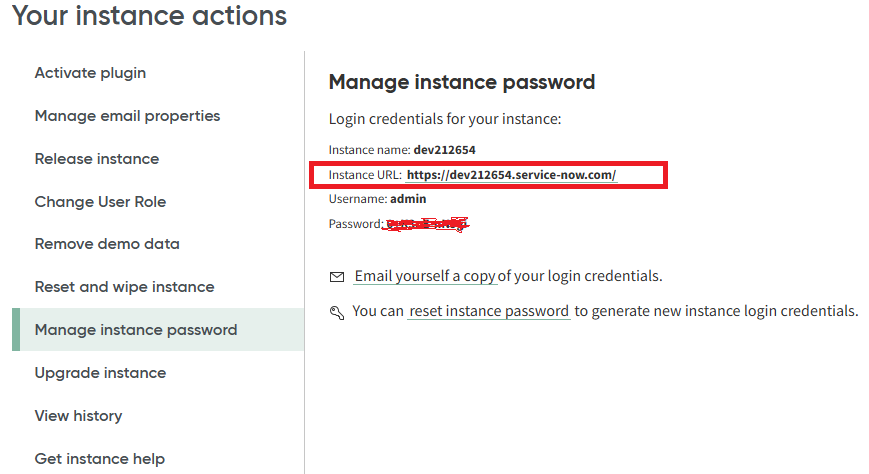
Do a POST on this URL (https://<yourinstance>.service-now.com/oauth_token.do)
Set the body with all the relevant information in x-www-form-urlencoded
- Check that you can retrieve the incident List
Create a new request and do a GET on https://<yourinstance>.com/api/now/v2/table/incident?sysparm_limit=10
add in the Header : Authorization with value Bearer <access_token>

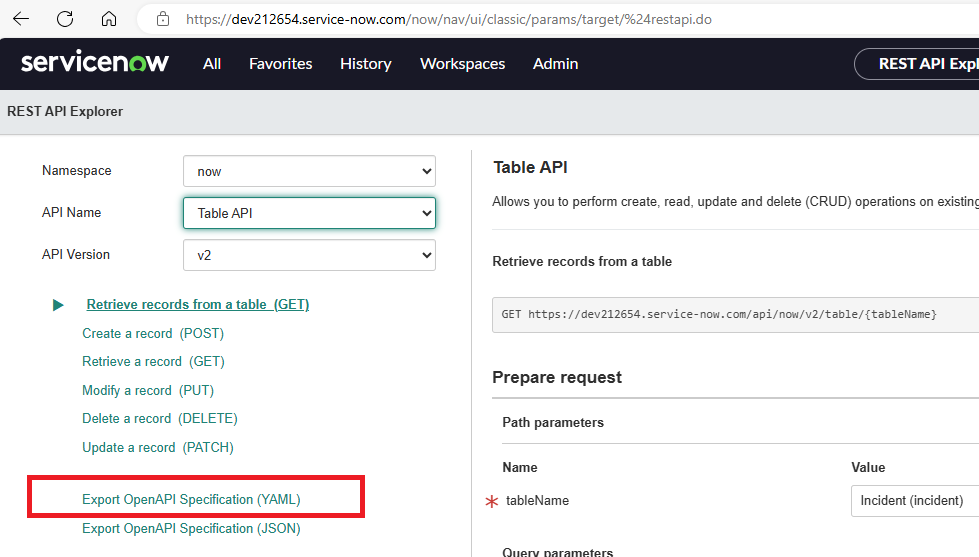
6/ Go back to API Explorer in your instance and Export the yaml file from servicenow that corresponds to Table API
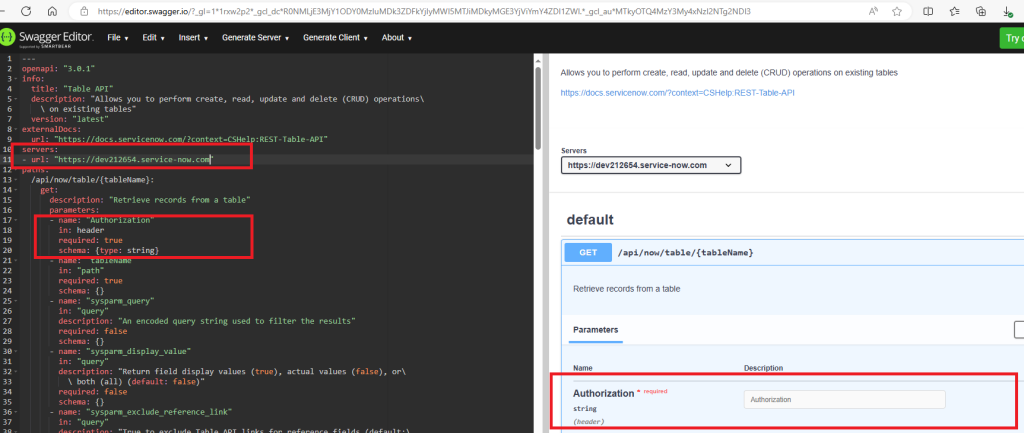
Modify the yaml file. Add under parameters (use https://editor.swagger.io)
name: « Authorization »
in: header
required: true
schema: {type: string}
Remove / and the end of the url (servers)
Save the new yaml file.
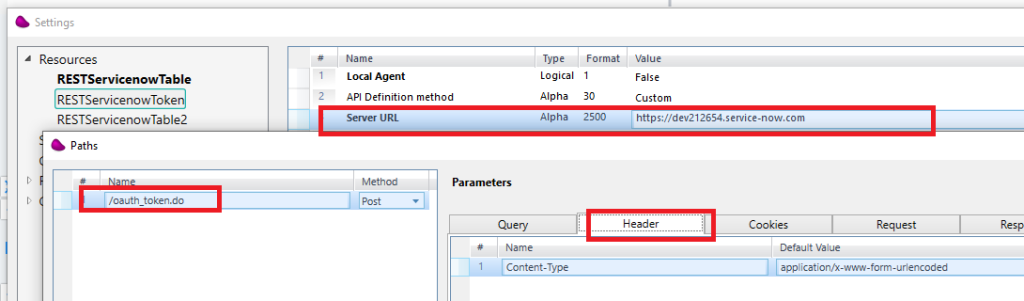
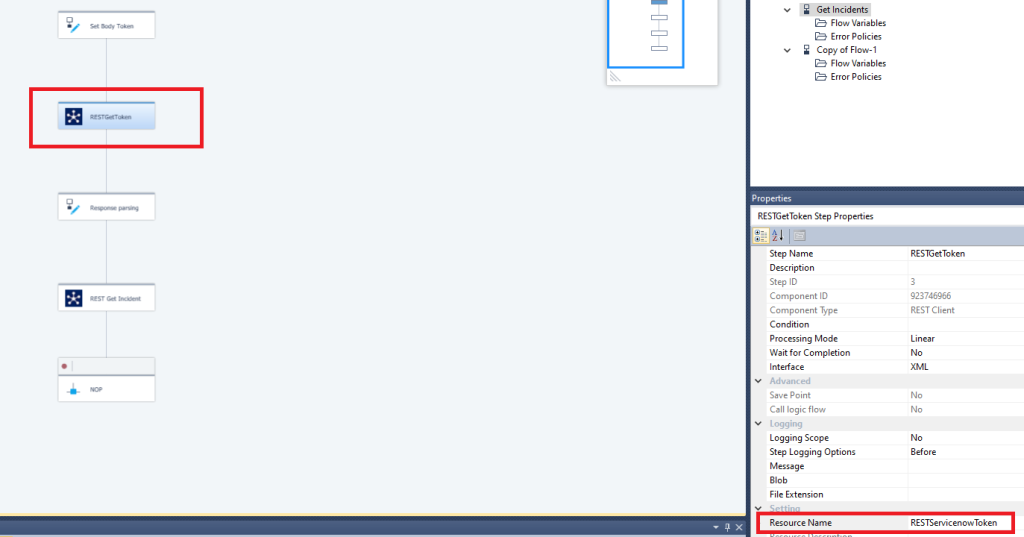
7/ Open your magic xpi project and Create a REST Client resource for the Access Token
Servicenow token URL is : https://<yourinstance>.service-now.com/oauth_token.do
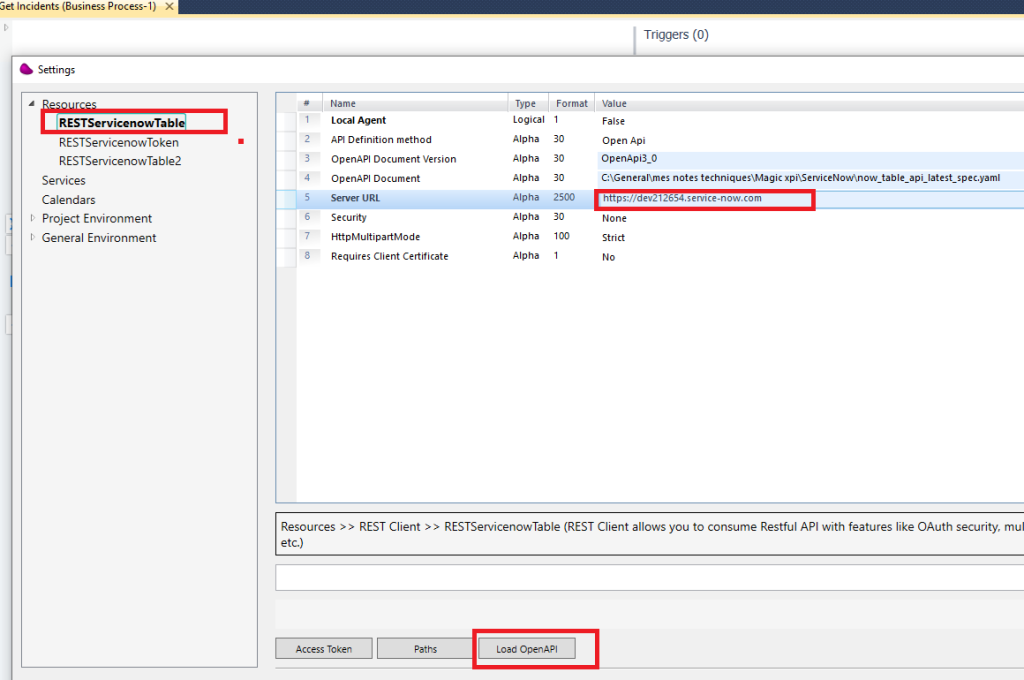
8/ Create another REST Client resource to access the servicenow TABLE_API (RESTServicenowTable)
Load the previous yaml file
Click on Paths, you should discover all the available Paths
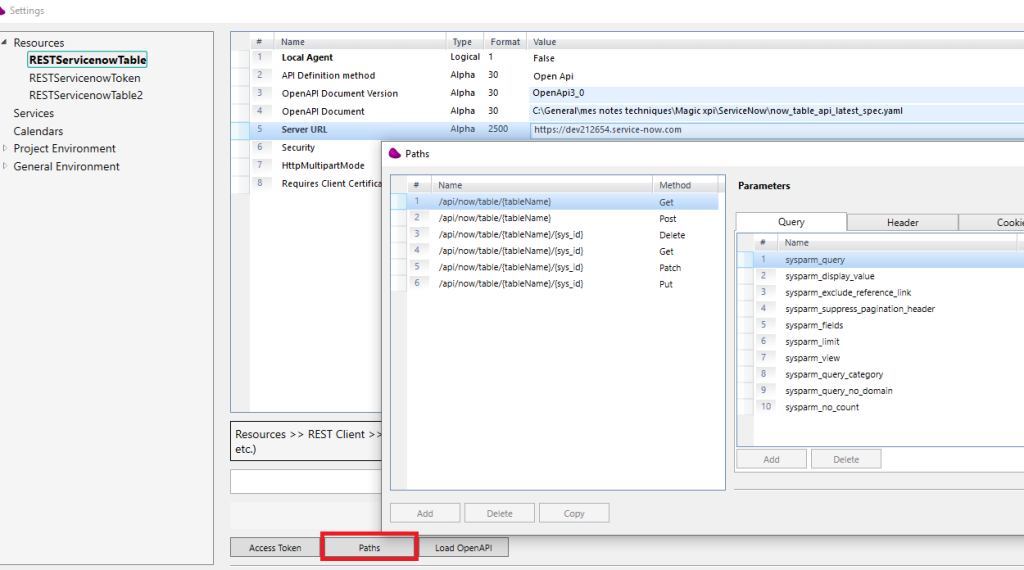
For the first Path, you should have Keywork « Authorization » in the header tab control
(*) if you want to have this keyword for all paths, you should add the keyword in the yaml file (step 6)
9/ Create a new flow
Create 2 flow variables (F.BodyToken (Blob), F.Token (alpha unlimited))
Update F.BodyToken with the body information
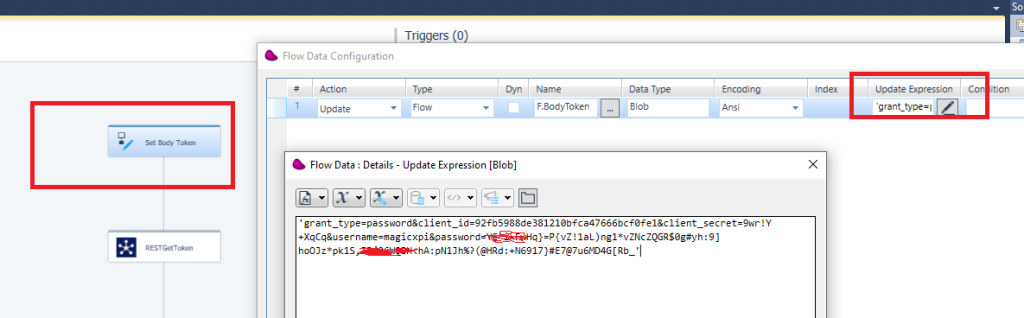
10/ Drag & Drop REST Client connector
Link the step to the Token Resource
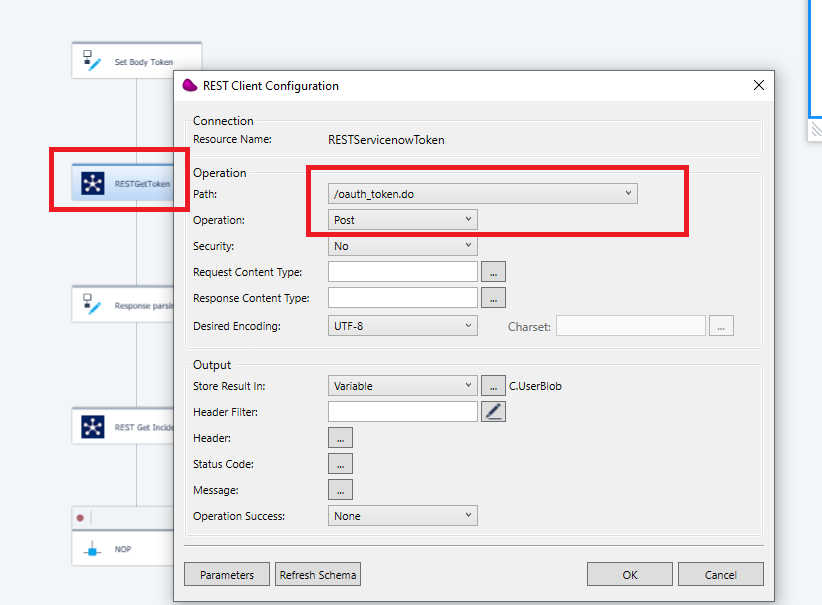
Click OK and set DataBlob to F.BodyToken
11/ Get the access_token
use a flow data and update the F.Token with the expression ‘Bearer ‘&StrToken (C.UserBlob,4,' »‘)
(*) you can use a datamapper to parse the json
12/ Drag & Drop a new REST Client connector
Link the step to the « RESTServicenowTable »
Choose a GET on path : /api/now/table/{tableName}
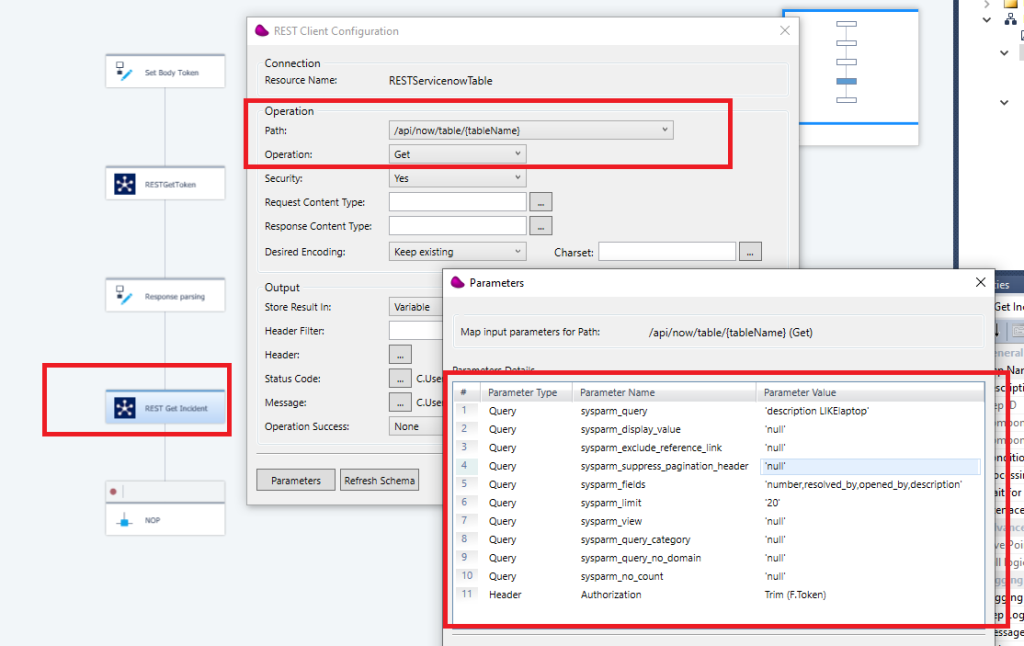
You can set the parameters like below
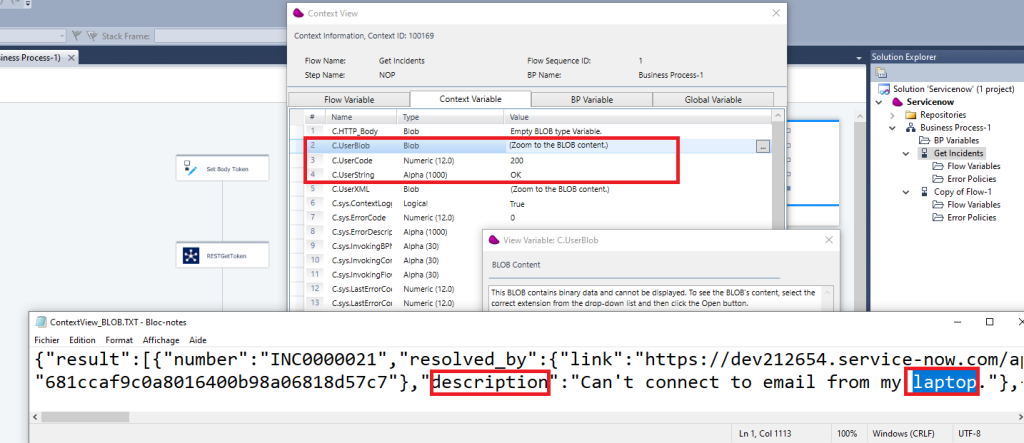
sysparm_query : description LIKElaptop (to filter with « like » clause on description)
sysparm_fields : ‘number,resolved_by,opened_by,description’ (to retrieve only these fields)
sysparm_limit : ’20’ (to limit the result to 20 occurences)
Authorization : trim(F.token) (to pass the autorization header)
(*) for the other parameters, set them to null
13/ Execute the flow in debug mode
You should get a 200 HTTP Status code with OK
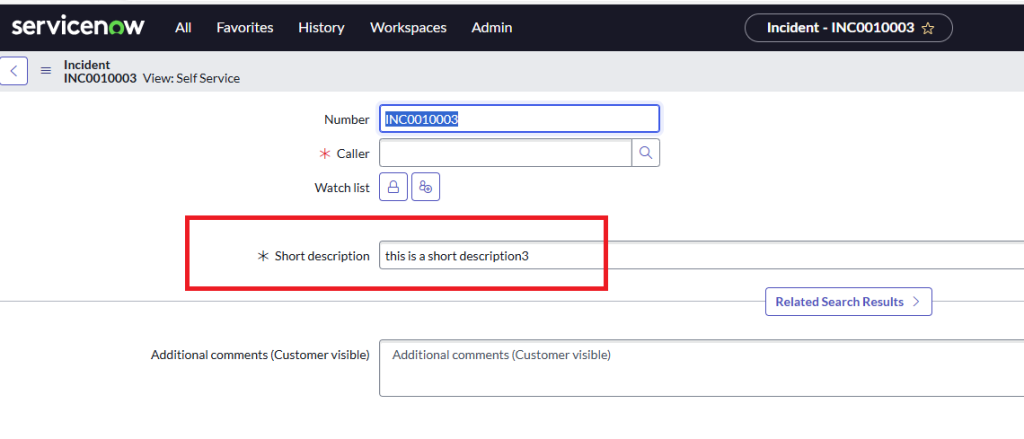
14/ Create an Incident
create a Flow variable (F.BodyIncident blob) and update this variable with the requested json
‘{« description »: »test3″, »short_description »: « this is a short description3 »}‘
15/ Drag & Drop a REST Client connector
Do a POST on https://<yourinstance>.service-now.com/api/now/v2/table/incident
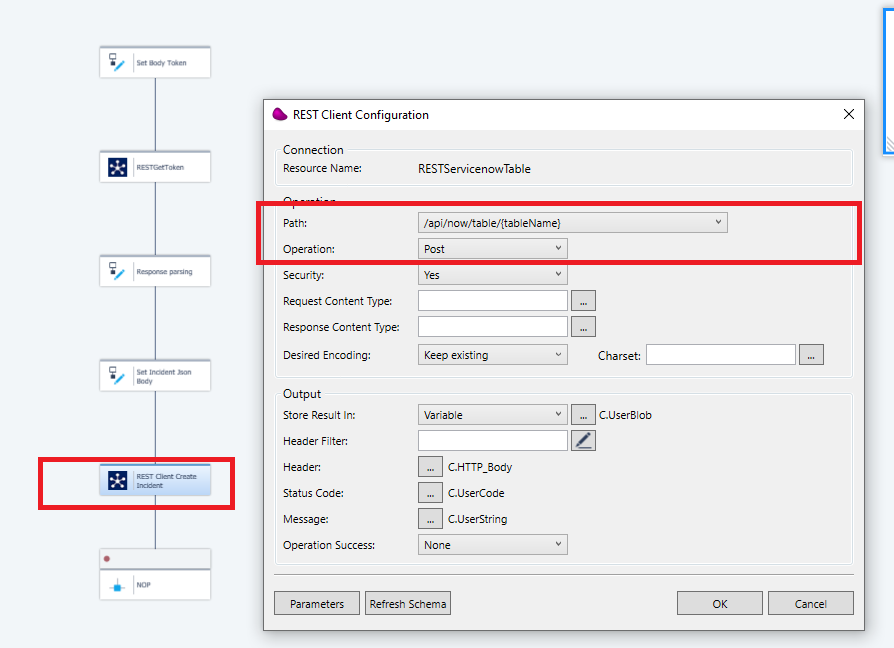
set the DataBlob to F.BodyIncident and tableName to Incident

16/ Execute the flow in debug mode
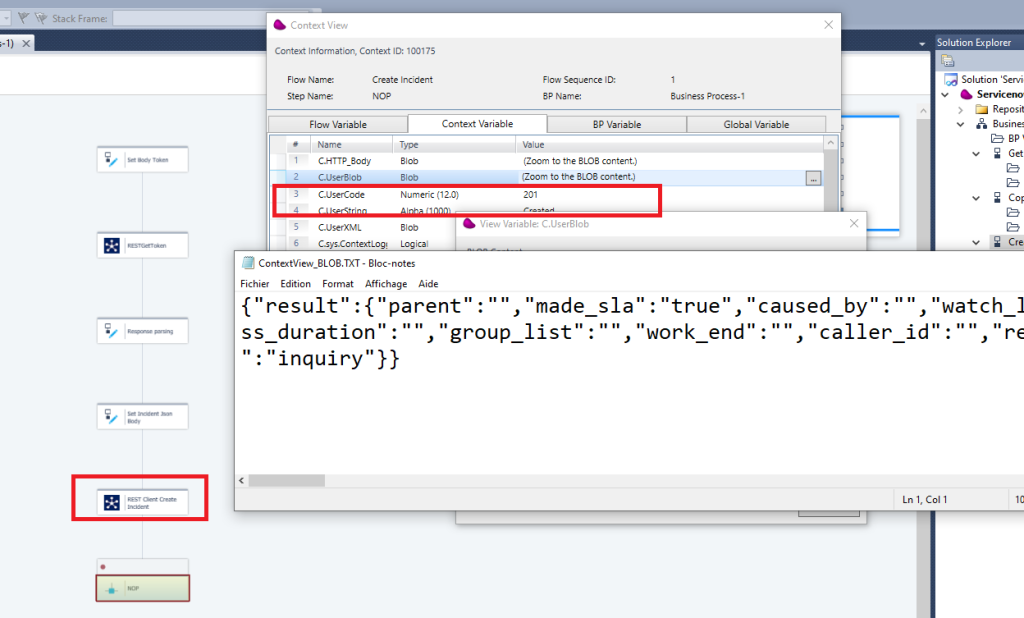
you should receive HTTP Status Code 201