Goal : run a databricks job through REST api with Magic xpi
Prequisites :
- access to databricks endpoint
- PAT (Personal Access Token for free edition) or Oauth2 ( for enterprise edition).
- table defined in catalog
- notebook
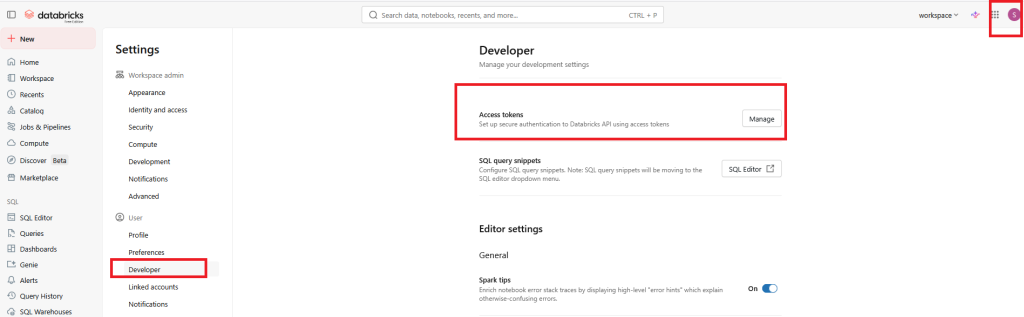
1/ Generate your PAT in the user/developer settings
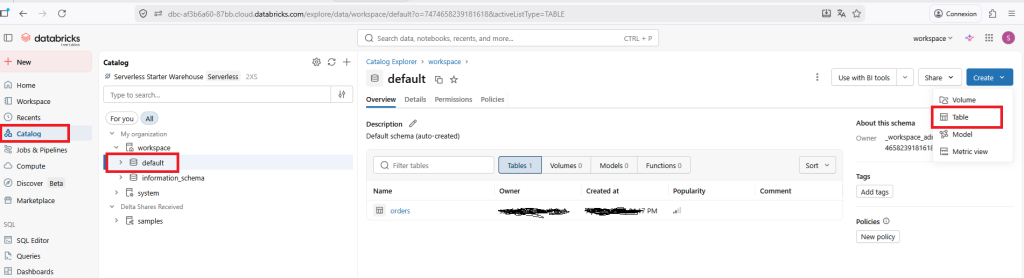
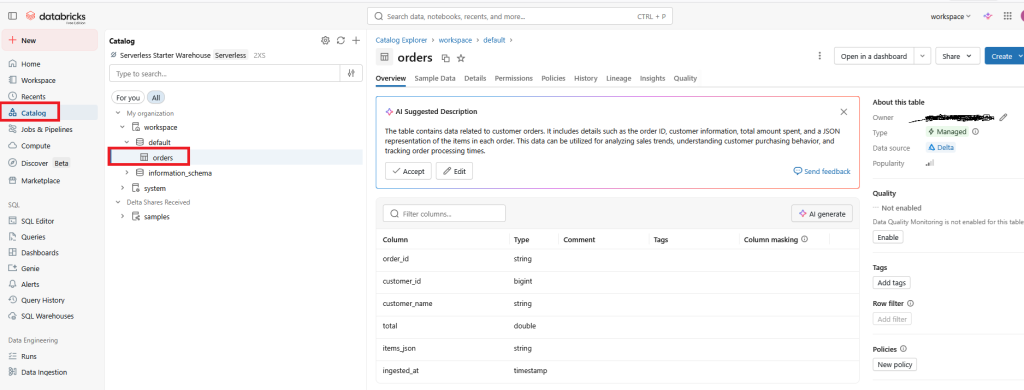
2/ Create a table in your catalog
3/ create a notebook in your workspace
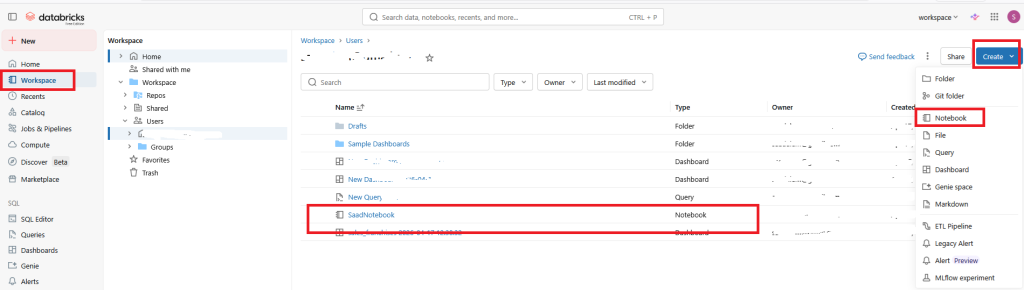
Copy/Paste the below python script
import json
from pyspark.sql import Row
dbutils.widgets.text("payload", "{}")
raw = dbutils.widgets.get("payload")
data = json.loads(raw)
# Transforme en DataFrame (1 ligne)
df = spark.createDataFrame([Row(
order_id=data["order_id"],
customer_id=data["customer"]["id"],
customer_name=data["customer"]["name"],
total=float(data["total"]),
items_json=json.dumps(data["items"]),
ingested_at=spark.sql("SELECT current_timestamp()").collect()[0][0]
)])
# Écrit en mode append dans une table Delta (Unity Catalog)
df.write.mode("append").saveAsTable("workspace.default.orders")
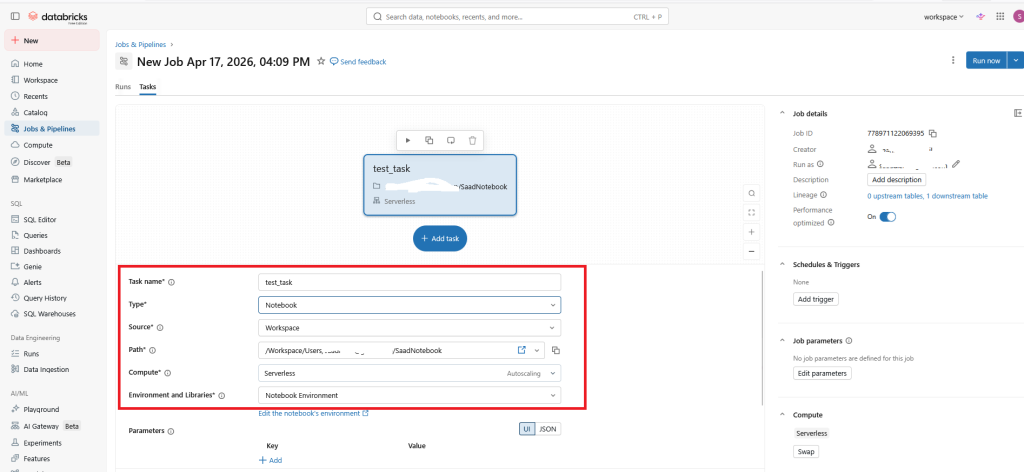
dbutils.notebook.exit(json.dumps({"status": "ok", "order_id": data["order_id"]}))4/ create a Job
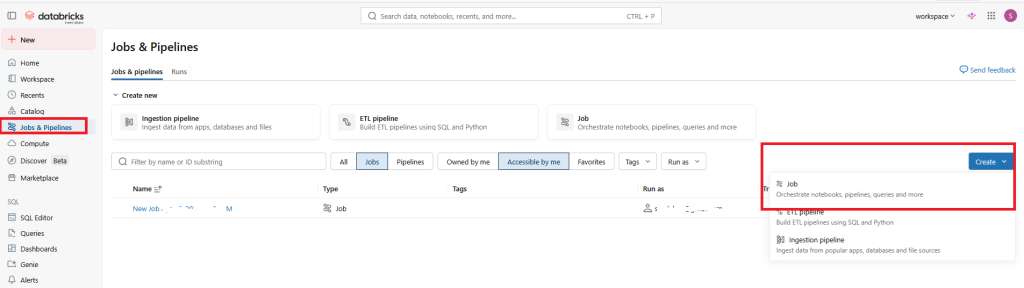
set the previous notebook
5/ Before running the job, you can populate your payload with a valid json
Go to Job parameters, set the key to : payload and the value to {« order_id »: »A130″, »customer »:{« id »:43, »name »: »Saad »}, »items »:[{« sku »: »X1″, »qty »:3},{« sku »: »Y7″, »qty »:9}], »total »:303}

You can run the job and check that everything is ok.

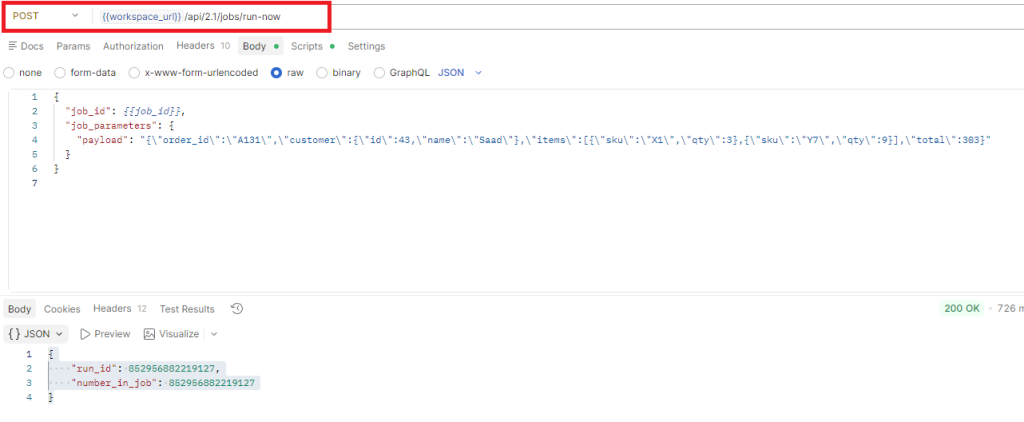
6/ Check with postman
- check that the databricks REST API endpoint is working
You can post the json below on the url : {{workspace_url}}/api/2.1/jobs/run-now
{
  "job_id": {{job_id}},
  "job_parameters": {
    "payload": "{\"order_id\":\"A131\",\"customer\":{\"id\":43,\"name\":\"Saad\"},\"items\":[{\"sku\":\"X1\",\"qty\":3},{\"sku\":\"Y7\",\"qty\":9}],\"total\":303}"
  }
}
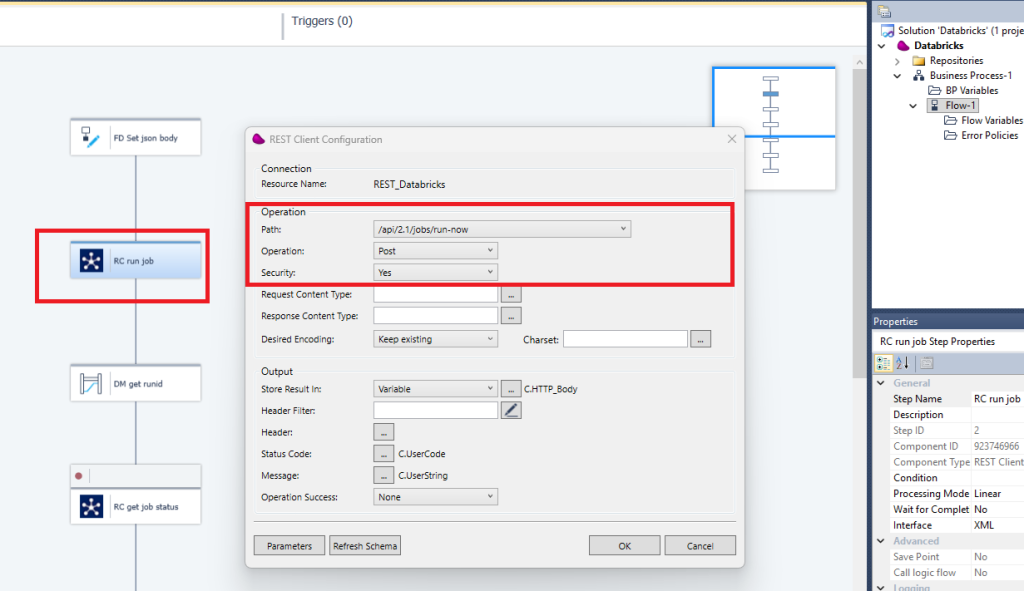
7/ Create a Magic xpi REST Client resource
Create 2 paths :
- /api/2.1/jobs/run-now
- /api/2.1/jobs/runs/get?run_id={run_id}&include_history=false
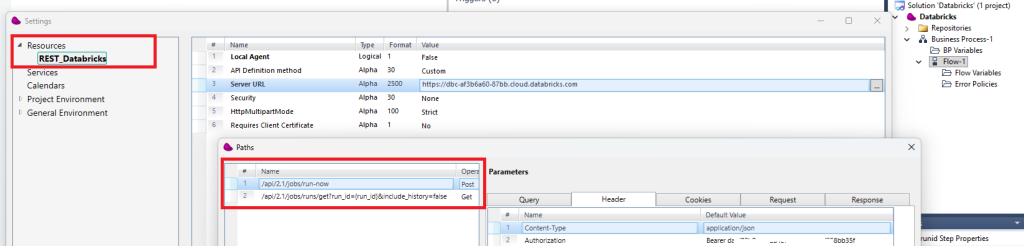
Don’t forget to set in the header the Content-Type with application.json and the Authorization with the PAT.
8/ Use a Flow data component to set the JSON payload.
Don’t forget to set the \ before double quotes in the payload key
'{
  "job_id": 778971122069395,
  "notebook_params": {
    "payload": "{\"order_id\":\"A129\",\"customer\":{\"id\":42,\"name\":\"Alice\"},\"items\":[{\"sku\":\"X1\",\"qty\":1},{\"sku\":\"Y7\",\"qty\":1}],\"total\":100}"
  }
}'
9/ Drag and drop a REST Client component to set the path (/api2.3/jobs/run-now)
10/ Use a datamapper with a json schema to retrieve the runid

11/ Use the previous runid to retrieve the job status

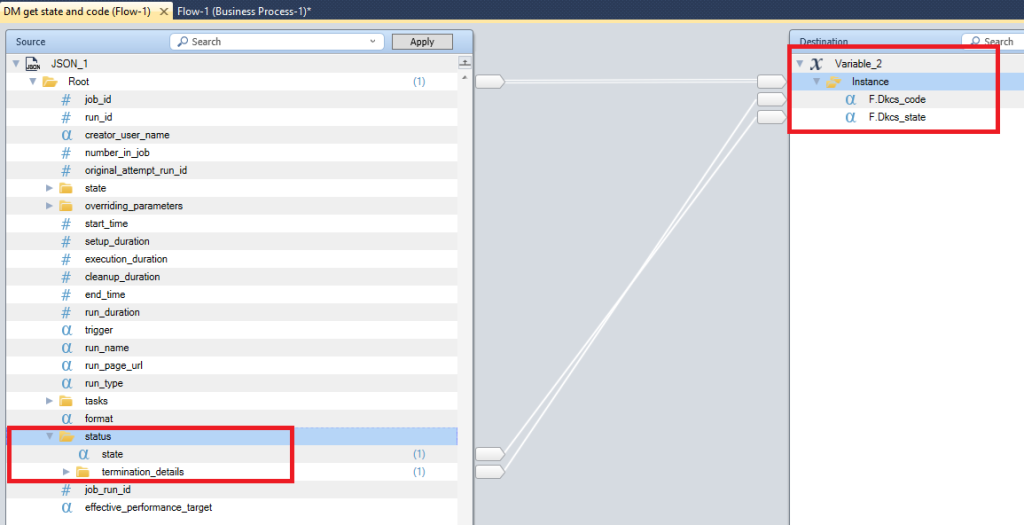
12/ Use a Datamapper with a json schema to retrieve the State and Code job
13/ Use the SQL Editor in databroicks
Run the SQL statment below
SELECT customer_name, SUM(total) AS ca
FROM workspace.default.orders
GROUP BY customer_name
ORDER BY ca DESC;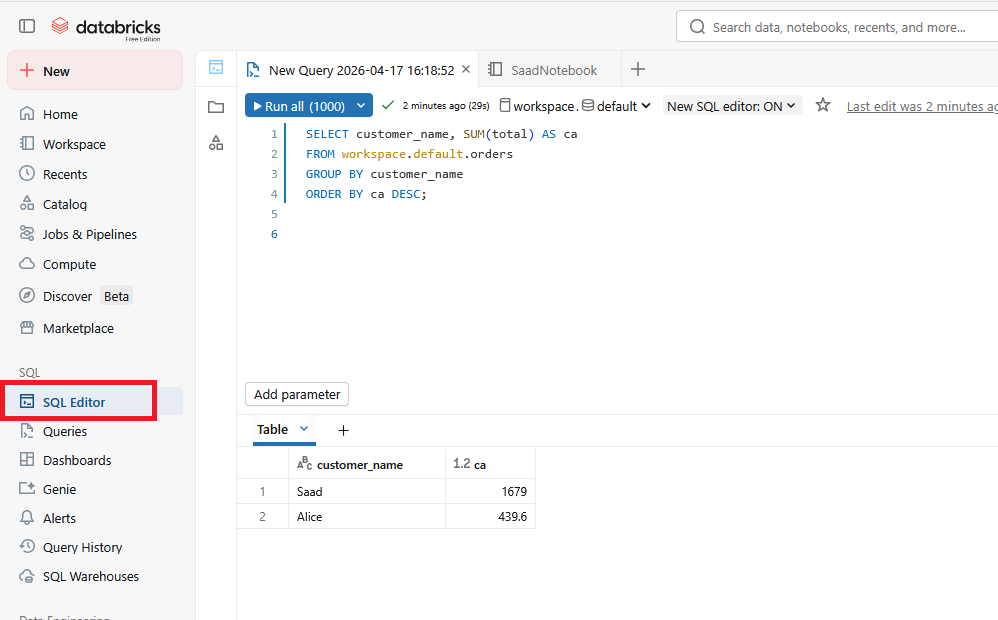
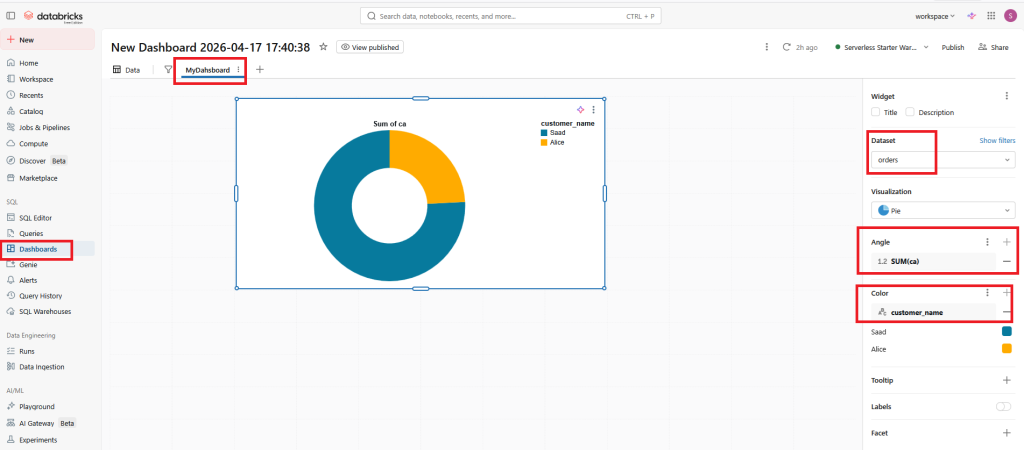
14/ Create a new dashboard
Choose the Datasets (orders) with the previous sql query

15/ Click on the 2nd tab control to build your dashboard
To display a Pie, choose SUM in the Angle and customer_name in the Color properties.
16/ Documentations
(*) https://docs.databricks.com/api/workspace/jobs/runnow