Goal : Handle Hadoop with Magic xpi using Hadoop REST API (Put and Delete file)
1/ Download and install Hadoop 2.9.1 to C:\bigdata\hadoop-2.9.1 (https://hadoop.apache.org/release/2.9.1.html)
2/ Set JAVA_HOME to jdk1.8.0_221 (example : c:\progra~1\java\jdk1.8.0_221)
Set HADOOP_BIN to <hadoop installation directory>\bin (example : C:\bigdata\hadoop-2.9.1\bin )
Set HADOOP_BIN_PATH to <hadoop installation directory>\bin
Set HADOOP_HOME <hadoop installation directory> (example : C:\bigdata\hadoop-2.9.1)
Add in the PATH : <hadoop installation directory>\bin, <hadoop installation directory>\sbin and <hadoop installation directory>
(example : C:\bigdata\hadoop-2.9.1\sbin, Add in the PATH : C:\bigdata\hadoop-2.9.1\bin and Add in the PATH : C:\bigdata\hadoop-2.9.1 )
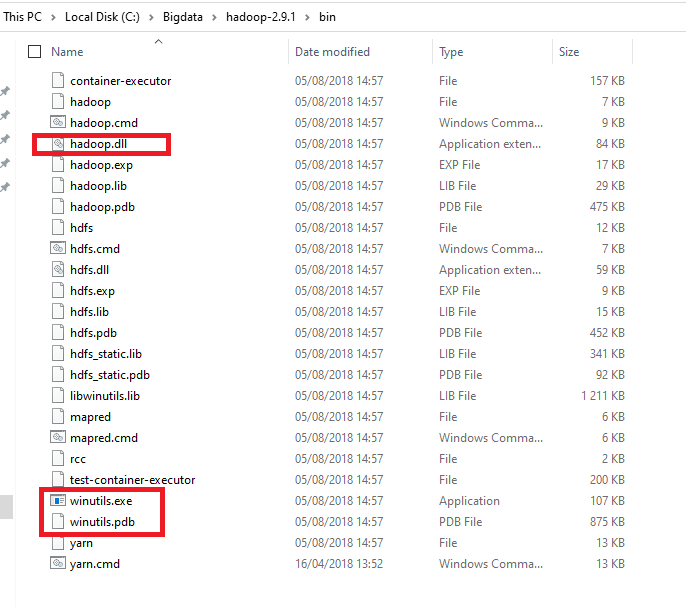
3/ Verify that you have these files under bin.
If hadoop.dll and winutils.exe and winutils.pdb are not present , download and copy these files under bin.
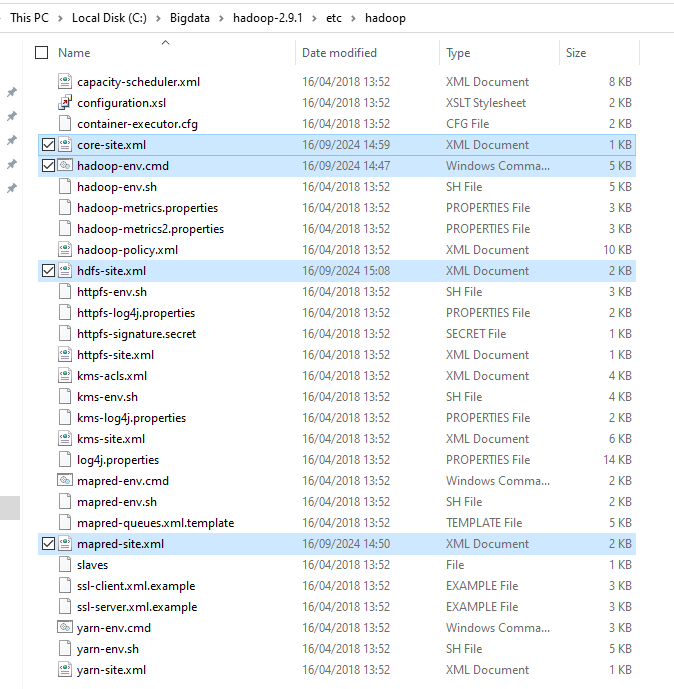
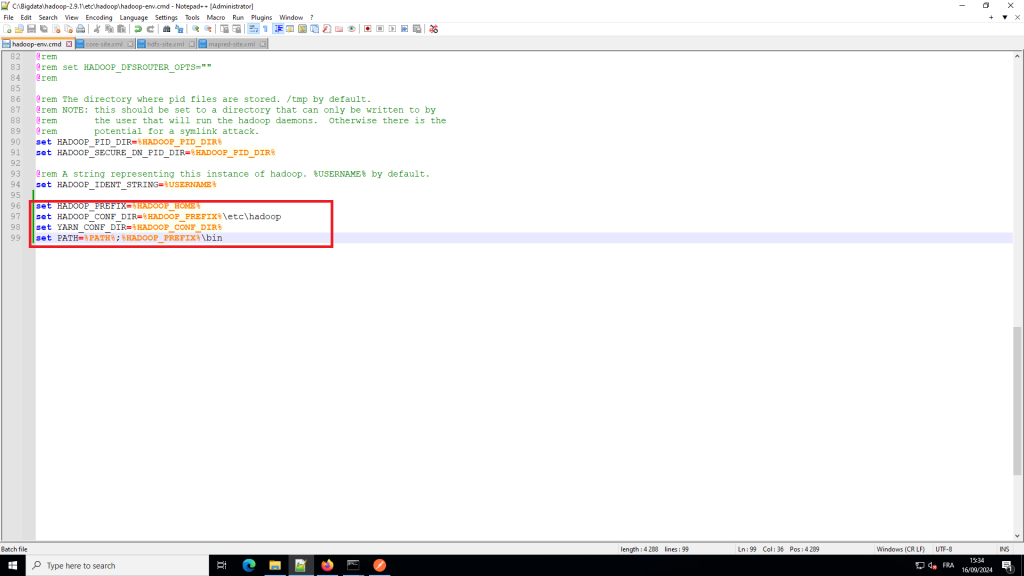
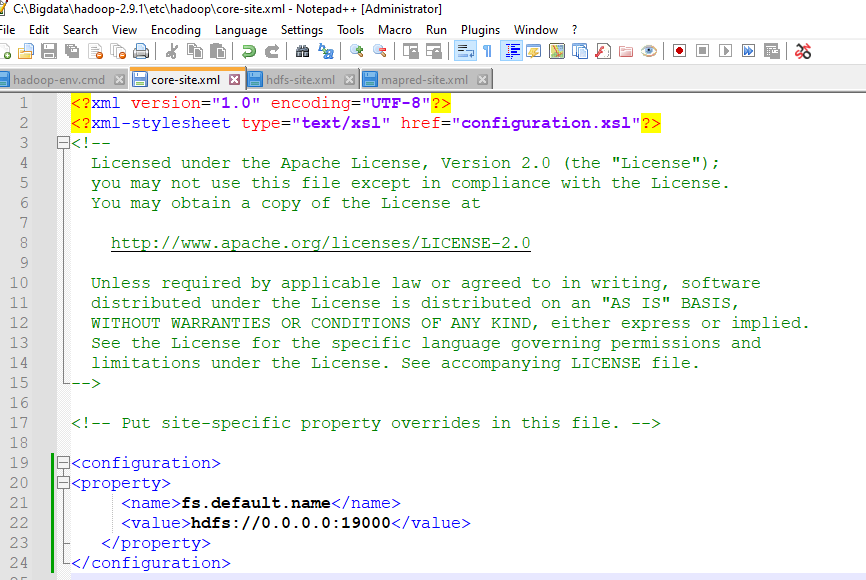
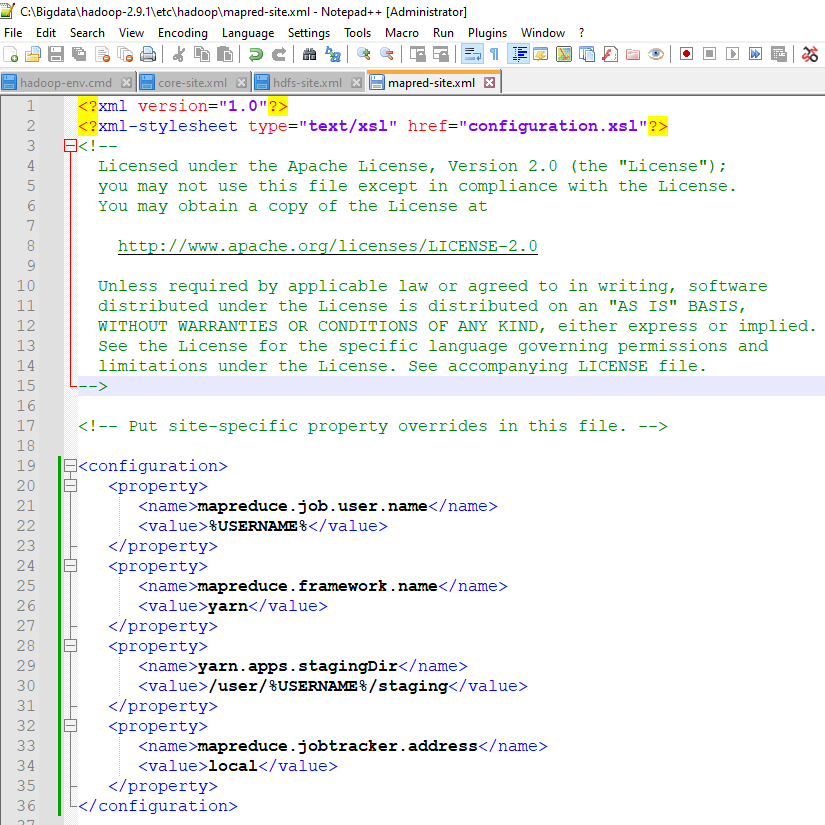
4/ Configure these 4 files below (hadoop-env.cmd, core-site.xml, hdfs-site.xml, mapred-site.xml)
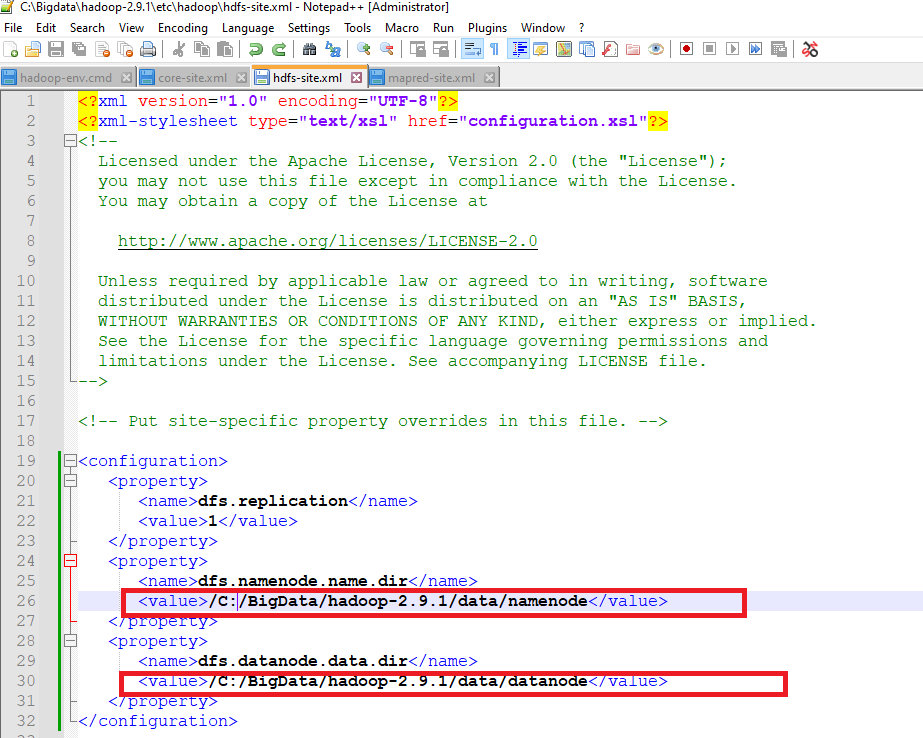
5/ Create Data Node and Name Node
Goto C:/BigData/hadoop-2.9.1 and create a folder ‘data’. Inside the ‘data’ folder create two folders ‘datanode’ and ‘namenode’. Your files on HDFS will reside under the datanode folder.
6/ Format Name Node
Open a new Windows Command Prompt and run below command. It may give you some warnings, ignore them
hadoop namenode -format7/ Open a new Windows Command Prompt (admin privilege)
Create a New Hfds directory
hadoop fs -mkdir /test
Set rights on /test
hdfs dfs -chmod 777 /test
Check by listing the directory
hdfs dfs -ls /test
8/ Start Hadoop in a Command Line (with admin privilege)
enter : start-all.cmd
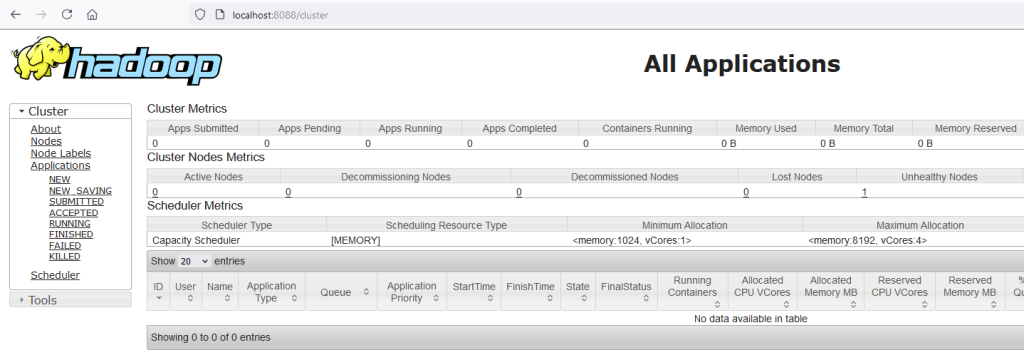
9/ Check on your browser that you can have access to Hadoop (http://localhost:8088)
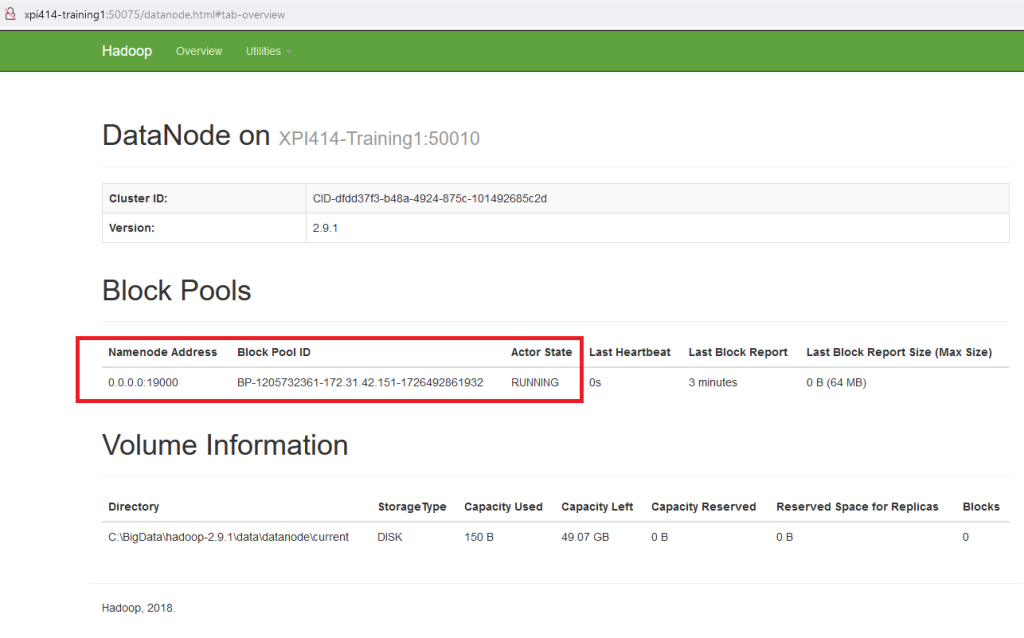
10/ Check the node
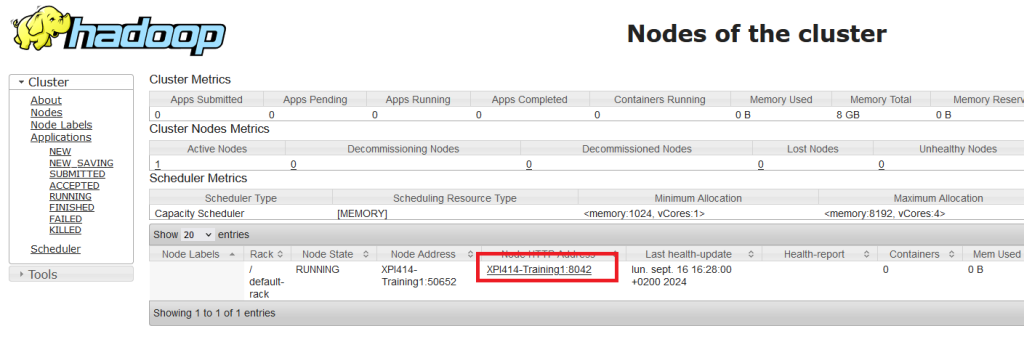
Check that the node is running (Start a browser and check the data nodes (http://xpi414-training1:50075/datanode.html#tab-overview)
11/ Check with Postman that you can upload a file on your Hdfs directory
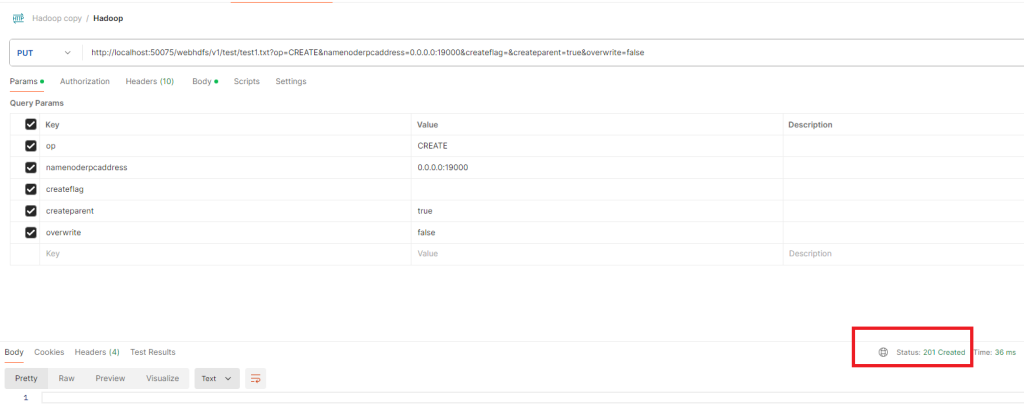
You can check that on you Hdfs the file is present

Technical documentation is available here :
https://hadoop.apache.org/docs/stable/hadoop-project-dist/hadoop-hdfs/WebHDFS.html
How to Install Hadoop on Windows
12/ Define your Magic xpi REST Resource

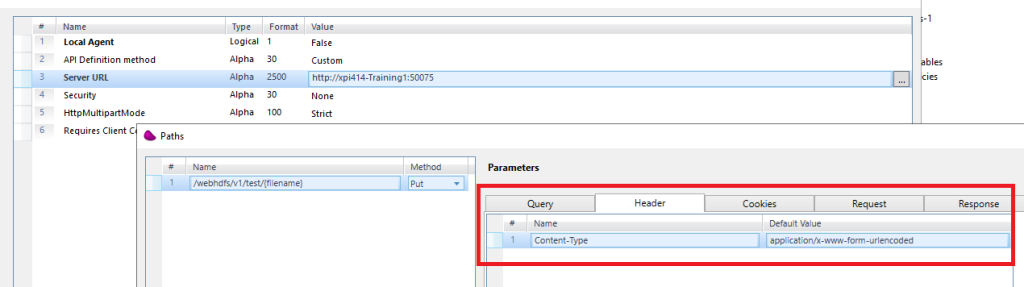
Leave Cookies, Request and Response empty
13/ Drag and drop a Flow data component
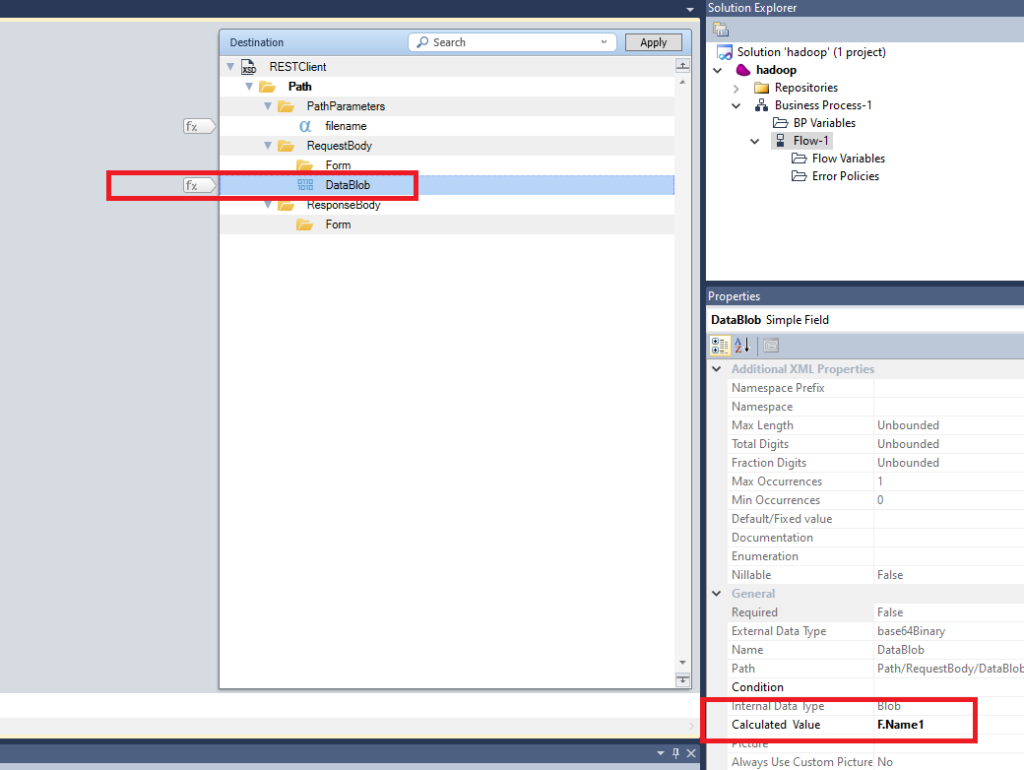
Define a flow variable F.Name1 (type blob) and load a file into it by using File2blb function.
14/ Drag and Drop a REST Client connector.
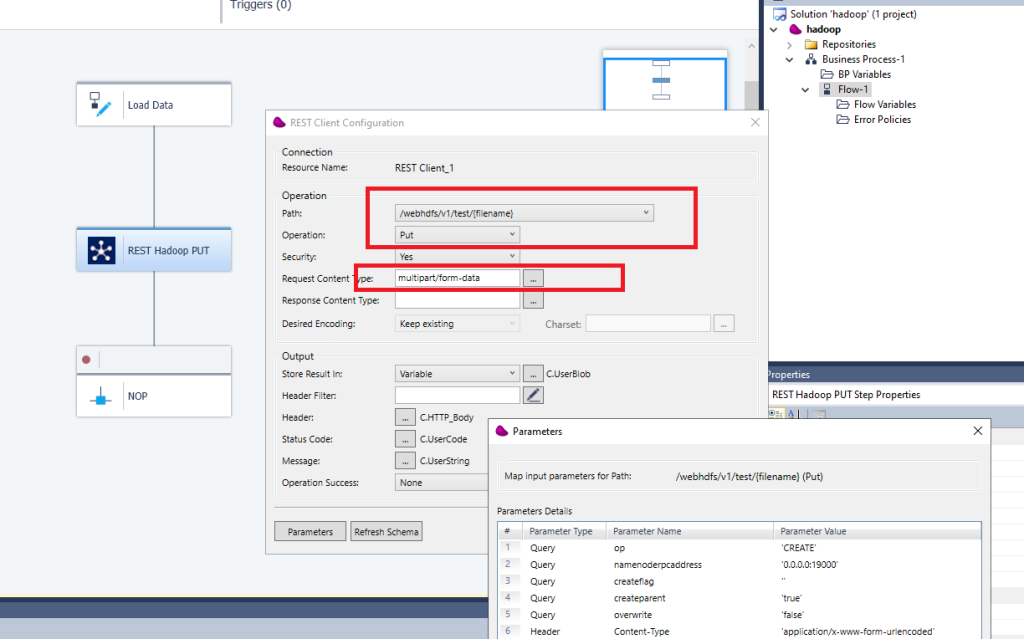
Click OK and Set the {filename} parameter and DataBlob with your previous flow variable
15/ Set a breakpoint in the next step and execute the flow in debug mode
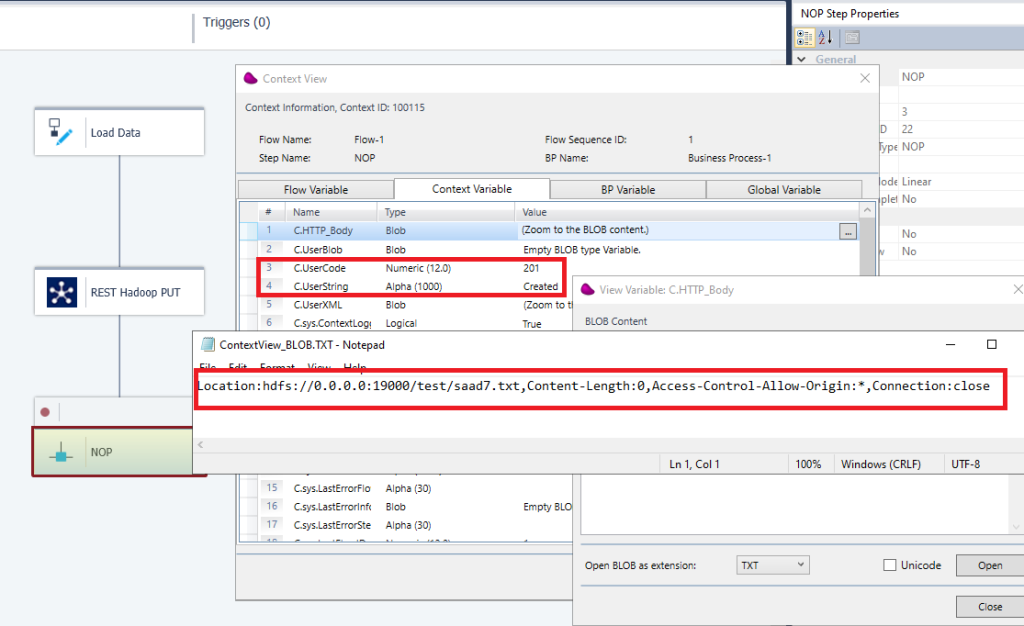
You should catch 201 Http code in response.
you can control that the file is present in your hdfs directory by running hdfs dfs -ls /test
16/ If you want to delete a file
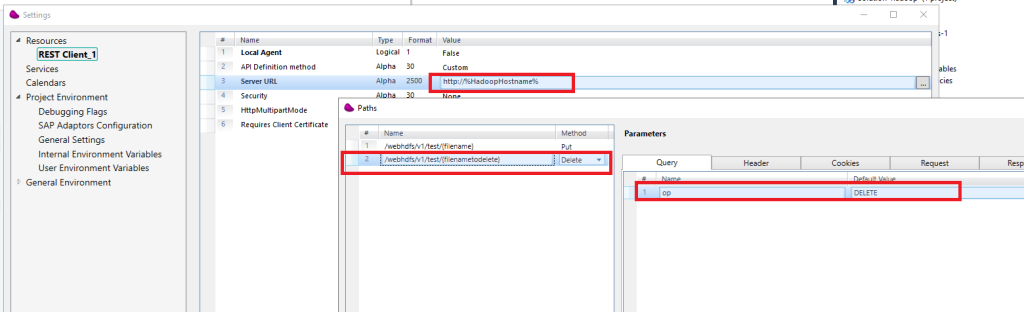
Modify the existing Resource file by replacing the hostname and port with an Environment variable (%HadoopHostname%)
Set the environment variable to : xpi414-Training1:50075 (for example)
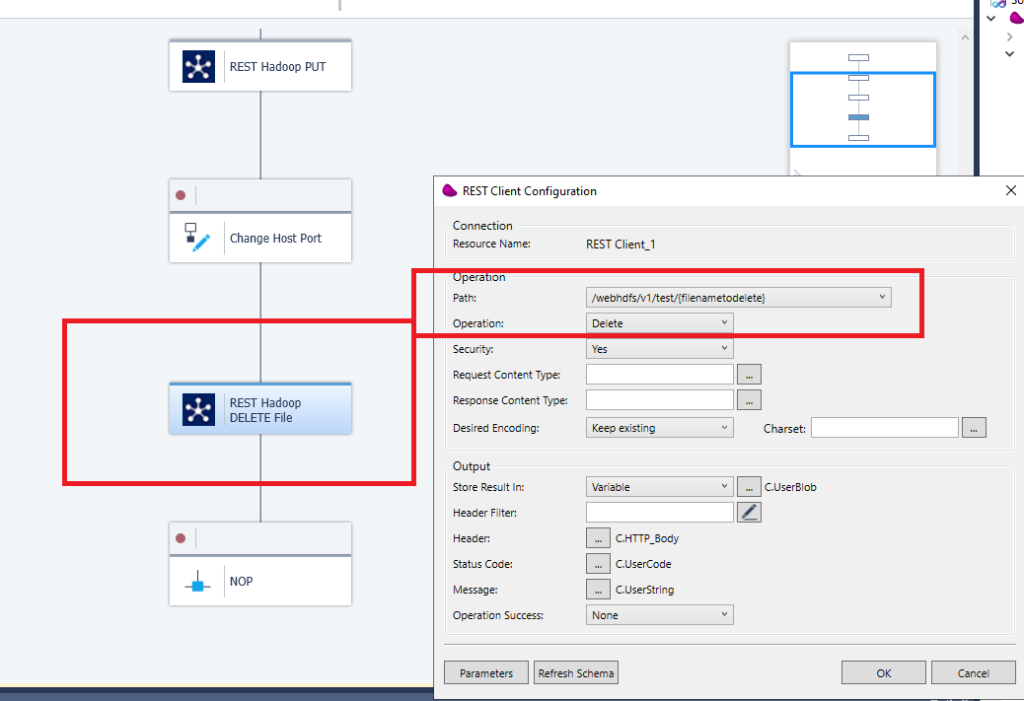
Add a new Path : /webhdfs/v1/test/{filenametodelete} ,choose delete method and add in the query parameter : op DELETE
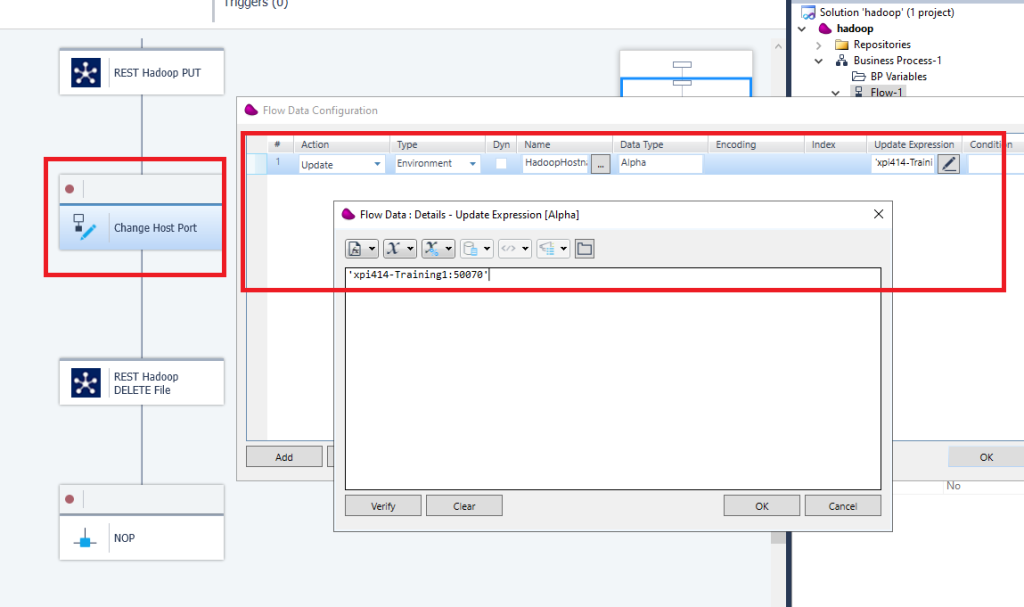
17/ After the Put Operation, drag and drop a Flow data component to set the Environment variable
to xpi414-Training1:50070 in our example
Then Drag and drop REST Client Connector and configure the Delete operation
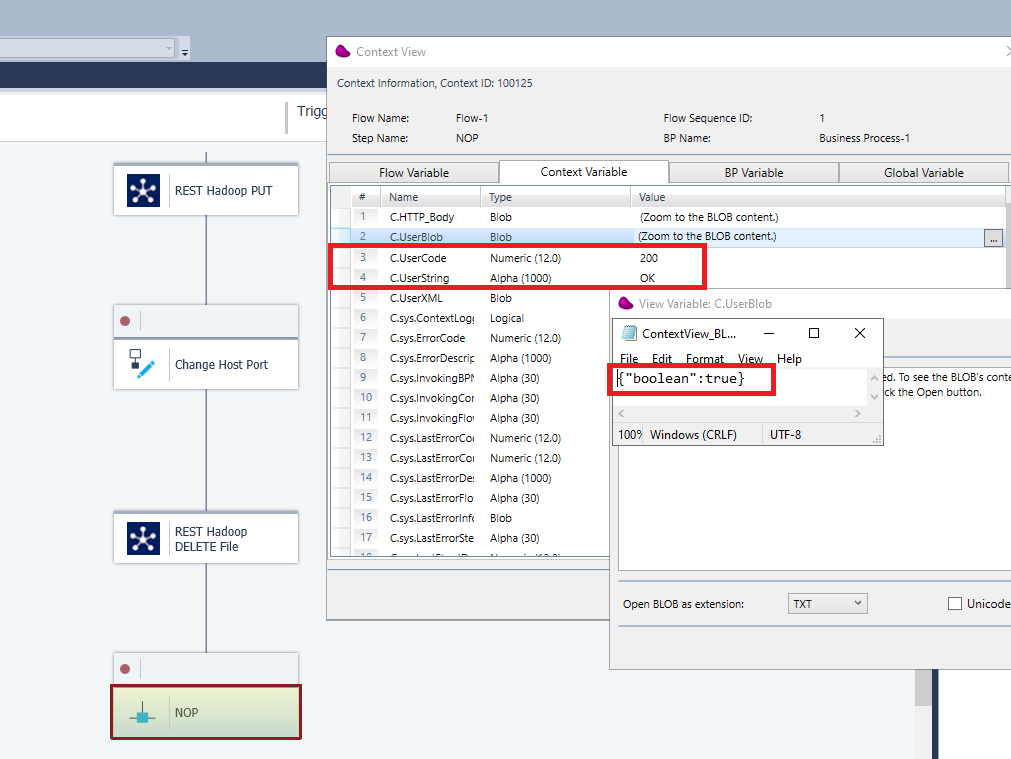
You should receive an Http code 200 with OK and a true value in the json response
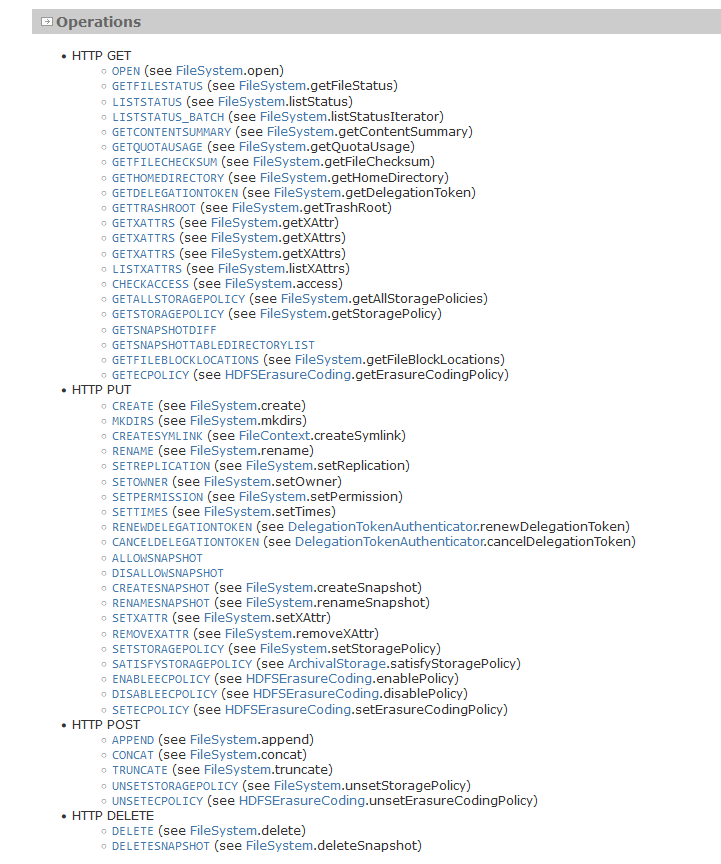
18/ All exposed methods are available on this link
https://hadoop.apache.org/docs/stable/hadoop-project-dist/hadoop-hdfs/WebHDFS.html