Describe the different steps for connecting Magic xpi with Office365 using REST Microsoft Graph API
1/ Define in Azure Portal An app registration and add permission for Office365 via Microsoft Graph
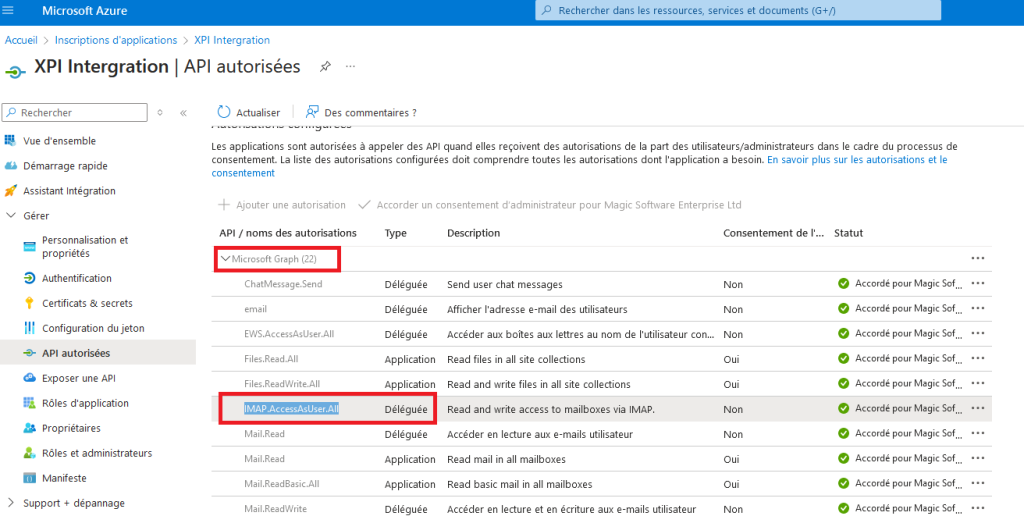
Retrieve the ClientId, ClientSecret, TenantId in other to define this settings in the Magic xpi Resource Repository
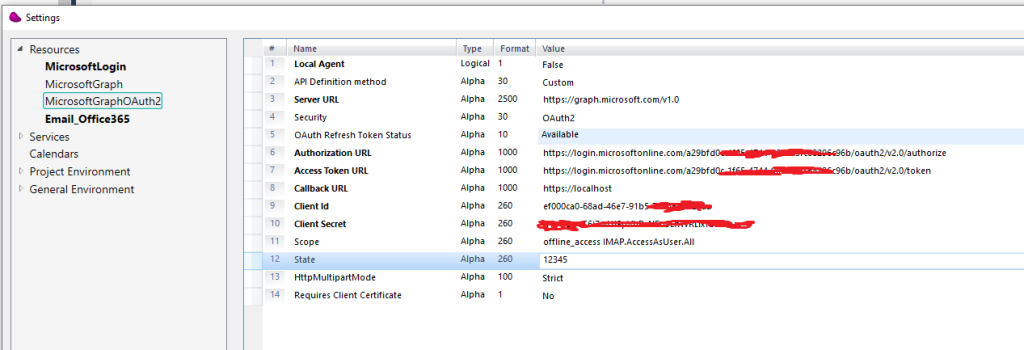
2/ Open the Resource repository in Magic xpi Studio
Define all the settings like below
Set the scope with : offline_access IMAP.AccessAsUser.All
3/ Click on the Paths Button and define 4 endpoints
/users/{id}/mailfolders/inbox/messages
/users/{id}/mailfolders/inbox/messages/{messageid}/attachments/{attachid}/$value
/users/{id}/mailfolders/inbox/messages/{messageid}/attachments
/{attachment_path}

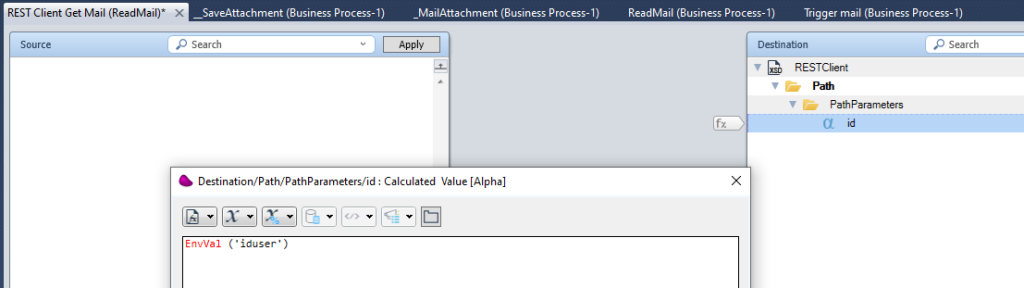
4/ Drag and Drop a REST Client connector and use /users/{id}/mailfolders/inbox/messages endpoint
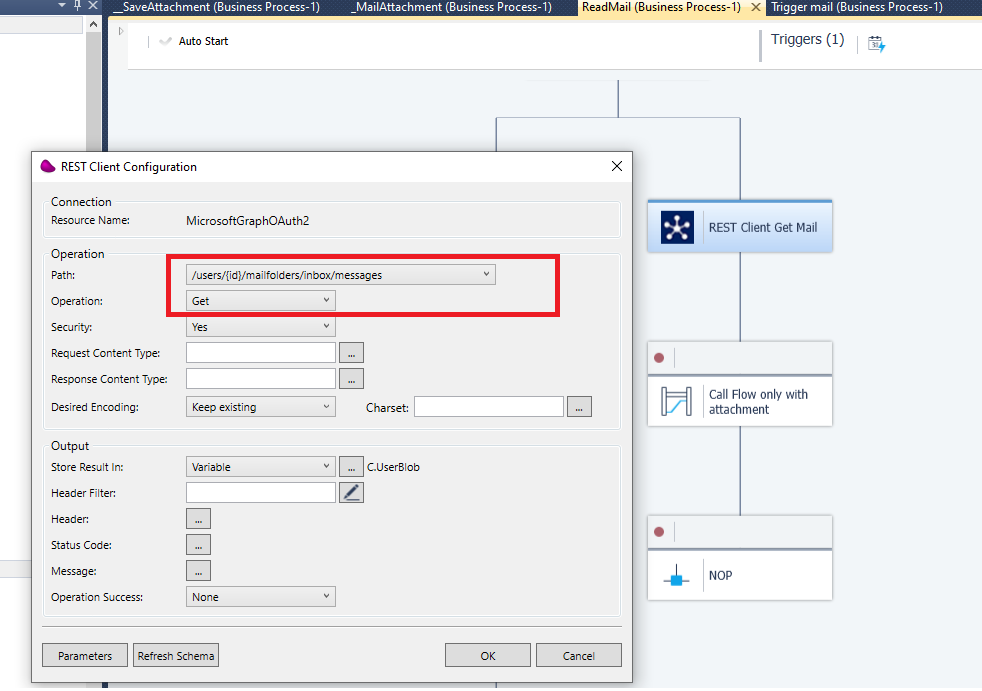
Set the Id with the User uuid
(*) You can make a GET on https://graph.microsoft.com/v1.0/users/{Mailbox] to retrieve the UserUUID
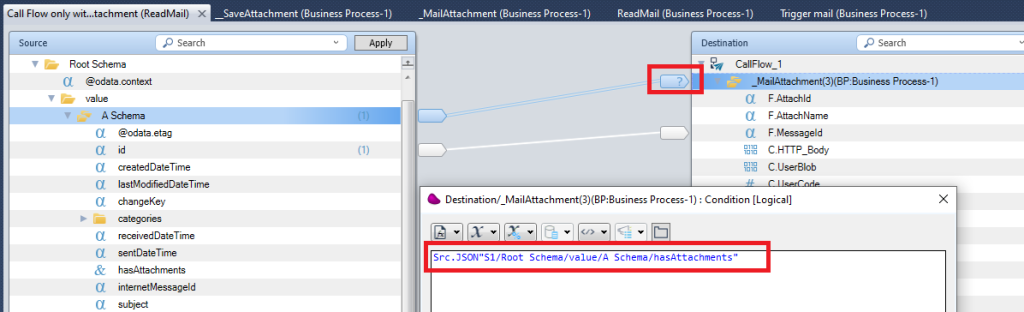
5/ Drag and Drop Datamapper connector to make a loop in other to download Mail attachments by calling a Subflow and passing the Id
(*) In the example, we process only Mails that have attachments
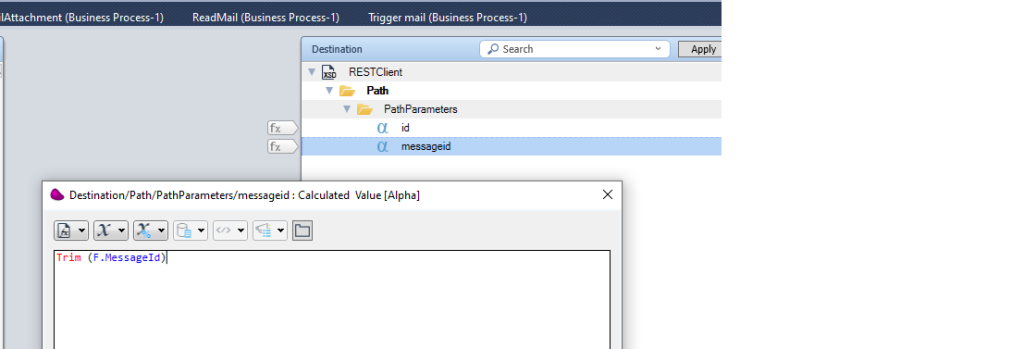
6/ In the called subflow, Make a GET on this URL : /users/{id}/mailfolders/inbox/messages/{messageid}/attachments
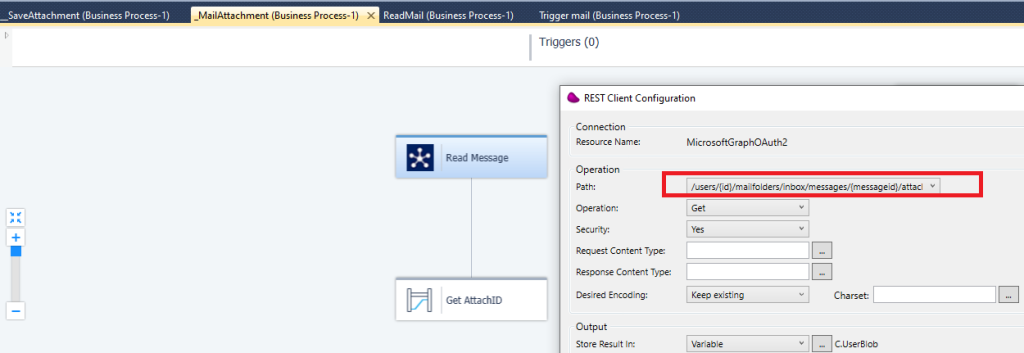
Click OK and pass the MessageID and User UUID
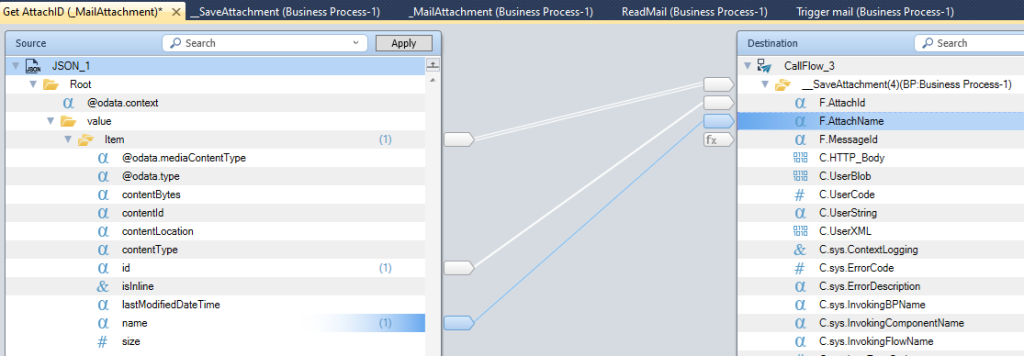
7/ Parse the JSON response and call another subflow to download Mail Attachment by passing the Name and AttachmentID
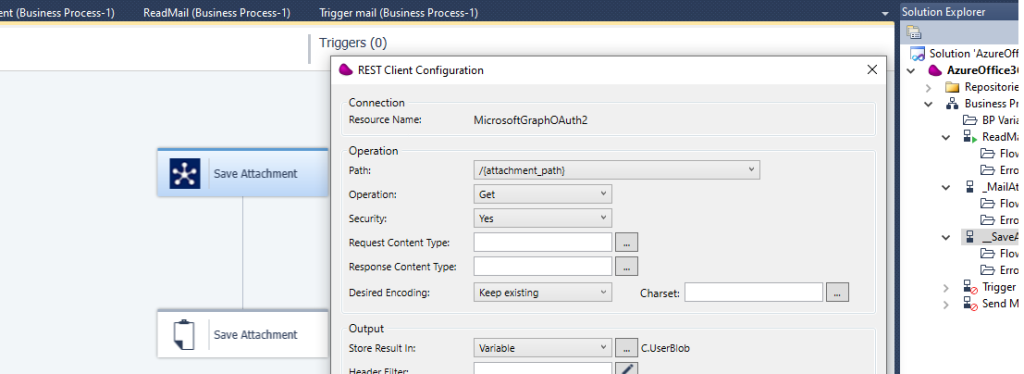
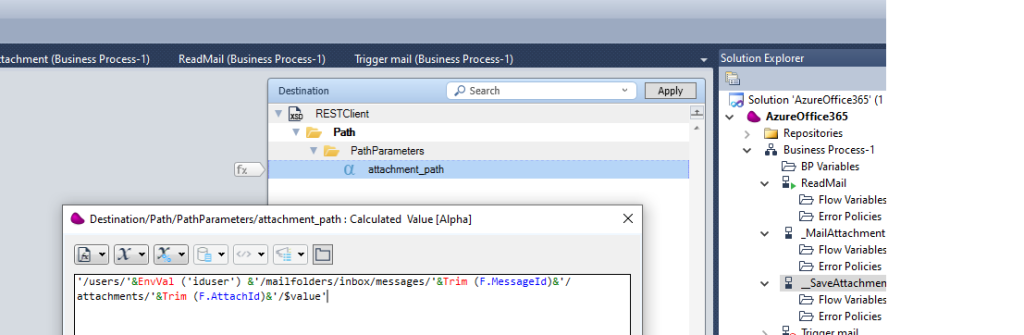
8/ In the second subflow, make a get on this URL : /{attachment_path}
set attachment_path : ‘/users/{User UUID}/mailfolders/inbox/messages/{MessageId}/attachments/{AttachId}/$value‘
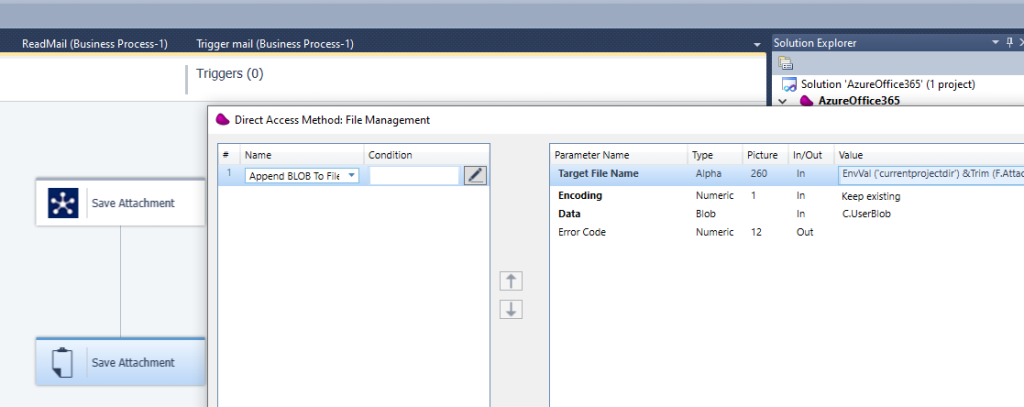
Use the FileManagment to save the file content locally
9/ To send Mail using REST Client connector
Create a resource like below
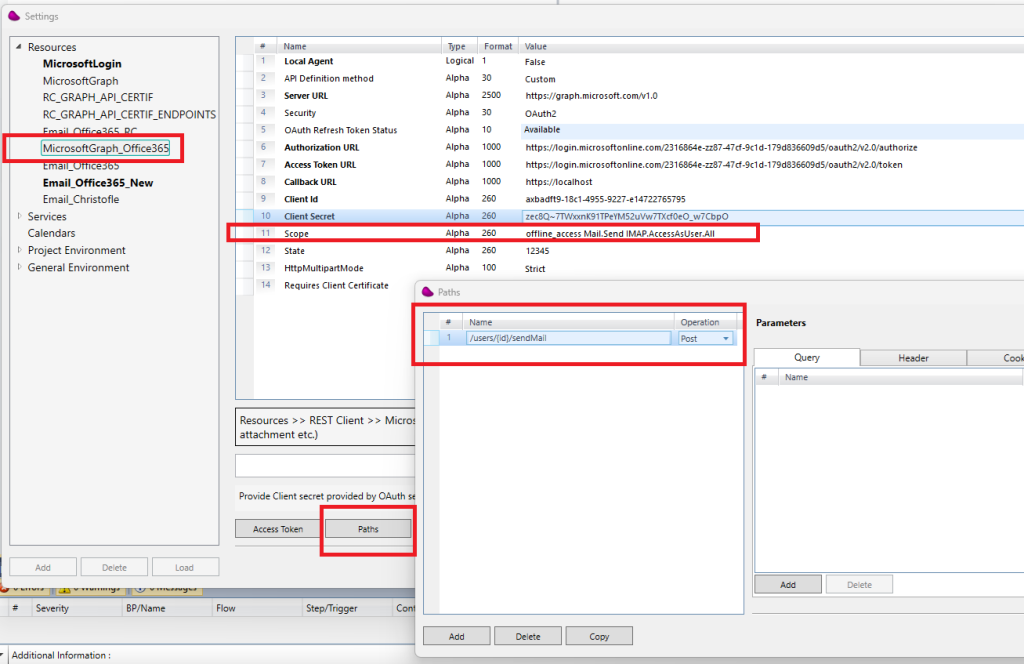
Scope should be : offline_access Mail.Send IMAP.AccessAsUser.All
The path must be in the format : /users/{id}/sendMail : id can correspond to
- the userid, it can be retrieved directly from the admin console or by sending a GET on : https://graph.microsoft.com/v1.0/users
- the email From
The json body should be in the format like below
{
  "message": {
    "subject": "Meet for lunch?",
    "body": {
      "contentType": "Text",
      "content": "The new cafeteria is open."
    },
    "toRecipients": [
      {
        "emailAddress": {
          "address": "[email protected]"
        }
      }
    ],
    "ccRecipients": [
      {
        "emailAddress": {
          "address": "[email protected]"
        }
      }
    ]
  },
  "saveToSentItems": "false"
}
Drag and Drop REST Client connector and configure it like below
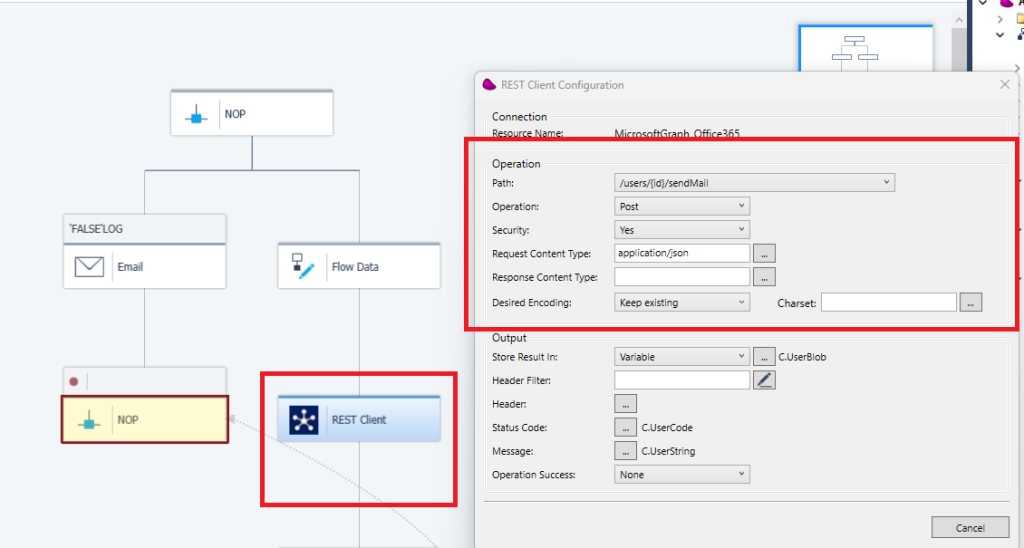
10/ After executing the flow, you should receive status 202

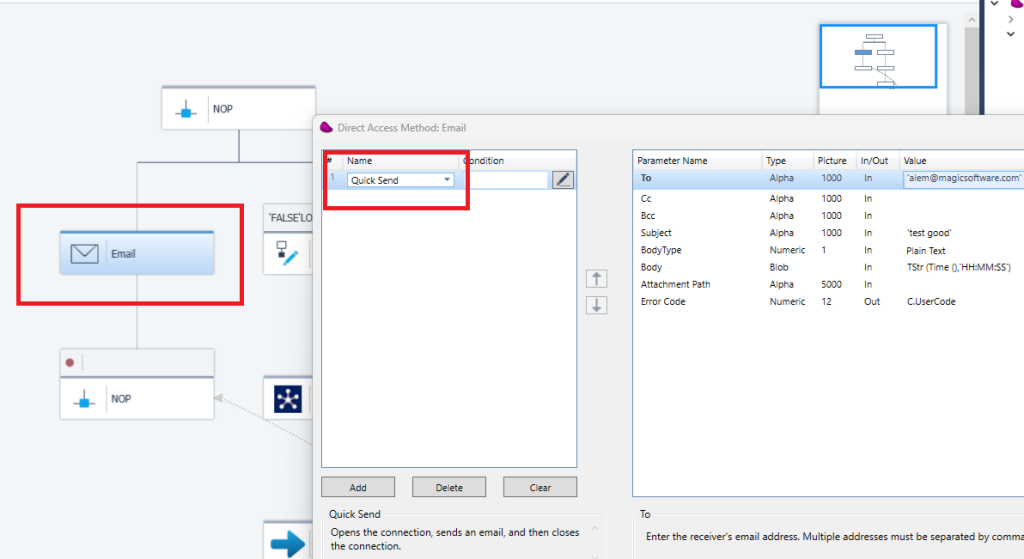
11/ To send Mail using the Mail connector
You should define a Mail resource like below :
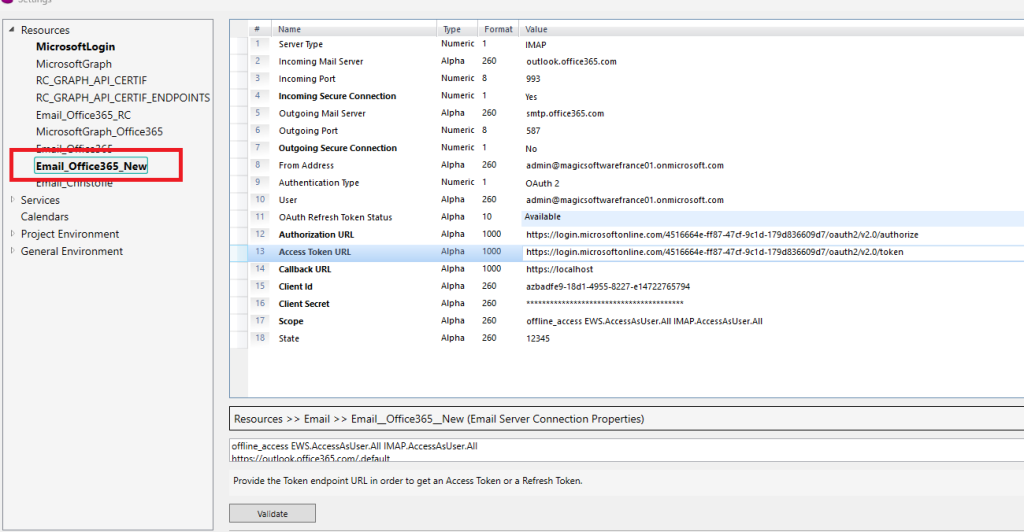
Drag and Drop the Mail connector and use the Quick Send method. The result should be the same.