Goal : Configure OAuth2 Authentication for Magic xpi RESTful API Service using Amazon Cognito
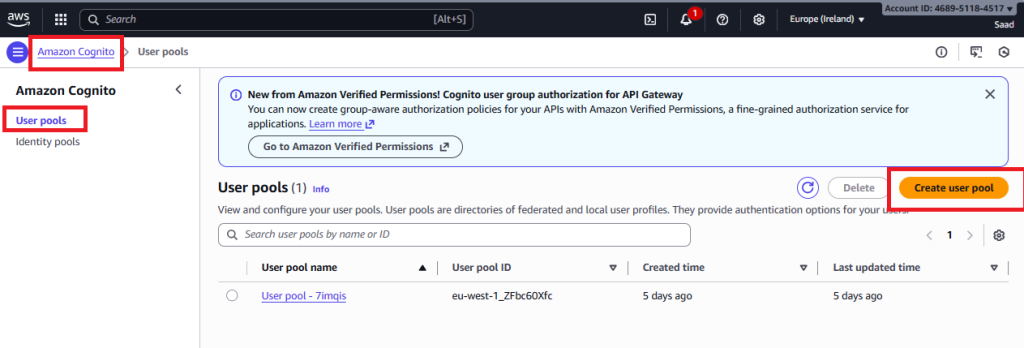
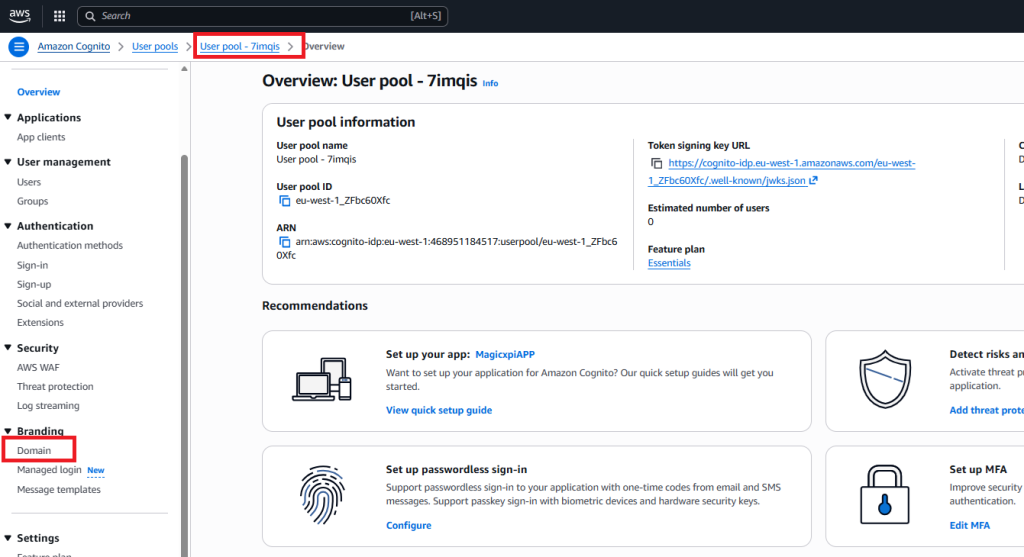
1/ Sign on your AWS portal and create a user pool in Cognito
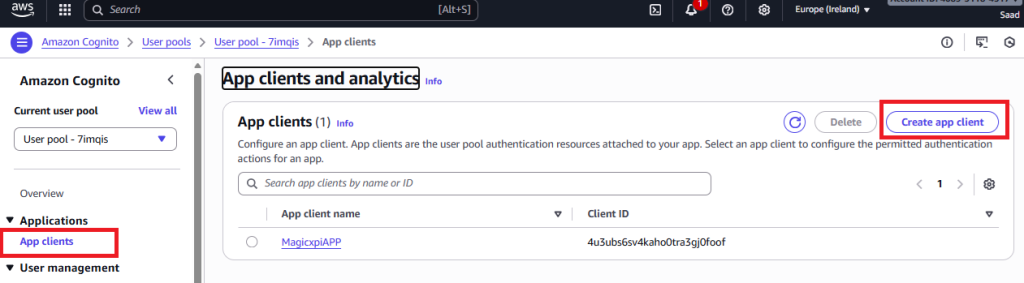
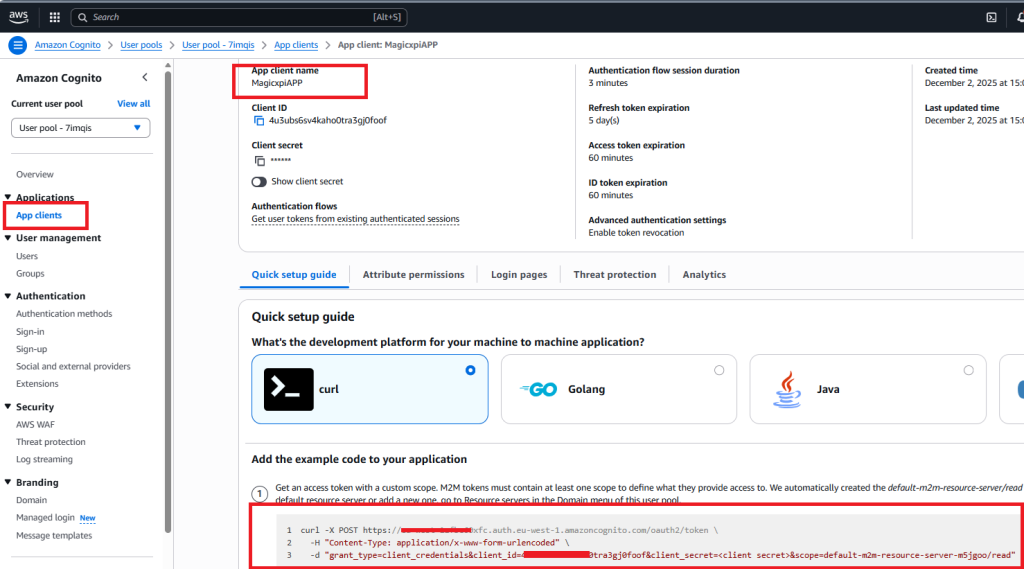
In this user pool, create an application client (MagicxpiAPP)
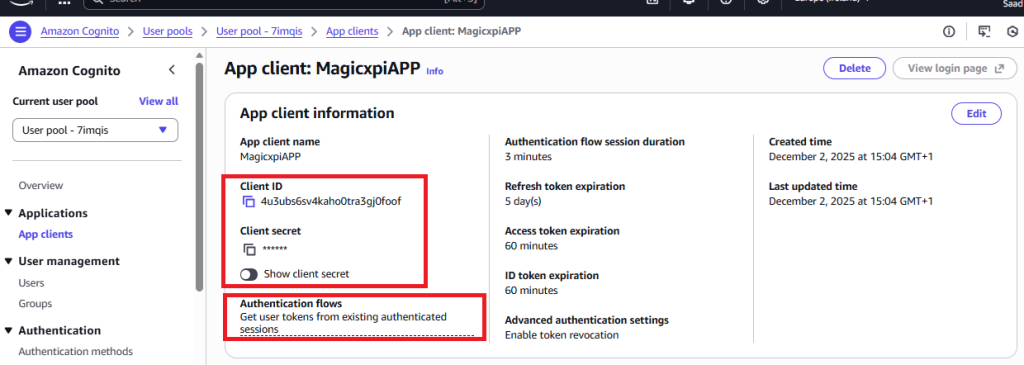
Copy the client id and client secret
Return to user pool level and click on Domain
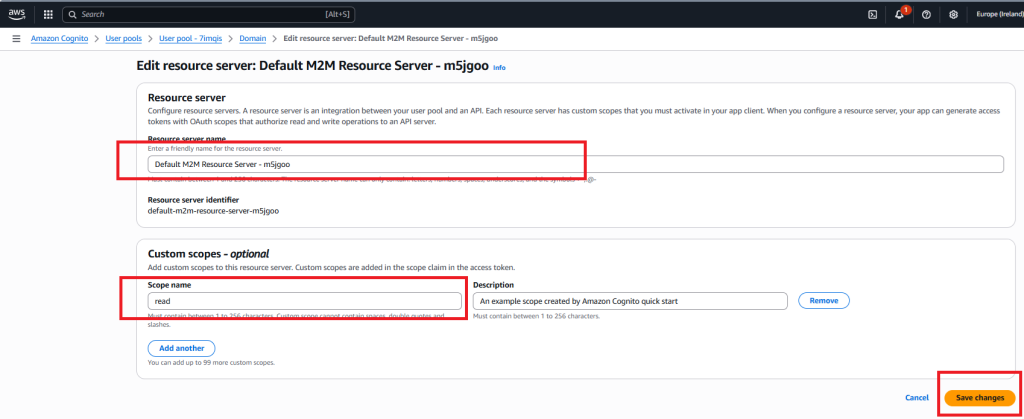
Scroll down and Create a resource server
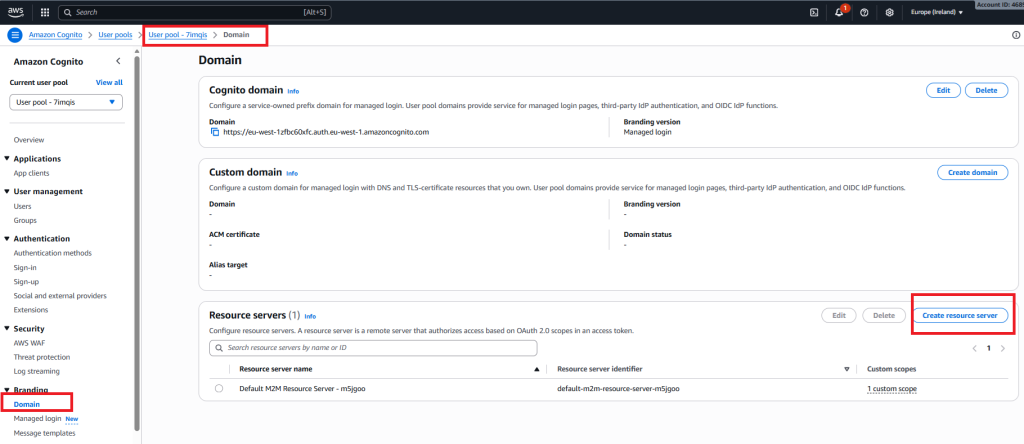
Create a scope inside this resource server
Return to App clients level, scroll down and copy the information to get an access token from aws Cognito
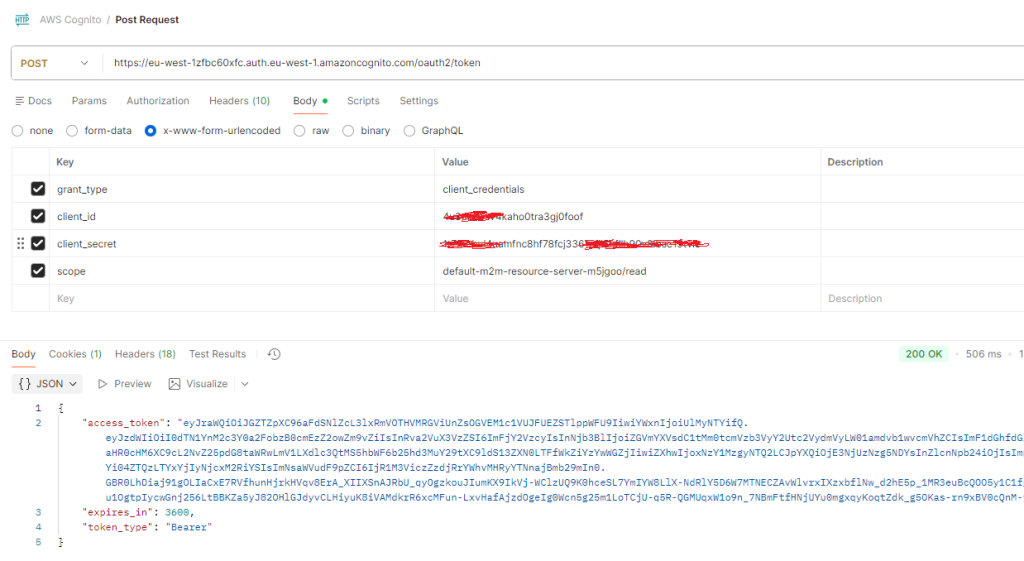
2/ Check with Postman that you can get an access token like below
make a POST on your token URL and pass in the body (clientid, client secret, grant type and scope) using an urlencoded format
use the information from the previous step.
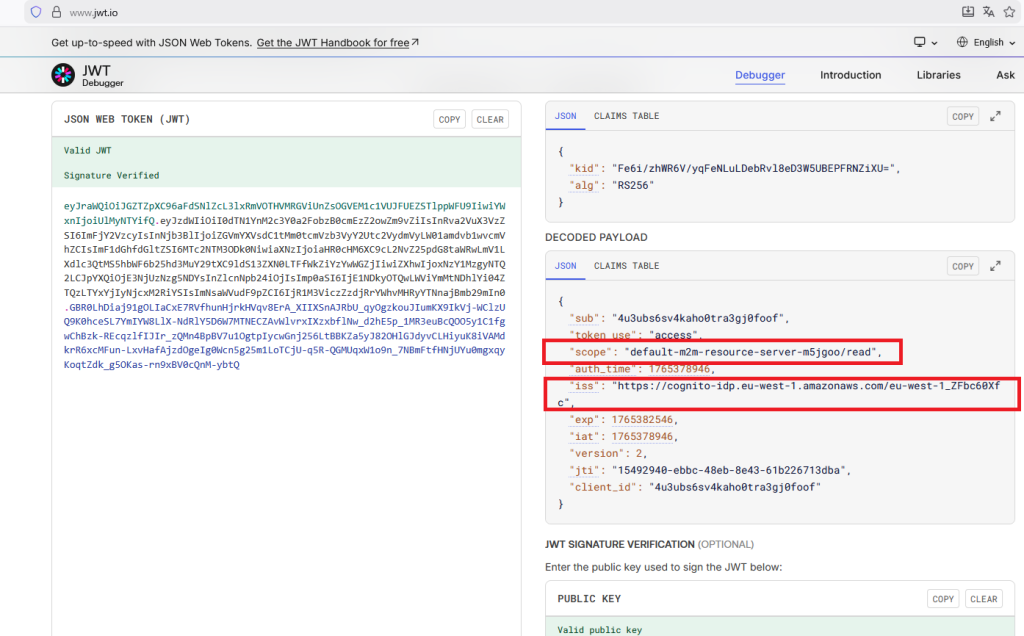
3/ Check in the token that you get the scope and the iss (issuer)
You can use the website : https://www.jwt.io (copy and paste the bearer token)
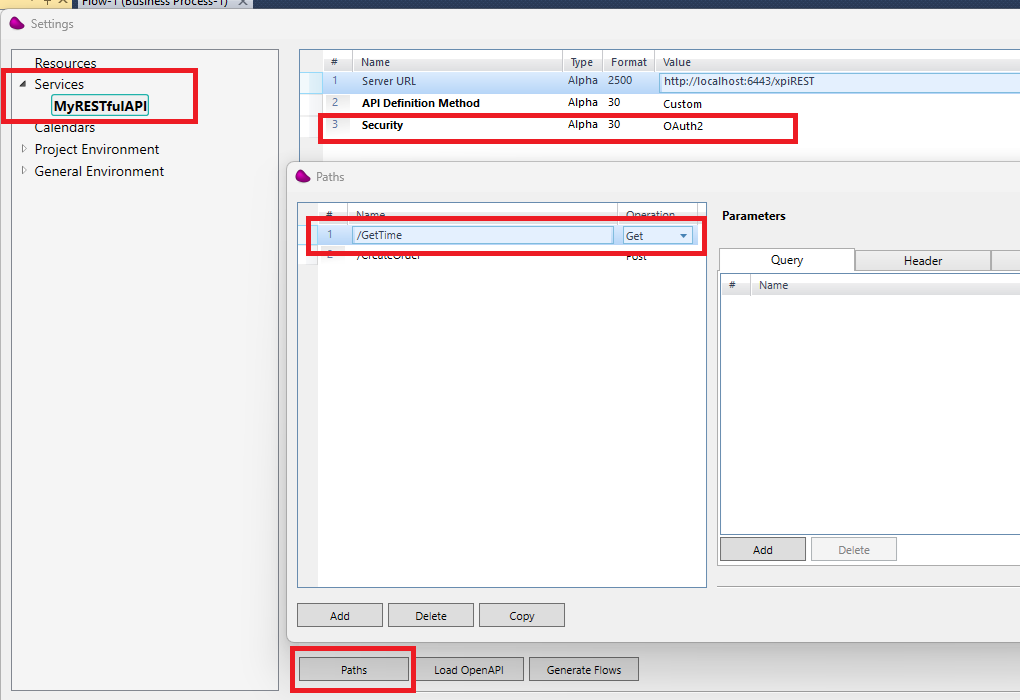
4/ Create an xpi project and create a RESTFul API service like below
(*) In my example, i use 6443 for the apache/tomcat port (can be change in the server.xml file in the apache conf directory)
Set the Security to OAuth2
Create GetTime path.
5/ Create a new flow and use a RESTFul API connector in the trigger area
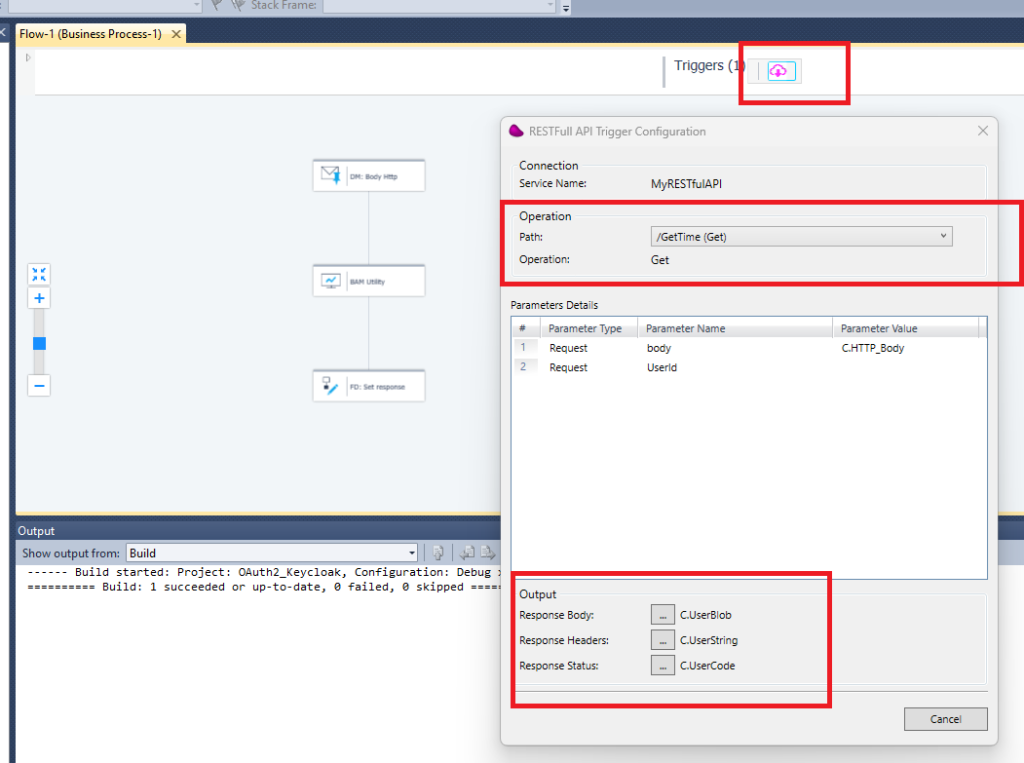
In the last step of your flow, add a Flow Data to update C.UserBlob variable with a simple json containing the time (‘{« time »: »‘&TStr (Time (),’HH:MM:SS’)&' »}’) and C.UserCode with 201.
6/ Open the XML service definition file of your RESTFul service under your project directory
(ex : <Magicxpi installation directory>Runtime\projects\OAuth2_Keycloak\OAuth2_Keycloak\RESTful API\MyRESTfulAPI)
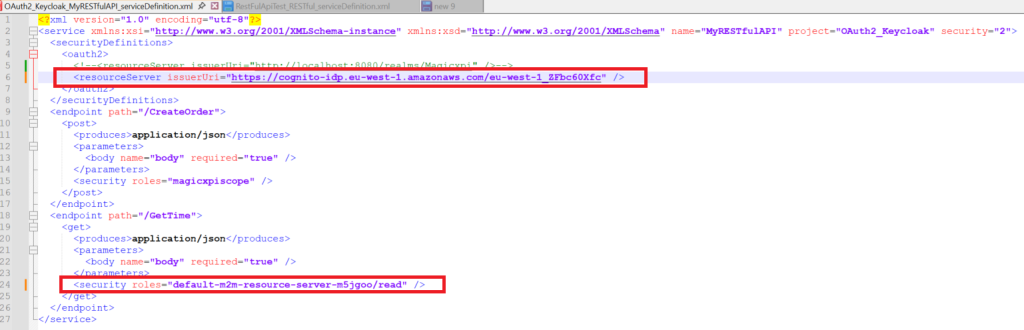
Add the oauth2 resource server in the securityDefinitions
Use the iss value from the token (step 3) for the issuerUri
Add the security role (« default-m2m-resource-server-m5jgoo/read ») (step 3) for the path you want to protect
7/ Copy the war file (xpiREST.war) from your installation directory (ex: <Magicxpi installation directory>\Runtime\addon_connectors\RESTfulAPI\servicefiles to your webapps apache directory (ex: <Magicxpi installation directory>\Runtime\apache-tomcat\webapps)
!! Use the last version of the war file (you can get it from the Magic support)
8/ Start your apache server (startup.bat) from your apache directory (ex : <Magicxpi installation directory>\Runtime\apache-tomcat\bin) using command line (Admin mode)
You should see the xpiREST folder created.

9/ Copy the service definition file from step6 to directory « rest-services » of your apache/tomcat

10/ Start your magic xpi project
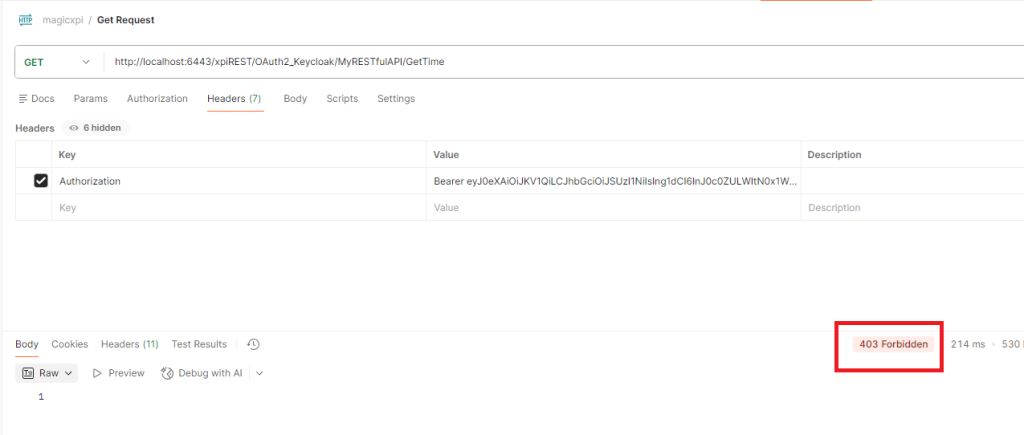
11/ Use Postman to call Magic xpi service and use the bearer token you got from step 2/
Set the Authorization header with the Bearer token
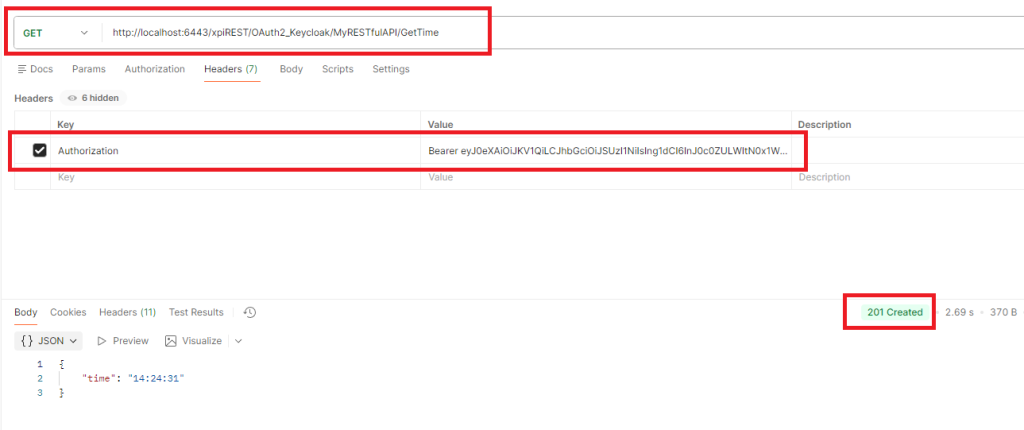
You should receive status 201 with the time value in a json format.
12/ Set a wrong role in the service definition file in your apache directory
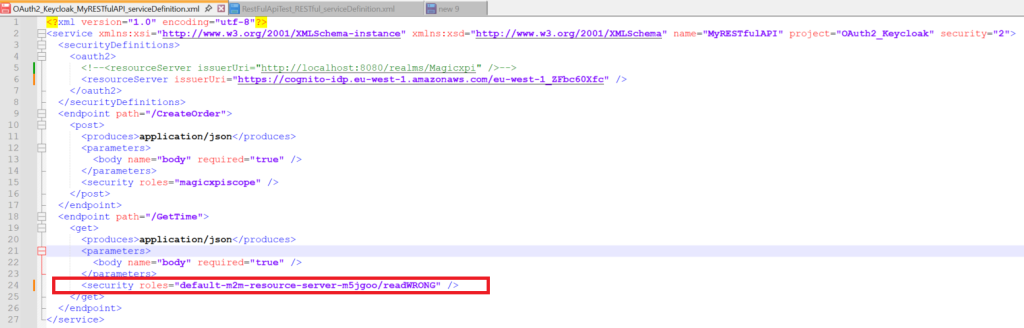
If you call again the service, you should get error status 403 Forbidden